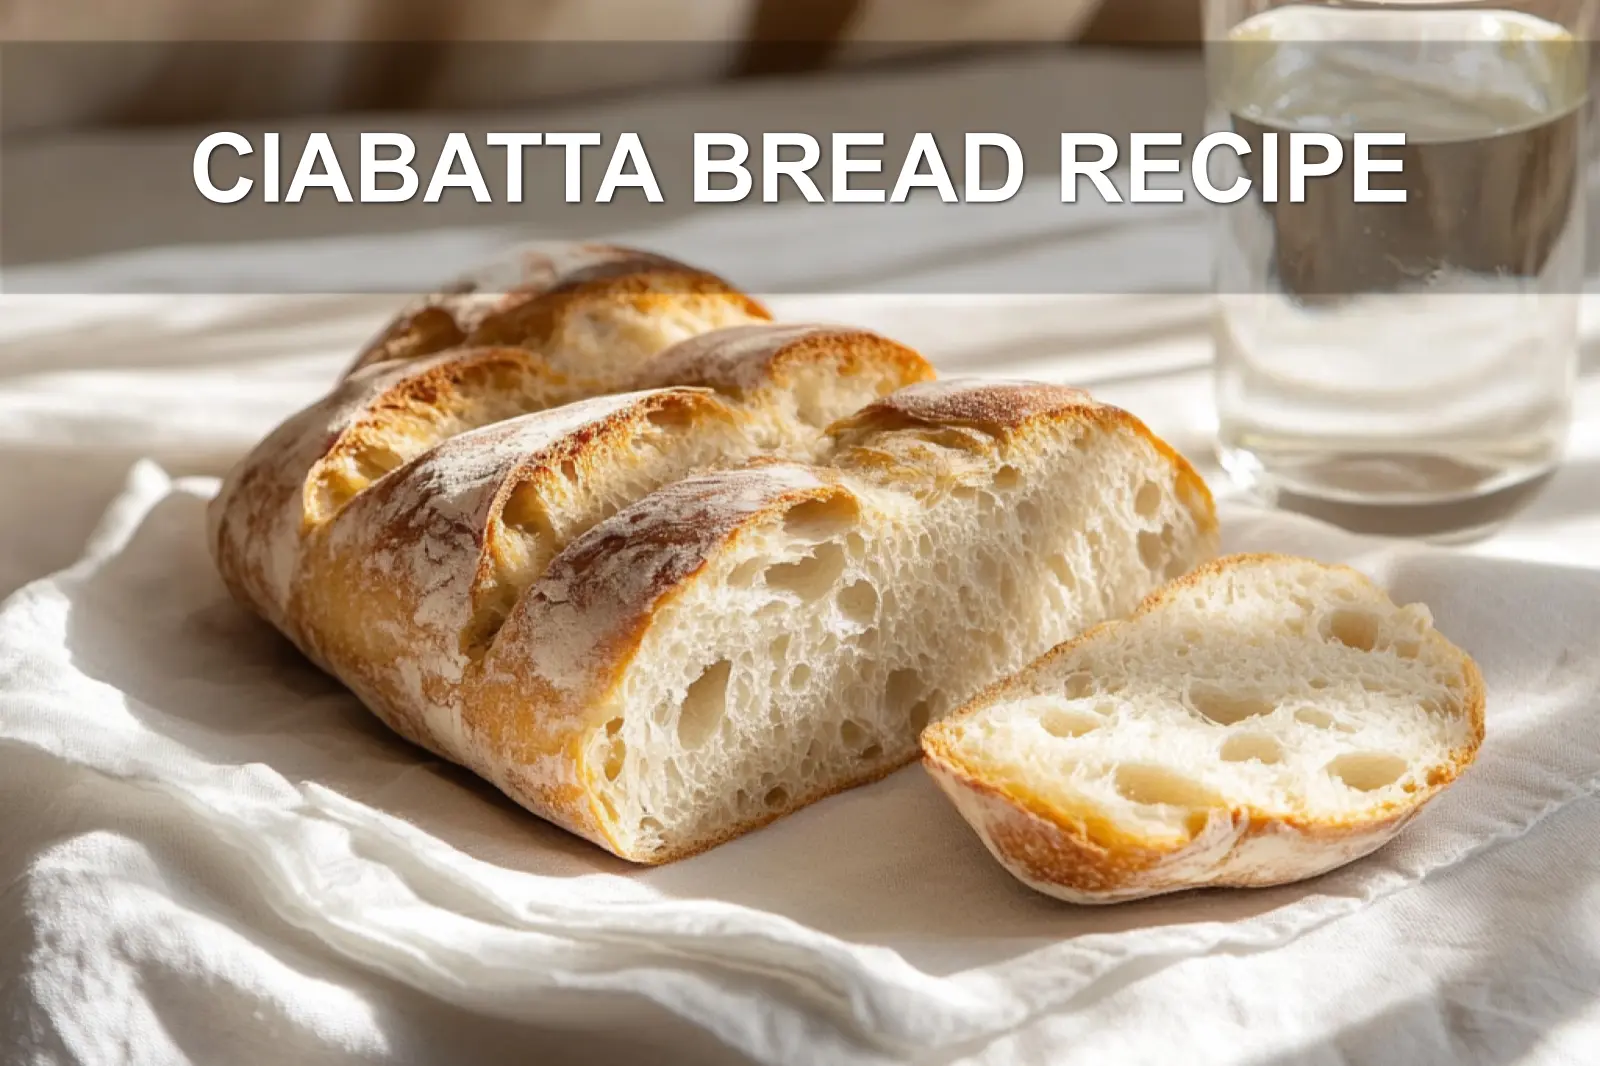
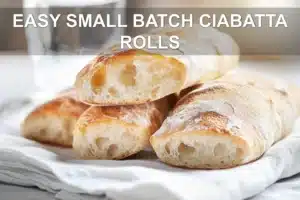
There’s something magical about the smell of fresh bread filling your kitchen that warm, yeasty aroma that makes everyone gather around. This ciabatta bread recipe has been trending online lately, and honestly? I get it. The combination of that perfectly crusty loaf exterior with an impossibly airy interior is pure comfort food gold.
Think of ciabatta as Italy’s gift to bread lovers everywhere it’s all about that signature open crumb and crispy crust. You’ll need just flour, water, yeast, salt, and a drizzle of olive oil to create this artisan ciabatta bread that rivals any bakery version. It’s like focaccia’s sophisticated cousin, but far less finicky than you’d expect. Keep reading for everything you need to know to pull it off at homeeven as a beginner!
I’ve been experimenting with different hydration levels and fermentation times to nail that perfect texture balance. After countless test batches (my family certainly didn’t mind!), I discovered that the true secret lies in gentle folding and patience. Trust me this recipe will completely shift how you approach homemade bread.
Why You’ll Fall in Love with This Ciabatta
What draws me to this particular ciabatta bread recipe is how it transforms just five simple pantry ingredients into something absolutely magical. The contrast between that golden, crackling crust and the soft, hole-filled interior creates a sensory experience that’s both rustic and refined.
Unlike dense sandwich breads, ciabatta’s open crumb structure makes it perfect for soaking up olive oil, cradling hearty fillings, or simply enjoying warm with a pat of butter. This artisan ciabatta bread delivers bakery-quality results without requiring expensive equipment or professional skills.
- Beginner-friendly: No sourdough starter or special mixers required
- Versatile: Ideal for sandwiches, bruschetta, paninis, or dipping in soups
- Impressive: Looks and tastes like it came from a high-end bakery
- Quick turnaround: Enjoy fresh bread in about 3 hours
Understanding Your Ingredients
The beauty of ciabatta lies in its simplicity just flour, water, yeast, salt, and olive oil come together to create this airy bread masterpiece. Each ingredient has a unique role in flavor, structure, and crust development.
The high-hydration dough, meaning higher water-to-flour ratio, is essential for ciabatta’s signature holes and chewy interior. Olive oil enriches the dough slightly and helps crisp the crust during baking, adding beautiful color and flavor depth.
| Ingredient | Purpose | Key Tips |
|---|---|---|
| All-purpose flour | Structure and texture | Weigh ingredients for best results and avoid compacting |
| Instant yeast | Leavening and mild flavor | Substitute with active dry yeast (equal amount), but bloom first |
| Warm water | Hydration and yeast activation | Use water at 100–105°F to activate yeast without killing it |
| Salt | Enhances flavor and strengthens dough | Add separately from yeast for optimal rise |
| Olive oil | Flavor and a golden-brown crust | Use extra-virgin olive oil for richness and aroma |

The Magic Behind the Method
This method emphasizes gentle mixing and patient fermentation to unlock the crusty loaf exterior and light interior. Time and minimal handling are your greatest assets for creating that characteristic ciabatta texture.
Unlike standard bread doughs requiring heavy kneading, ciabatta’s sticky dough benefits from light folding techniques. This preserves bubbles formed during fermentation, which help achieve the open crumb structure.
- First rise: Doubles the dough and allows deep flavor development
- Gentle shaping: Retains precious air pockets from fermentation
- Second rise: Supports final dough expansion and lightness
- High heat baking: Ensures caramelized crust and oven spring
Timing Your Bake Day
Planning ahead makes baking ciabatta a relaxing, rewarding experience. Most of the dough’s work is hands-off, giving you flexibility while still delivering fresh artisan bread.
| Step | Active Time | Total Time | What’s Happening |
|---|---|---|---|
| Mix & Knead | 15 minutes | 15 minutes | Builds gluten and initial dough formation |
| First Rise | 2 minutes | 60 minutes | Dough ferments and doubles in size |
| Shape & Rest | 5 minutes | 45 minutes | Dough relaxes and final proof happens |
| Bake | 5 minutes prep | 25 minutes | Crust forms, bread rises rapidly in oven |
Troubleshooting Common Issues
Even seasoned bakers occasionally struggle with ciabattait’s normal! Its wet dough can be tricky, but these fixes help keep your baking stress-free:
Dough too sticky: Totally normal! Use oiled or wet hands when handling dough. Adding flour risks making it dense.
- Flat loaves: Likely under-proofed; allow more time for final rise
- Dense crumb: May come from over-mixing or handling too aggressively
- Pale crust: Try increasing baking temperature or spritzing oven with water for steam
- Inactive yeast: Check if your yeast is fresh and water temp isn’t too hot
Simple Swaps and Variations
Classic ciabatta is delicious as-is, but thoughtful additions can make each loaf unique. Try these substitution ideas to customize the flavor or texture:
| Original | Swap Option | Result |
|---|---|---|
| All-purpose flour | Replace 1 cup with bread flour | More chew and structure |
| Plain water | Mix in 1 tbsp honey | Slightly sweet flavor and better browning |
| Basic olive oil | Use garlic- or rosemary-infused oil | Herbal, savory crust |
| Regular salt | Top with coarse sea salt just before baking | Enhanced crust texture and rustic flair |
Serving and Storage Secrets
Fresh ciabatta is best enjoyed the day it’s made, but you can absolutely store extras the right way to preserve its signature texture.
Pro tip: To revive a slightly stale loaf, mist with water and warm in a 350°F oven for 5–8 minutesit freshens the crust beautifully!
- Day of baking: Leave uncovered to retain crisp crust
- Next day: Wrap in a clean, dry kitchen towel to prevent drying
- Long-term: Slice and freeze; toast slices straight from frozen
- Want it warm?: Heat whole loaf gently in oven for 8–10 minutes at 350°F
Expert Says: The Art of Ciabatta Bread Recipe
Ciabatta bread’s signature open crumb and crispy crust come from a high-hydration dough and gentle handling. Mastering this balance in your ciabatta bread recipe ensures a light, airy texture that makes this Italian classic truly stand out in your baking repertoire.
For more delicious recipes and cooking inspiration, follow me on Facebook, Pinterest and Reddit!
Mastering the Art of Ciabatta Bread Recipe
This ciabatta bread recipe took several tries before I finally captured the exact texturelight and airy with a sturdy crust. I learned that being hands-off with the dough was crucial, and each sticky batch taught me to observe how the dough behaved during fermentation. The result is a brilliant blend of rustic flavor and refined textureperfect for family meals, snacks, and gourmet sandwiches alike.
FAQs ( Irresistible Ciabatta Bread Recipe for Perfect Baking )
What makes ciabatta bread different from other artisan breads?
Ciabatta bread is distinguished by its incredibly high hydration dough, which creates its signature open, airy crumb structure with large irregular holes. Unlike denser artisan loaf breads, ciabatta has a thin, crispy crust that shatters when you bite into it, revealing the light, chewy interior. The wet dough requires special folding techniques rather than traditional kneading, making it a unique challenge even for experienced bakers. This Italian bread’s name literally means “slipper” due to its flat, elongated shape that resembles old-fashioned footwear.
Do I need a starter for bread making authentic ciabatta?
While traditional ciabatta uses a biga (Italian pre-ferment), you don’t necessarily need a sourdough starter for bread making to create delicious ciabatta at home. Many excellent ciabatta recipes rely on commercial yeast with a long, slow fermentation process that develops complex flavors naturally. However, using a starter for bread will definitely elevate your loaf with deeper, more nuanced flavors and improved digestibility. If you’re just starting out, focus on mastering the high-hydration dough technique first, then experiment with starters once you’re comfortable with the basic process.
Why is my ciabatta not getting that crusty loaf bread texture?
Achieving that perfect crusty loaf bread exterior on ciabatta requires creating steam during the first part of baking, then allowing the crust to crisp up in dry heat. Place a pan of hot water in the bottom of your oven or spray the walls with water just after loading your bread. Your oven temperature should be high (around 450-475°F) to create that initial steam burst that helps form the crust. Make sure to remove the steam source after 15-20 minutes to allow the crust to become golden and crunchy. Also, avoid opening the oven door during the first half of baking, as this releases crucial steam.
How long does homemade ciabatta bread stay fresh?
Fresh ciabatta bread tastes best within 24-48 hours of baking, when the crust is still crispy and the interior remains perfectly chewy. After that, the crust will soften and lose its delightful crunch, though the bread is still perfectly edible for 3-4 days when stored in a paper bag or bread box. Never store ciabatta in plastic, as this will make the crust soggy immediately. To refresh day-old ciabatta, pop it in a 350°F oven for 5-10 minutes to crisp up the exterior again. For longer storage, slice and freeze portions, then toast directly from frozen.
What are the most common mistakes when making airy bread recipes like ciabatta?
The biggest mistake with airy bread recipes is adding too much flour because the dough feels too sticky – resist this urge completely! Ciabatta dough should be wet and almost unmanageable, which is what creates those beautiful air pockets. Over-handling or trying to knead the dough traditionally will destroy the delicate gluten structure needed for the open crumb. Another common error is not allowing enough fermentation time, which develops both flavor and the gas bubbles that create the airy texture. Finally, many bakers shape the dough too roughly, deflating all those precious air bubbles you’ve worked so hard to develop through gentle folding.

Your New Go-To Artisan Bread
This ciabatta bread recipe delivers everything you want in homemade breadcrackly crust, open crumb, and rich flavor. In just a few hours from start to finish, you’ll have a crusty loaf bread that surpasses most bakery versions. Plus, the high hydration technique becomes second nature after the first tryit’s much easier than it looks.
Feel free to personalize it: stir in chopped rosemary and sea salt for a Mediterranean flair, or brush shaped loaves with garlic oil for added aroma. I’ve found that a tablespoon of honey in the water adds mild sweetness and deepens the crust color. For storage, wrap loaves in a towel once cooledenjoy within two days or freeze for future airy bread recipes. This method adapts beautifully to other artisan loaf bread experiments too.
There’s deep comfort in baking your own bread, in the scent wafting through the air and the crackle that echoes when you slice into a loaf fresh from the oven. I’d love to hear how your batch turns out. Did you add unique flavors? Have a nostalgic bakery memory it reminded you of? Tag me in your creations and let’s keep the joy of baking aliveone crusty loaf at a time.
PrintCIABATTA BREAD RECIPE
This artisan ciabatta bread recipe is a delightful way to make crusty loaf bread at home. Enjoy the airy bread recipes that create a soft and chewy interior with a golden crust. Perfect for sandwiches or dipping, it’s an easy and irresistible artisan loaf for any occasion.
- Prep Time: 10 minutes
- Cook Time: 20 minutes
- Total Time: 40 minutes
- Yield: About 12 slices 1x
- Category: Bread
- Method: Baked
- Cuisine: Italian
- Diet: Vegetarian
Ingredients
- 4 cups all-purpose flour 500g
- 1 ½ tsp instant yeast 5g
- 1 ¾ cups warm water 410ml
- 2 tsp salt 10g
- 3 tbsp extra virgin olive oil 45ml
Instructions
- In a large mixing bowl, combine flour and salt. In another bowl, dissolve yeast in warm water.
- Gradually mix the yeast mixture into the flour until a shaggy dough forms.
- Knead on a floured surface for about 10 minutes until smooth.
- Place dough in a greased bowl, cover, and let rise for about an hour or until doubled.
- Punch down the dough, divide it into two pieces, and shape each into an oval loaf.
- Let loaves rise on a parchment-lined baking sheet for another 30-45 minutes.
- Preheat oven to 425°F 220°C, drizzle loaves with olive oil, sprinkle with sea salt, then bake for 20-25 minutes until golden brown.
Nutrition
- Serving Size: 1 slice (50g)
- Calories: 130
- Sugar: 0g
- Sodium: 200mg
- Fat: 3g
- Saturated Fat: 0.5g
- Unsaturated Fat: 2g
- Trans Fat: 0g
- Carbohydrates: 24g
- Fiber: 1g
- Protein: 4g
- Cholesterol: 0mg

