As the sun shines down and the weather warms up, what better way to embrace those delightful summer days than with a Delicious Strawberry Ice Cream Delight? This healthy twist on a beloved classic comfort food not only tantalizes the taste buds but also creates sweet memories with your loved ones. Using fresh strawberries, creamy heavy cream, and your favorite cookies, this dish brings together flavorful, low-carb goodness that can easily fit into your busy weeknight dinners or meal prep plans.
One of my fondest memories is making Strawberry Ice Cream sandwiches for the first time with my kids. I was amazed at how this healthier version turned out to be such a hit! The creamy filling harmonized perfectly with the tender cookies, and we all enjoyed customizing them with our favorite toppings. Whether you sprinkle on some chopped nuts, drizzle with chocolate, or add a hint of mint, the versatility of this dessert makes it an instant favorite for any health-conscious foodie seeking comfort without compromise. Join in the fun and create your own Strawberry Ice Cream joy!
Why we love this recipe: Strawberry Ice Cream:
The cookie crust is delightfully tender yet offers a satisfying crispness. The creamy filling features luscious Strawberry Ice Cream, making each bite a truly indulgent experience. Easy to make, this delightful treat comes together quickly and is an excellent option for those adhering to low-carb lifestyles.
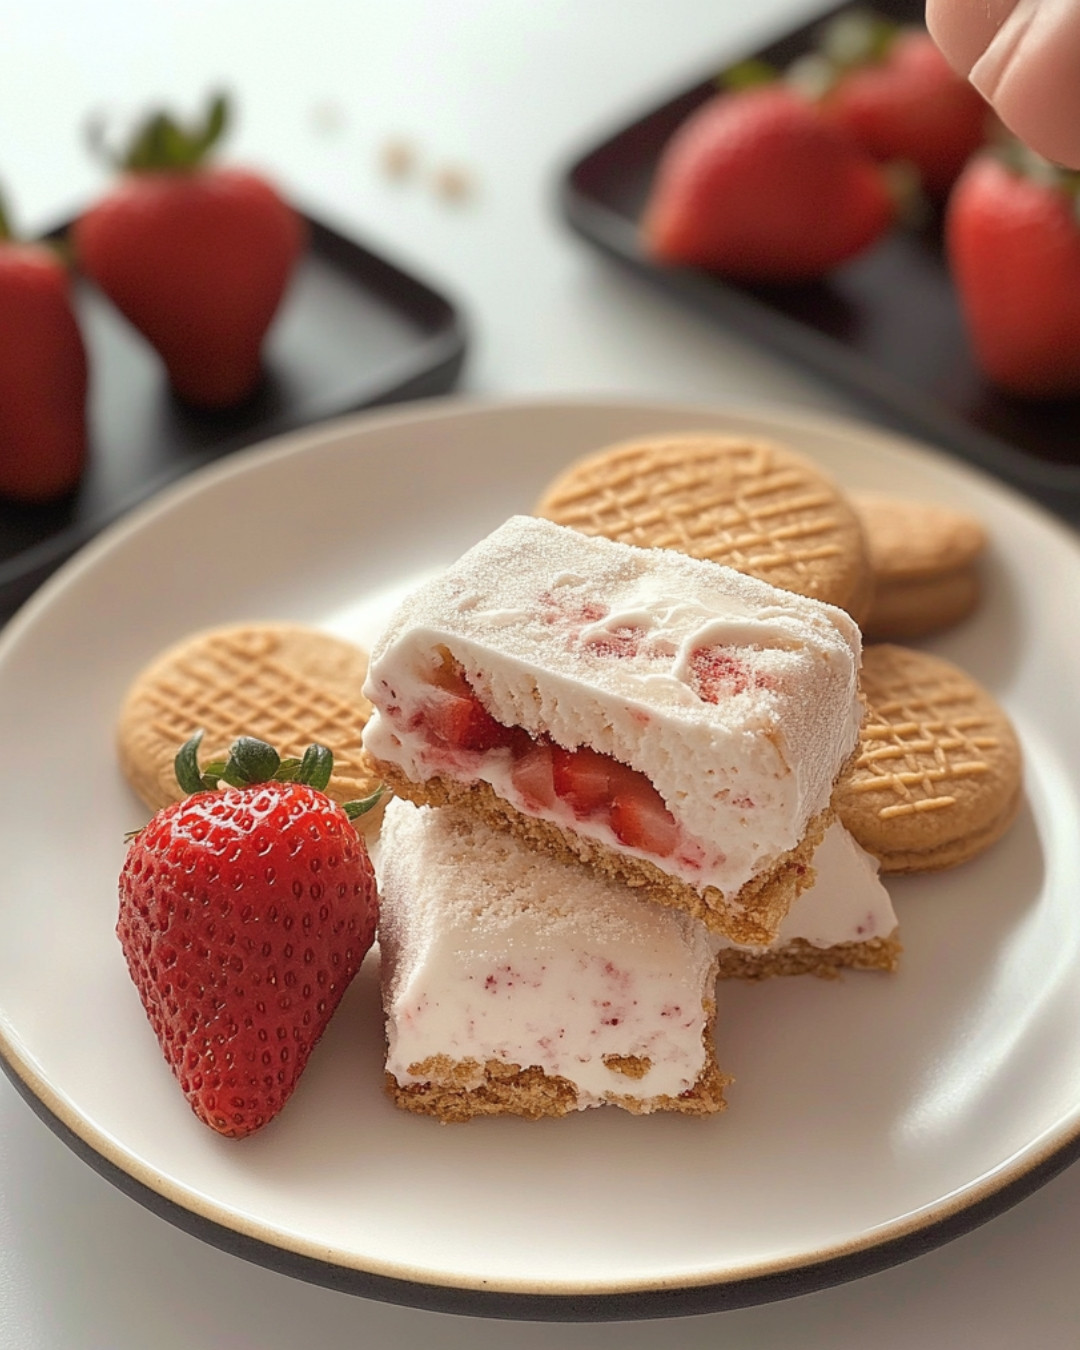
Step-by-Step Cooking Instructions
Now that you’ve got all the ingredients and tools ready, it’s time to craft a delightful treat that transforms simple components into an indulgent Strawberry Ice Cream sandwich. Follow these steps carefully to ensure each bite is a harmonious blend of flavors, textures, and pure joy.
Step 1: Prepare the Strawberries
Begin by washing the fresh strawberries under cold water. This cleans off any dirt or residues, ensuring that your Strawberry Ice Cream has a vibrant, fresh taste. Once clean, hull the strawberries by removing the green tops, then chop them into small pieces. This will help them blend seamlessly into the ice cream, infusing it with their luscious flavor. Set them aside to allow the natural juices to flow.
Step 2: Make the Ice Cream Base
Grab a mixing bowl and combine creamy ingredients—heavy cream, milk, granulated sugar, and a dash of vanilla extract. Whisk these ingredients together until the sugar dissolves completely. This step is crucial; it forms the rich, creamy base for your Strawberry Ice Cream. Add in the chopped strawberries and fold them gently into the mixture. The vibrant red color of the strawberries will spread throughout the mix, creating a delightful swirl.
Step 3: Churn the Ice Cream
Pour the strawberry mixture into your ice cream maker, following the manufacturer’s instructions. This is where the magic happens! As the mixture churns, air is incorporated, creating a light and fluffy texture. Let it churn for about 20-25 minutes. You’ll know it’s ready when the consistency is thick and creamy—so irresistible!
Step 4: Freeze the Ice Cream
Transfer your churned Strawberry Ice Cream into an airtight container. Press a layer of plastic wrap directly onto the ice cream’s surface to avoid ice crystals forming. Place the container in the freezer for at least 4 hours, or overnight if you can wait! This step solidifies the ice cream, making it scoopable and perfect for your sandwich.
Step 5: Assemble the Sandwiches
Once the ice cream is perfectly frozen, it’s time to get creative! Start by selecting your favorite cookies—soft-baked, crunchy, or even brownies. Scoop a generous portion of your homemade Strawberry Ice Cream onto one cookie. Gently press another cookie on top, sandwiching the creamy delight in between. Don’t be afraid to enjoy the messy goodness!
Step 6: Serve and Enjoy
Your Strawberry Ice Cream sandwiches are ready to be devoured! Consider adding a sprinkle of crushed nuts or chocolate chips for an extra crunch. Serve them immediately or wrap them in parchment paper and store them back in the freezer for a later treat. Each bite offers a burst of strawberry flavor that’s simply irresistible!
Notes
Tip 1: Adjusting Sweetness
Feel free to adjust the amount of sugar based on your taste preferences. If your strawberries are particularly sweet, you may want to reduce the sugar for a more balanced flavor.
Tip 2: Flavor Variations
Experiment with different cookie types or add-ins like mini chocolate chips or crushed graham crackers. This will personalize your Strawberry Ice Cream sandwiches, making them uniquely yours.
Tip 3: Quick Serving
To avoid melting, serve your sandwiches quickly after assembly. You can even place them back in the freezer for a few moments before serving to ensure they hold their shape.
Strawberry Ice Cream: A Delight for All Ages
There’s something truly magical about Strawberry Ice Cream. Whether you’re hosting a summer backyard party or just enjoying a quiet evening, this delightful treat brings smiles to faces of all ages. The bright color and fresh flavor make it the perfect dessert for any occasion, lifting spirits and creating lasting memories.
Get Creative with Toppings
Unleash your inner chef! Toppings can transform your Strawberry Ice Cream sandwiches into a gourmet experience. Think whipped cream, fresh mint leaves, or even a drizzle of chocolate or caramel sauce. This adds not only flavor but also a touch of elegance and fun. Each contributing element can elevate a simple dessert into a culinary celebration!
Perfect for Any Gathering
Whether it’s a casual get-together, a fancy dinner party, or just a family night in, Strawberry Ice Cream sandwiches fit seamlessly into any setting. They invite everyone to gather around, share stories, and enjoy the shared experience of creating something delicious together. More than just dessert, they’re a delightful addition to your culinary repertoire!
Common Mistakes to Avoid
Mistake 1: Not Chilling the Mixture
Make sure your ice cream base is thoroughly chilled before churning. If it’s too warm, you won’t achieve that creamy texture and it may take longer to freeze.
Mistake 2: Over-Filling the Ice Cream Maker
Avoid overloading your ice cream maker. Churn it in batches if needed. This ensures proper aeration, resulting in a light and fluffy Strawberry Ice Cream.
Mistake 3: Skipping the Waiting Time
Patience is key! Allowing your sandwiches to freeze properly helps set the ice cream and makes for a much more enjoyable eating experience. Don’t rush this deliciousness; good things come to those who wait!
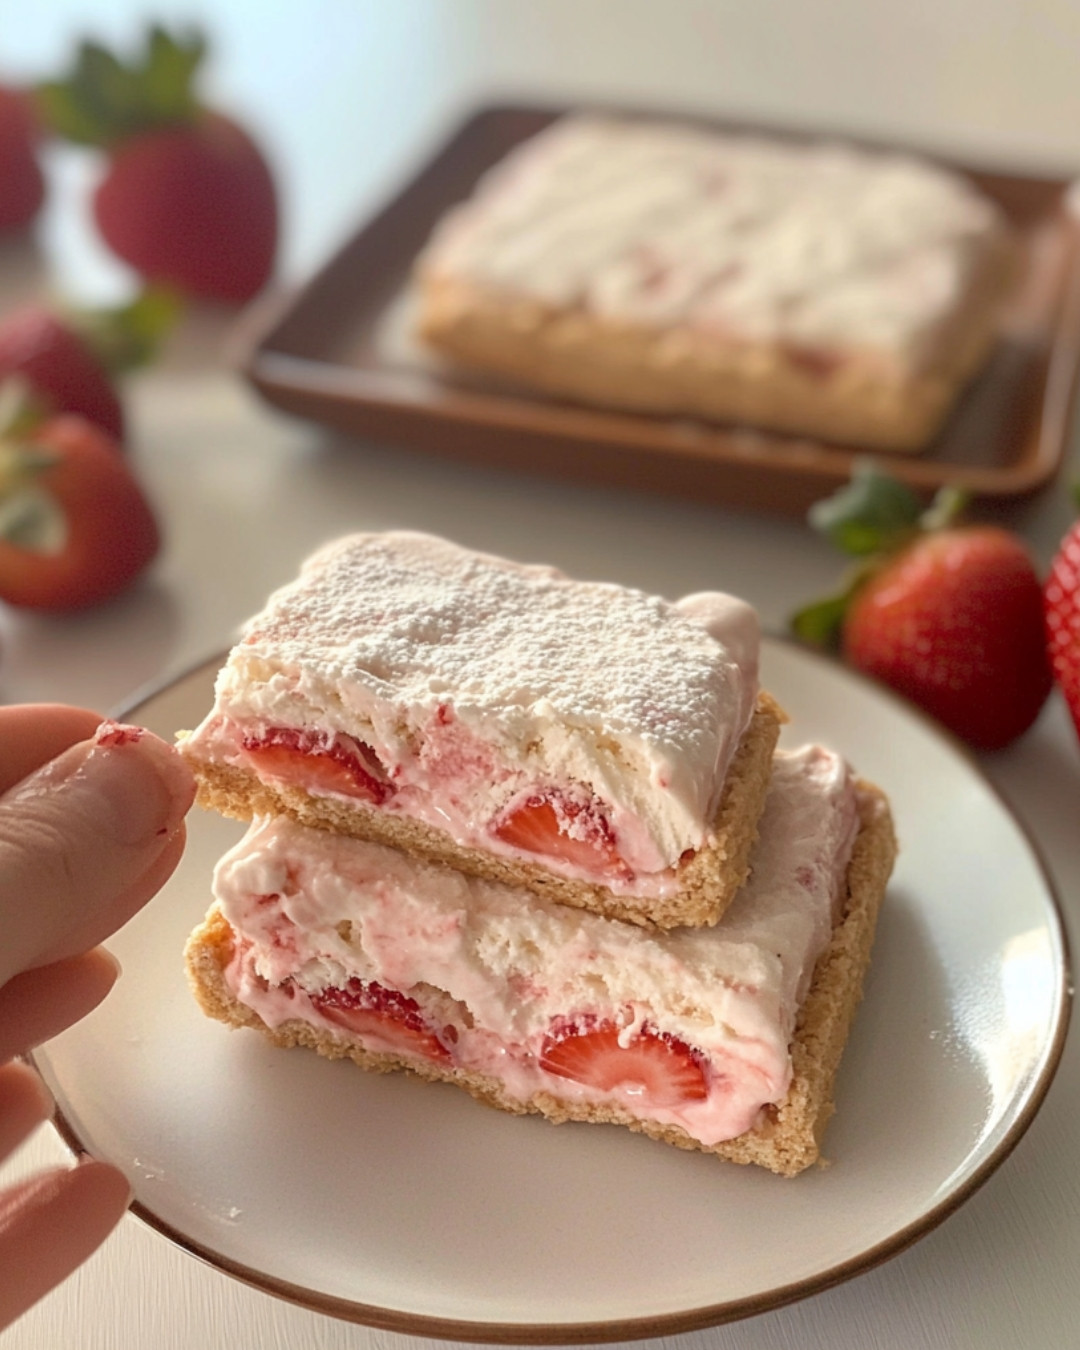
Key ingredients : Strawberry Ice Cream Sandwich
- 8 large chocolate chip cookies
- 4 cups strawberry ice cream
- 1 cup fresh strawberries, hulled and sliced
- 1/2 cup white chocolate chips
- 1 tablespoon vegetable oil
Preparation Time
- Prep Time: 20 minutes
- Cook Time:
- Total Time: 2 hours 20 minutes
- Yield: 4 servings
Cook techniques
Assembling the Sandwich
Start by placing a generous scoop of Strawberry Ice Cream between two cookies or biscuits. Ensure even distribution for balanced flavor in every bite. Press gently to avoid spilling the filling.
Freezing for Texture
To achieve the perfect consistency, freeze the assembled sandwich for 30 minutes. This step helps firm up the Strawberry Ice Cream and enhances the overall experience.
Flavor Infusion
Experiment with mixing pureed strawberries into the Strawberry Ice Cream prior to serving. This technique adds a burst of fresh strawberry flavor, enhancing the natural taste of the ice cream.
Serving and Presentation Ideas:
Serve the Strawberry Ice Cream sandwich on a decorative plate, garnished with fresh mint leaves or slices of ripe strawberries. Pair it with a drizzle of chocolate sauce or a sprinkling of powdered sugar for added visual appeal. Consider presenting the sandwiches on a rustic wooden board for a charming touch at gatherings.
People Also Ask:
What is the best way to store Strawberry Ice Cream sandwiches?
To preserve the freshness of your Strawberry Ice Cream sandwiches, store them in an airtight container in the freezer. This method keeps them tasty and prevents freezer burn, ensuring a delightful treat whenever you crave it.
Absolutely! Feel free to experiment with different cookie varieties, such as chocolate chip or oatmeal to complement the Strawberry Ice Cream. Each cookie brings its unique flavor, creating various delightful combinations.
Is it possible to make strawberry ice cream from fresh strawberries?
Yes, using fresh strawberries is an excellent way to create homemade Strawberry Ice Cream. Simply blend ripe strawberries with your preferred ingredients for a fresh and fruity flavor.
FAQ:
Can I make Strawberry Ice Cream ahead of time?
Yes, you can prepare the Strawberry Ice Cream several days in advance. Store it in the freezer until you’re ready to assemble the sandwiches, making it a convenient and delicious option for gatherings.
Can I use dairy-free ice cream?
Certainly! Dairy-free varieties of Strawberry Ice Cream work well for those with dietary restrictions, ensuring everyone can enjoy this tasty treat without compromising flavor and texture.
What toppings can I add to Strawberry Ice Cream sandwiches?
Consider topping your Strawberry Ice Cream sandwiches with sprinkles, chopped nuts, or a drizzle of caramel or chocolate sauce. These additions can elevate the presentation and taste.
Conclusion
The Delicious Strawberry Ice Cream Delight features a juicy strawberry flavor combined with creamy, luscious ice cream, all encased between delightful cookies. It is an incredibly satisfying dessert perfect for any occasion, from weeknights to festive gatherings.
Preparing this treat is fuss-free; simply mix ingredients, assemble, and freeze. While it chills, the sweet aroma fills your kitchen, and the visual appeal is striking. This delightful dessert will impress guests and offer a restaurant-worthy experience in the comfort of your home.

Delicious Strawberry Ice Cream Delight
Indulge in a Delicious Strawberry Ice Cream Delight, the perfect treat for any occasion. This creamy, homemade dessert will transport your taste buds to a world of luscious strawberries and velvety sweetness. Whether you’re enjoying it on a hot summer day or needing a sweet pick-me-up, this delightful creation is sure to satisfy. Plus, it’s easier to make than you think. Ready to dive into this frozen oasis? Click to explore the full recipe and add a scoop of joy to your day. Your tastebuds will thank you!
- Prep Time: 20 minutes
- Cook Time: –
- Total Time: 2 hours 20 minutes
- Yield: 4 servings 1x
Ingredients
- 8 large chocolate chip cookies
- 4 cups strawberry ice cream
- 1 cup fresh strawberries, hulled and sliced
- 1/2 cup white chocolate chips
- 1 tablespoon vegetable oil
Instructions
Step 1: Prepare the Strawberries
Begin by washing the fresh strawberries under cold water. This cleans off any dirt or residues, ensuring that your Strawberry Ice Cream has a vibrant, fresh taste. Once clean, hull the strawberries by removing the green tops, then chop them into small pieces. This will help them blend seamlessly into the ice cream, infusing it with their luscious flavor. Set them aside to allow the natural juices to flow.
Step 2: Make the Ice Cream Base
Grab a mixing bowl and combine creamy ingredients—heavy cream, milk, granulated sugar, and a dash of vanilla extract. Whisk these ingredients together until the sugar dissolves completely. This step is crucial; it forms the rich, creamy base for your Strawberry Ice Cream. Add in the chopped strawberries and fold them gently into the mixture. The vibrant red color of the strawberries will spread throughout the mix, creating a delightful swirl.
Step 3: Churn the Ice Cream
Pour the strawberry mixture into your ice cream maker, following the manufacturer’s instructions. This is where the magic happens! As the mixture churns, air is incorporated, creating a light and fluffy texture. Let it churn for about 20 to 25 minutes. You’ll know it’s ready when the consistency is thick and creamy—so irresistible!
Step 4: Freeze the Ice Cream
Transfer your churned Strawberry Ice Cream into an airtight container. Press a layer of plastic wrap directly onto the ice cream’s surface to avoid ice crystals forming. Place the container in the freezer for at least 4 hours, or overnight if you can wait! This step solidifies the ice cream, making it scoopable and perfect for your sandwich.
Step 5: Assemble the Sandwiches
Once the ice cream is perfectly frozen, it’s time to get creative! Start by selecting your favorite cookies—soft-baked, crunchy, or even brownies. Scoop a generous portion of your homemade Strawberry Ice Cream onto one cookie. Gently press another cookie on top, sandwiching the creamy delight in between. Don’t be afraid to enjoy the messy goodness!
Step 6: Serve and Enjoy
Your Strawberry Ice Cream sandwiches are ready to be devoured! Consider adding a sprinkle of crushed nuts or chocolate chips for an extra crunch. Serve them immediately or wrap them in parchment paper and store them back in the freezer for a later treat. Each bite offers a burst of strawberry flavor that’s simply irresistible!
Notes
Adjusting Sweetness
- Feel free to adjust the amount of sugar based on your taste preferences. If your strawberries are particularly sweet, you may want to reduce the sugar for a more balanced flavor.
Flavor Variations
- Experiment with different cookie types or add-ins like mini chocolate chips or crushed graham crackers. This will personalize your Strawberry Ice Cream sandwiches, making them uniquely yours.
Quick Serving
- To avoid melting, serve your sandwiches quickly after assembly. You can even place them back in the freezer for a few moments before serving to ensure they hold their shape.






2 thoughts on “Delicious Strawberry Ice Cream Delight”