how to make sourdough starter
Dreaming of homemade sourdough bread? Learn how to make sourdough starter from scratch with our simple step-by-step guide! Unlock the secrets to a bubbling, active starter that will fill your kitchen with the irresistible aroma of freshly baked bread. Perfect for beginners and seasoned bakers alike, this
- Prep Time: 7 days
- Cook Time: -
- Total Time: 7 days
- Yield: -
Ingredients
- Flour (Whole grain wheat, unbleached all-purpose, and einkorn are all great choices)
- Filtered water
Instructions
Step 1: Gather Your Ingredients
To start your journey into the world of sourdough baking, you will need just a couple of basic ingredients: flour and water. It’s best to use a good quality all-purpose flour or a mix of whole wheat and all-purpose flour. The type of flour you choose can impact the flavor and rise of your starter, so don’t be afraid to experiment. For water, use filtered or dechlorinated water for a healthy, lively starter.
Step 2: Mix the Flour and Water
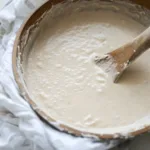
In a clean glass jar or bowl, combine equal parts flour and water. A good starting ratio is 1/2 cup of flour to 1/2 cup of water. Stir the mixture until it is well combined. The texture will be thick and pasty, which is perfect for getting those wild yeast cultures to thrive. Remember, this is the beginning of your very own sourdough starter guide.
Step 3: Cover and Let It Rest
Cover your jar loosely with a cloth or a lid. You want to keep dust out while still allowing air to flow in. Set your jar in a warm area of your kitchen, around 70°F to 75°F is ideal. Patience is key; let the mixture rest for 24 hours. During this time, the wild yeast in the air will start to gather in your mixture.
Step 4: Feed Your Starter
After the first 24 hours, it’s time to feed your starter! Discard half of the mixture (about 1/2 cup) from the jar and add another 1/2 cup of flour and 1/2 cup of water. Stir again, and then cover loosely. You’ll repeat this feeding process every day, which will help encourage the growth of your starter. Just think of it as nurturing a little yeast baby!
Step 5: Observe the Bubbles
Over the next few days, keep an eye on your starter. You should start to see bubbles forming, indicating that the fermentation process is starting. This is where the magic happens! It may take about 5 to 7 days for the starter to become fully active and ready to use for baking.
Step 6: Test Your Starter
To make sure your sourdough starter is ready to bake with, you can perform the “float test.” Take a small spoonful of the starter and place it in a glass of water. If it floats, congratulations! Your starter is bubbly and active, ready to create delicious sourdough bread. If it sinks, give it a couple more days of feeding.
Notes
Tip 1: Use Whole Wheat Flour
- Whole wheat flour contains more nutrients, which can help kickstart the fermentation process and create a robust starter.
Tip 2: Keep It Warm
- Your starter will thrive in warmer temperatures. If your home is cool, try placing the jar in a slightly warm spot, like on top of the refrigerator or in a sunny window.
Tip 3: Be Consistent
- Consistency is key for maintaining a healthy starter. Make sure to feed it at the same time each day, and try to use it regularly to keep it active.
Find it online: https://www.amgroyal.com/how-to-make-sourdough-starter/