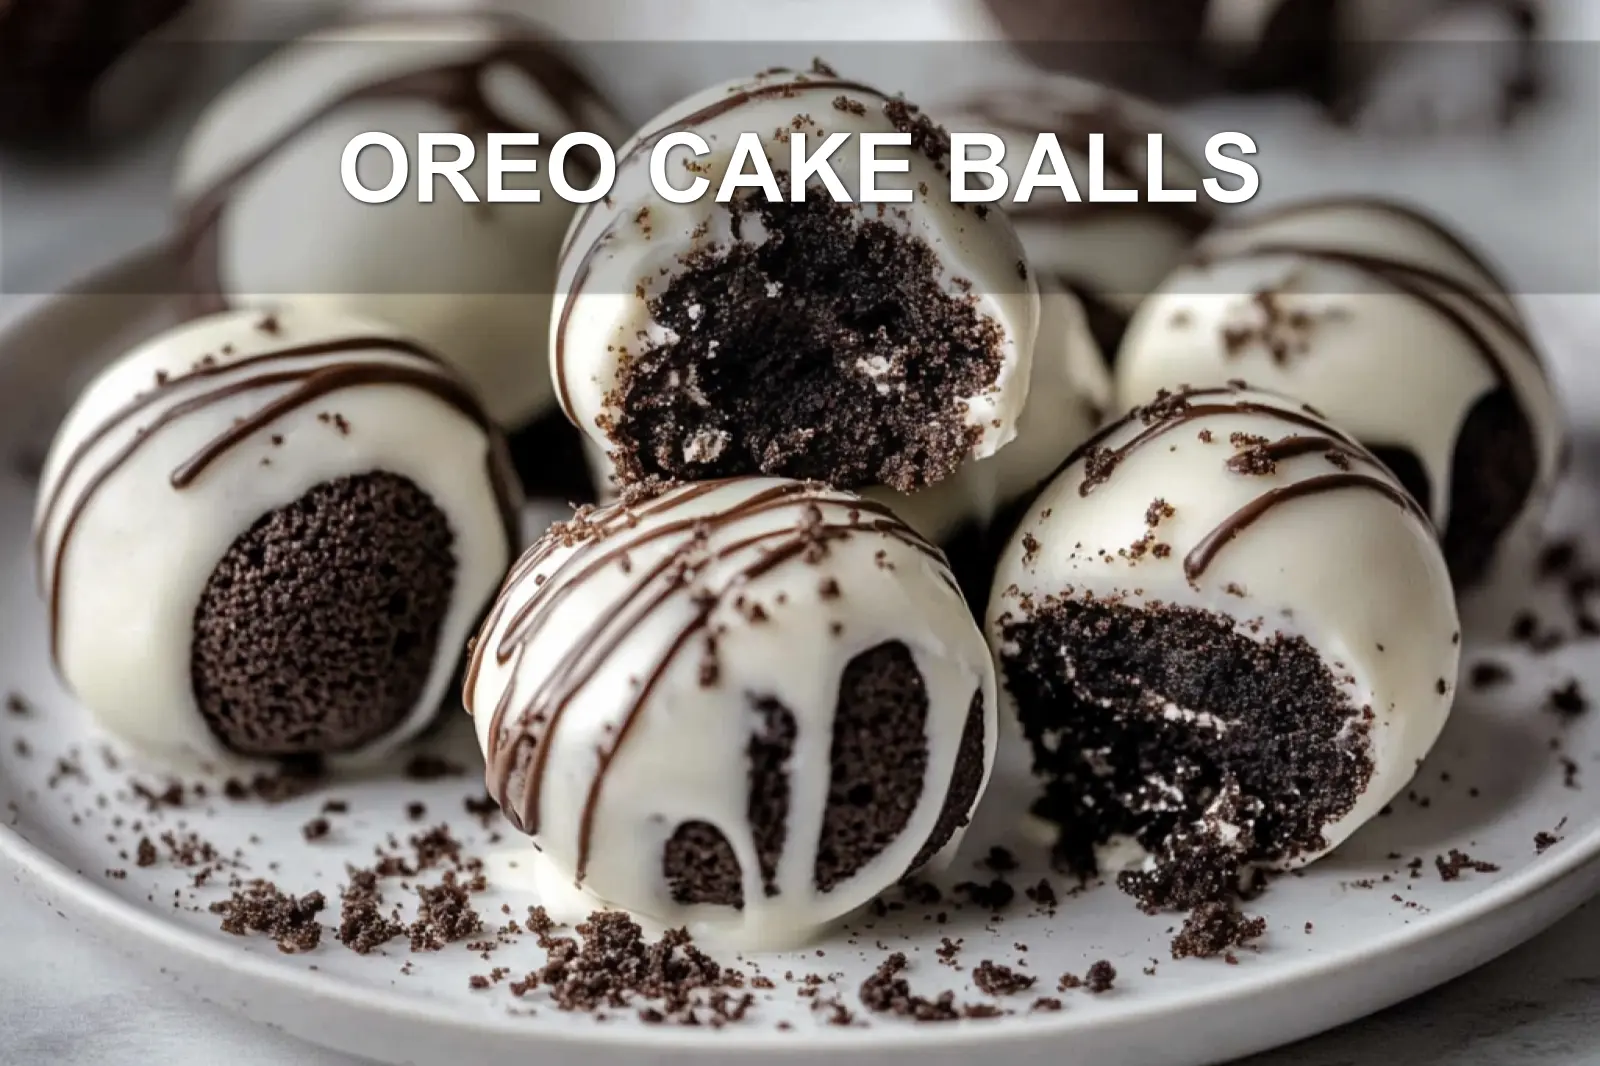
There’s something magical about turning a simple cookie into something extraordinary. Oreo cake balls have that special power they transform pantry staples into little bites of pure joy. These no-bake treats are trending everywhere, and for good reason. They’re foolproof enough for beginners but elegant enough to impress guests.
Picture this: crushed Oreos mixed with cream cheese, rolled into perfect spheres, then dipped in rich white chocolate. It’s like truffle-making, but simpler and more forgiving. Just three ingredients come together to create these irresistible sweet snacks that vanish faster than you can make them. Keep reading for the full recipe and expert tips below!
I’ve been making variations of these treats for decades, long before they had a fancy name. My secret? A tiny pinch of vanilla extract in the mixture it elevates the flavor in just the right way. Trust me, once you try this version, store-bought will never compare.
Why You’ll Fall in Love with These Oreo Cake Balls
These little treasures remind me of the first time I discovered you could transform everyday cookies into something magical. There’s something deeply satisfying about crushing those familiar black-and-white cookies and watching them become the foundation for an entirely new treat.
What makes these Oreo cake balls so special is their perfect balance of textures and flavor. The creamy, soft interior melts on your tongue, while the white chocolate coating provides that satisfying snap. It’s a bite-sized dessert that feels both indulgent and nostalgic.
- No-bake simplicity: Perfect for hot summer days when you don’t want to heat up the kitchen.
- Crowd-pleaser guaranteed: I’ve never met anyone who could resist these little spheres of joy.
- Make-ahead friendly: They actually taste better after resting in the fridge overnight as the flavors meld.
Your Essential Ingredients and Tools
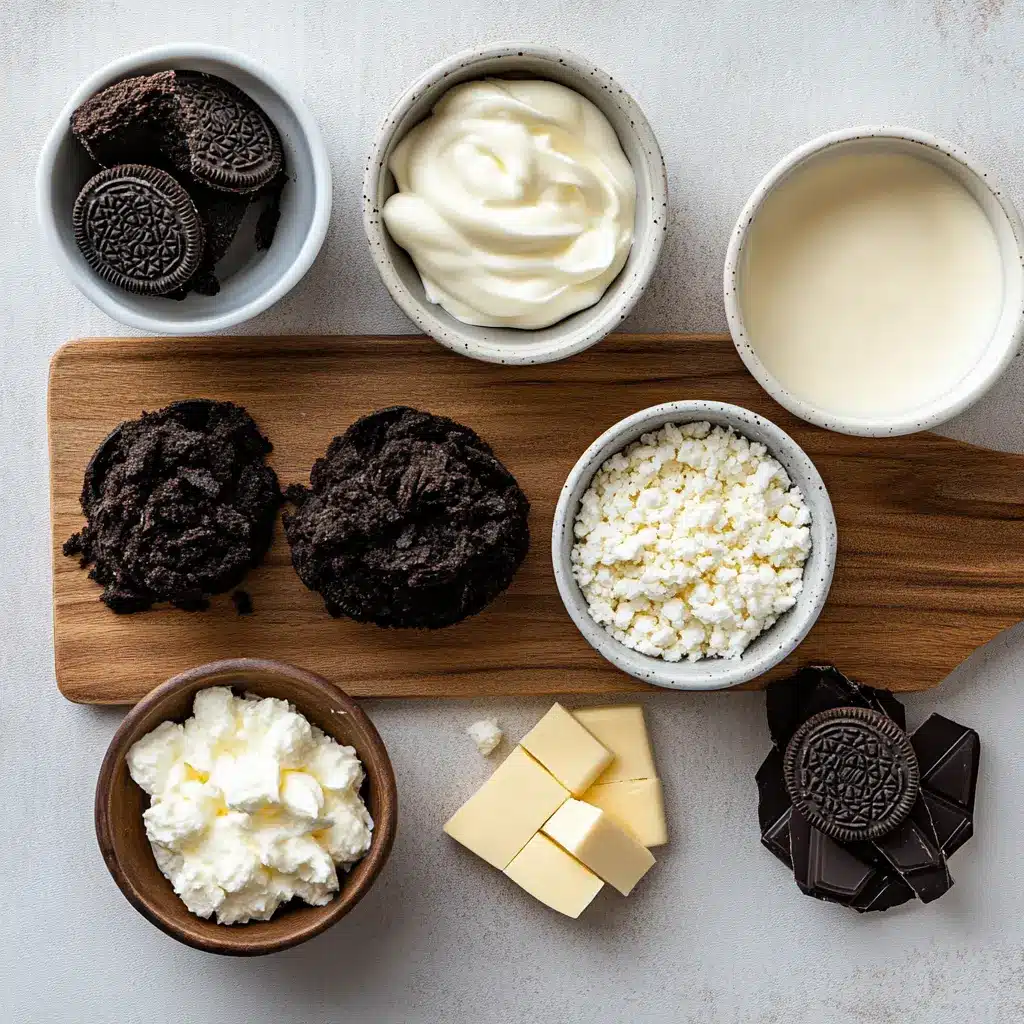
The beauty of this recipe lies in its simplicity. With just a handful of ingredients, you’ll create something that tastes like it came from a high-end bakery. I always keep these staples on hand you never know when the craving will strike!
The star ingredients are straightforward: Oreos for that iconic chocolate-vanilla cookie flavor, cream cheese for binding and creamy richness, and white candy melts to create a glossy, professional finish. Heavy cream comes in handy to loosen the coating if it’s too thick once melted.
| Ingredient | Amount | Purpose |
|---|---|---|
| Oreos | 24 cookies | Base flavor and texture |
| Cream cheese | 4 oz, softened | Binding agent, adds creaminess |
| White candy melts | 10 oz | Coating and visual appeal |
| Heavy cream | 2 tbsp | Thins coating if needed |
Essential Tools
- Food processor or rolling pin for crushing cookies
- Large mixing bowl for blending ingredients
- Small cookie scoop or spoon for shaping evenly sized truffles
- Microwave-safe bowl for melting candy melts
- Fork or dipping tool for smooth coating
- Wax paper or parchment-lined tray for chilling and setting
Step-by-Step Magic: How It All Comes Together
The process is wonderfully therapeutic. Start by crushing your Oreos into fine crumbsthis is where a food processor comes in handy, though a zip-top bag and rolling pin do the trick. Make sure all the filling is blended in for optimal texture.
Next, combine the Oreo crumbs with the softened cream cheese in a large bowl. Mix until it forms a smooth, dough-like consistency. A pinch of vanilla extract at this stage adds a lovely depth of flavor.
Roll the mixture into even balls, roughly 1 tablespoon each. Using a cookie scoop helps maintain consistency. After shaping, place the balls on a parchment-lined baking sheet and chill for at least 15 minutes so they firm up before dipping.
Melt the white candy melts in a microwave-safe bowl in 30-second intervals, stirring until smooth. Add 1–2 teaspoons of heavy cream if the coating is too thick. Dip each ball using a fork or skewer, gently tap off excess coating, and return to the tray to set.
| Step | Time | Key Tip |
|---|---|---|
| Crush Oreos | 3 minutes | Fine crumbs work best |
| Mix with cream cheese | 2 minutes | Ensure even distribution |
| Roll into balls | 10 minutes | Chill hands with cold water |
| Chill shaped balls | 15 minutes | Helps coating adhere better |
| Dip in melted coating | 10 minutes | Work quickly while coating is smooth |
Troubleshooting Your Cake Ball Adventures
Even seasoned bakers experience minor challenges when working with no-bake treats. If your mixture feels too soft or sticky to roll, simply refrigerate it for 15–20 minutes to firm up before shaping.
Pro Tip: If your white candy melts are difficult to dip smoothly, stir in heavy cream a little at a time. The consistency should resemble thick honey for best results.
- Cracking coating: Let cake balls sit at room temperature for 5–10 minutes before dipping to prevent temperature shock.
- Lumpy mixture: Make sure cream cheese is fully softened before blending for a smoother texture.
- Coating won’t stick: Chill shaped balls longer or dry any surface moisture before coating.
Creative Twists and Personal Touches
While the classic recipe is delicious as-is, these Oreo cake balls are endlessly customizable. I love rolling them in additional crushed Oreos for a crunchy outer layer or drizzling them with dark chocolate for contrast.
Get creative based on the occasion! Add a drop of flavored extract (like almond, peppermint, or orange) for holiday flair, or switch up the coating with colorful candy melts to match a party theme.
| Variation | How To | Perfect For |
|---|---|---|
| Mint chocolate | Add 1/4 tsp peppermint extract | Holiday parties |
| Birthday cake | Roll in colorful sprinkles | Celebrations |
| Double chocolate | Use chocolate candy melts instead | Chocolate lovers |
| Coconut dream | Roll in shredded coconut | Tropical vibes |
Serving Suggestions and Storage Wisdom
These versatile treats are a hit at any gatheringfrom cozy afternoons with friends to fancy dessert platters at weddings. Display them on a cake stand or place each in a festive mini cupcake liner for a polished presentation. Pair with fruit or espresso for an elegant touch.
Storage Note: Store your finished Oreo cake balls in an airtight container in the refrigerator. They’ll stay fresh for up to 7 days and improve in flavor overnight. For longer storage, freeze them on a tray first, then transfer to a container. Thaw overnight in the fridge before serving.
| Storage Method | Duration | Best Practice |
|---|---|---|
| Refrigerator | Up to 1 week | Airtight container, single layer |
| Freezer | Up to 1 month | Flash freeze first, then store |
| Room temperature | 2–3 hours max | Ideal for serving |
Expert Insight: The Appeal of Oreo Cake Balls
Oreo cake balls combine cookie crumbs and cream cheese into a perfectly bite-sized dessert. The secret to their success is achieving the ideal crumb-to-cream-cheese ratio, which keeps the texture firm yet tender. Dipped in chocolate, they’re visually impressive and effortless to enjoy.
For more delicious recipes and cooking inspiration, follow me on Facebook, Pinterest and Reddit!
The Journey to My Perfect Oreo Cake Balls
It took several attempts to truly master these Oreo cake balls. One batch was too dry, another far too sweetbut through trial and error, I landed on the perfect formula. With every bite, you taste the care and little lessons learned along the way. These are more than just a treatthey’re a family-favorite tradition now.

A Sweet Legacy in Every Bite
These Oreo cake balls deliver everything I promisedbold chocolate-vanilla flavor wrapped in a smooth white coating that melts beautifully on your tongue. In under an hour, you’ll have elegant treats that look professional yet taste like homemade goodness. The texture is divinesilky inside, crisp outside, and just sweet enough.
They’re also adaptable: try using golden Oreos for a vanilla profile or chocolate graham crackers for extra richness. Store them in the fridge for up to 5 days or freeze a batch so you always have a little sweetness ready to go. Let the flavors develop overnight for the best results.
There’s a special kind of joy in rolling each of these little spheres by handthe kind passed down in kitchens filled with laughter. I’d love to hear how your batch turns out. Share your twists and tag someone who deserves a homemade surprise. These little gems say: “I thought of you.”
PrintOREO CAKE BALLS
Oreo Cake Balls are irresistibly easy sweet snacks perfect for any occasion. These no-bake treats combine creamy Oreo cake insides with a hard candy exterior. Enjoy a fun baking recipe that’s quick, delicious, and sure to impress. Ideal for Oreo Recipes and Tasty Baking enthusiasts.
- Prep Time: 30 minutes
- Cook Time: 0 minutes
- Total Time: 30 minutes
- Yield: Serves 15 cake balls 1x
- Category: Dessert
- Method: No-Bake
- Cuisine: American
- Diet: Vegetarian
Ingredients
- 24 Oreos
- 4 oz softened cream cheese
- 10 oz white candy melts (Ghirardelli brand)
- 2 tbsp heavy cream use only if Candy melts need to be thinned out
Instructions
- Crush Oreos into fine crumbs and mix with softened cream cheese until well combined and creamy.
- Shape mixture into bite-sized balls and chill in refrigerator for 30 minutes.
- Melt white candy melts in a microwave-safe bowl, adding heavy cream if needed to thin.
- Dip chilled balls into melted candy and place on wax paper to set.
- Refrigerate until candy coating hardens and serve.
Notes
- For best results, use softened cream cheese and chill cake balls thoroughly before dipping to ensure smooth coating
Nutrition
- Serving Size: 1 cake ball
- Calories: 137 kcal

