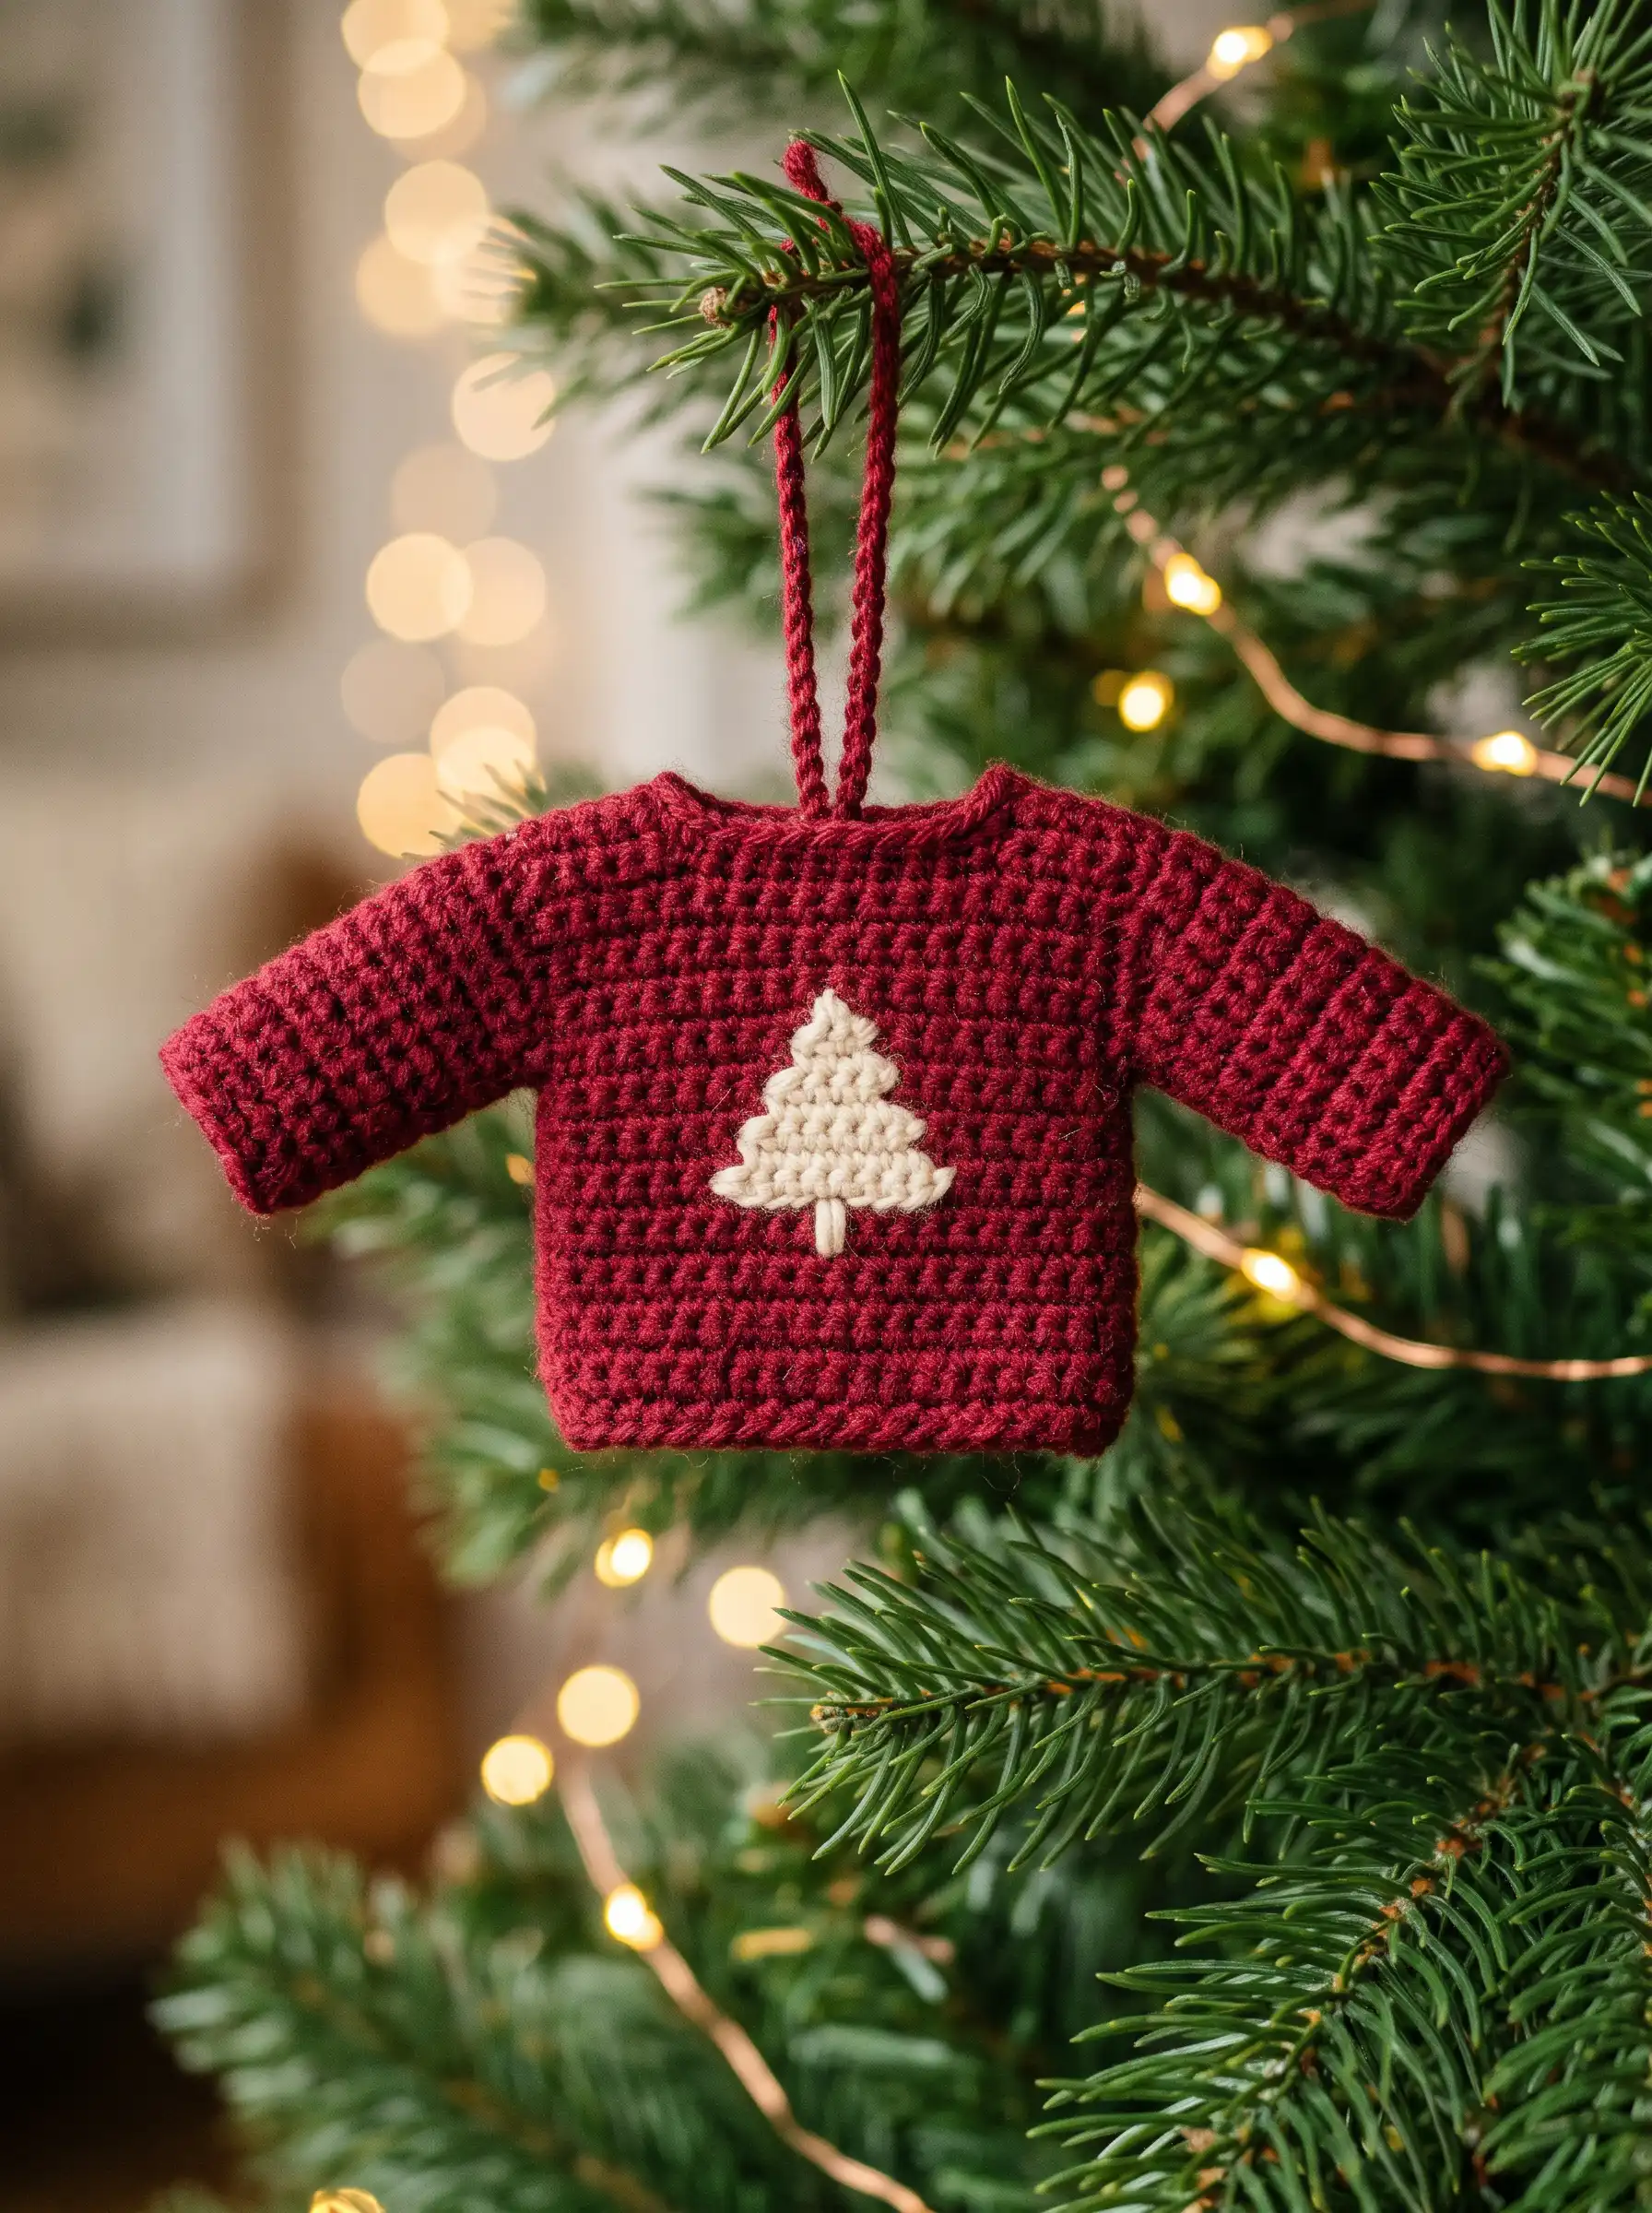
Your ornament will differ: the real size, drape and texture depend on your yarn, your hook and your tension.
Advanced beginner · one size (Mini, about 3 1/2 in (9 cm) wide) · DK yarn in Cranberry and Cream, US D-3 hook. Ugly Christmas Sweater Day falls on the third Friday of December: December 18 in 2026.
Important: nobody has crocheted this pattern yet. The stitch counts were checked by software. That does not prove how it looks or fits. Make the swatch first.
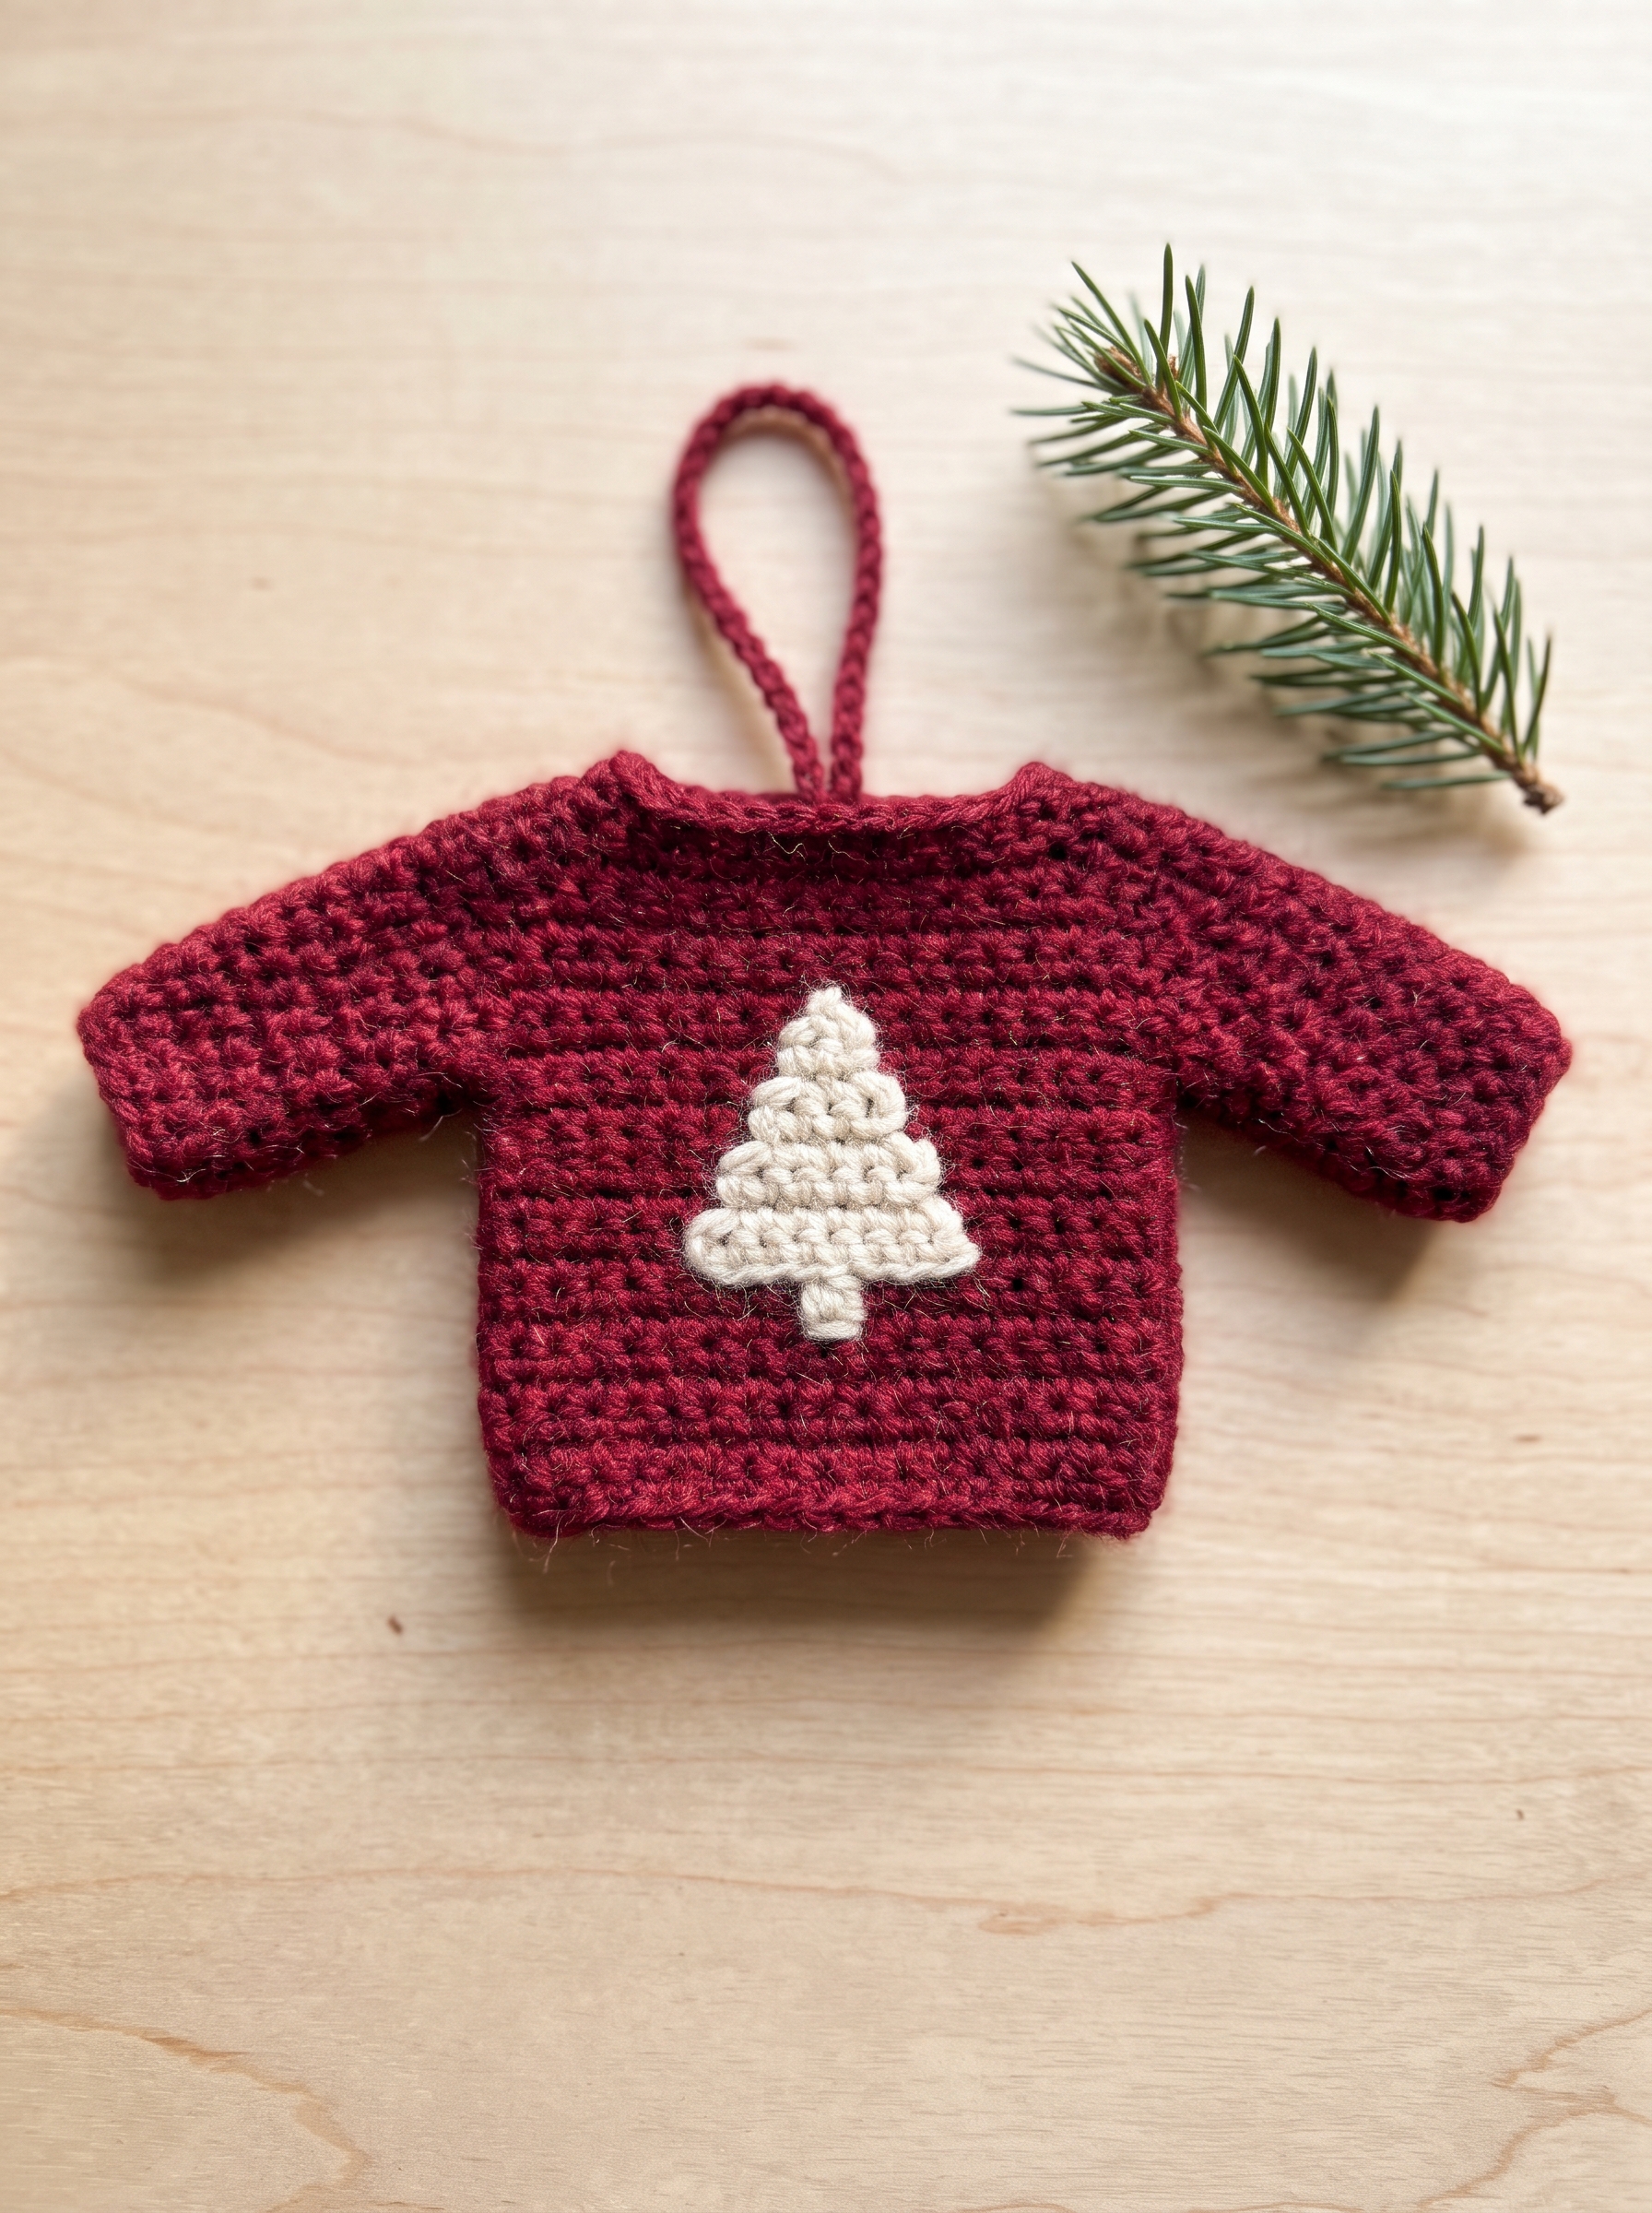
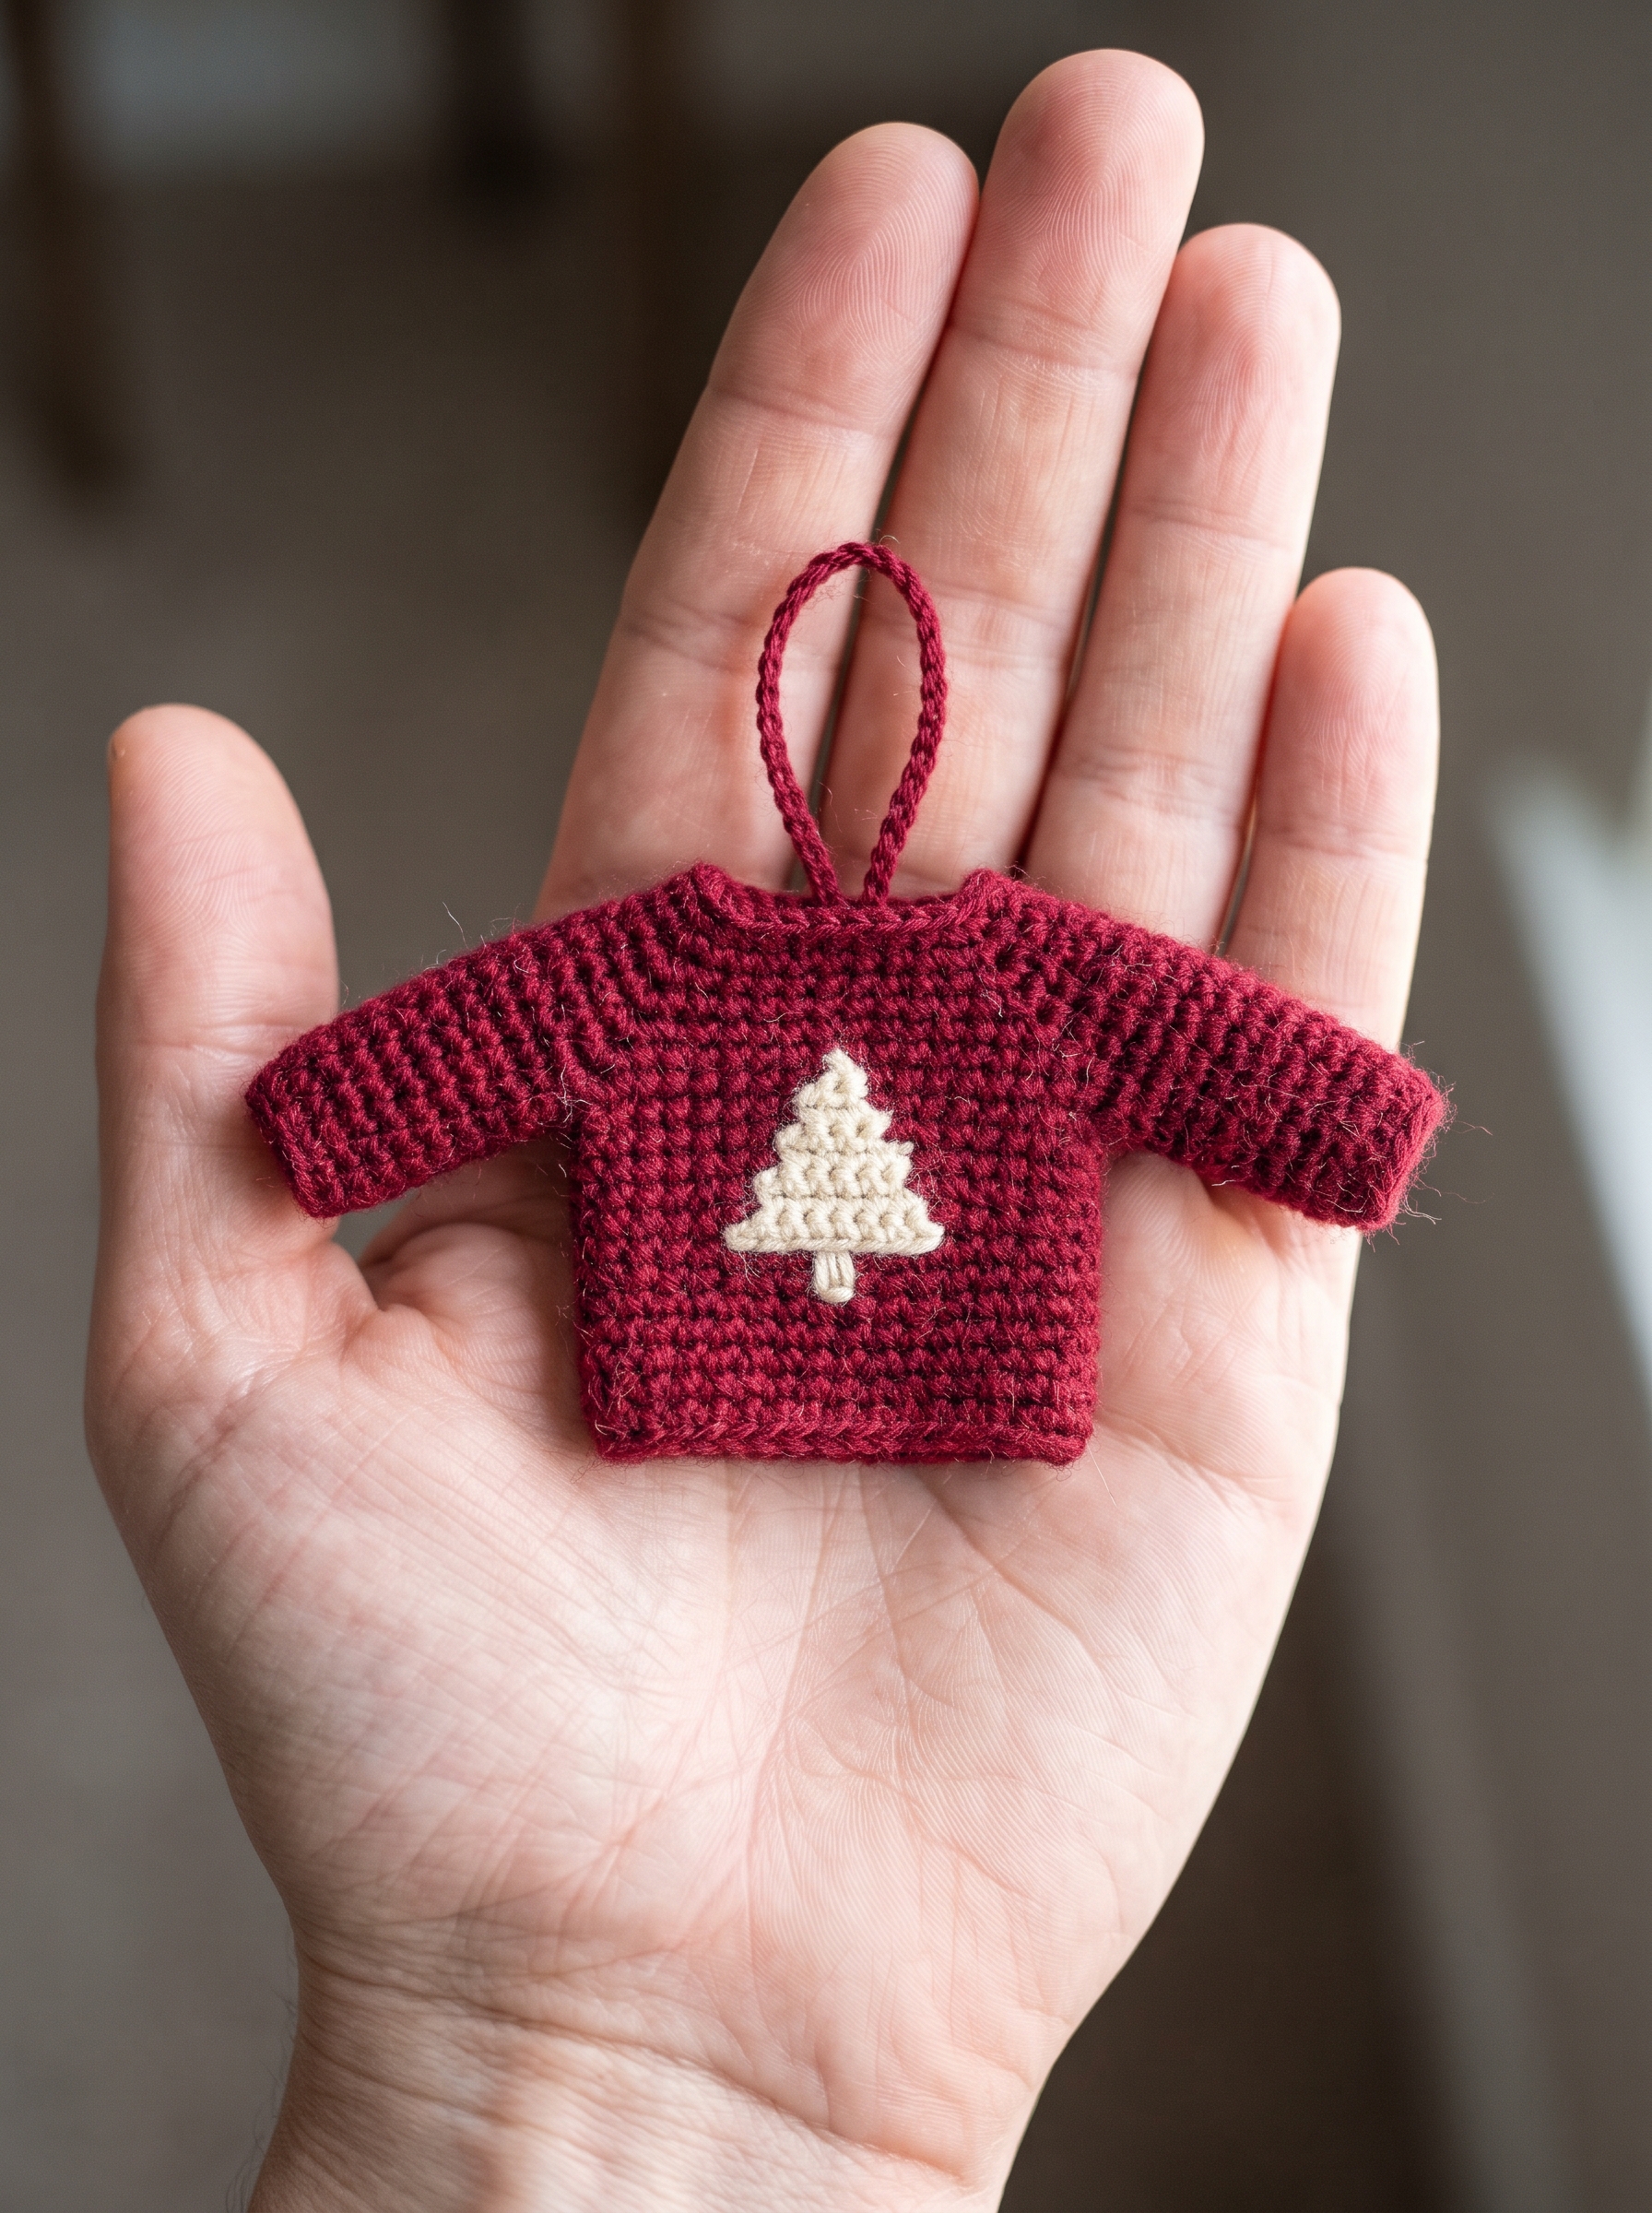
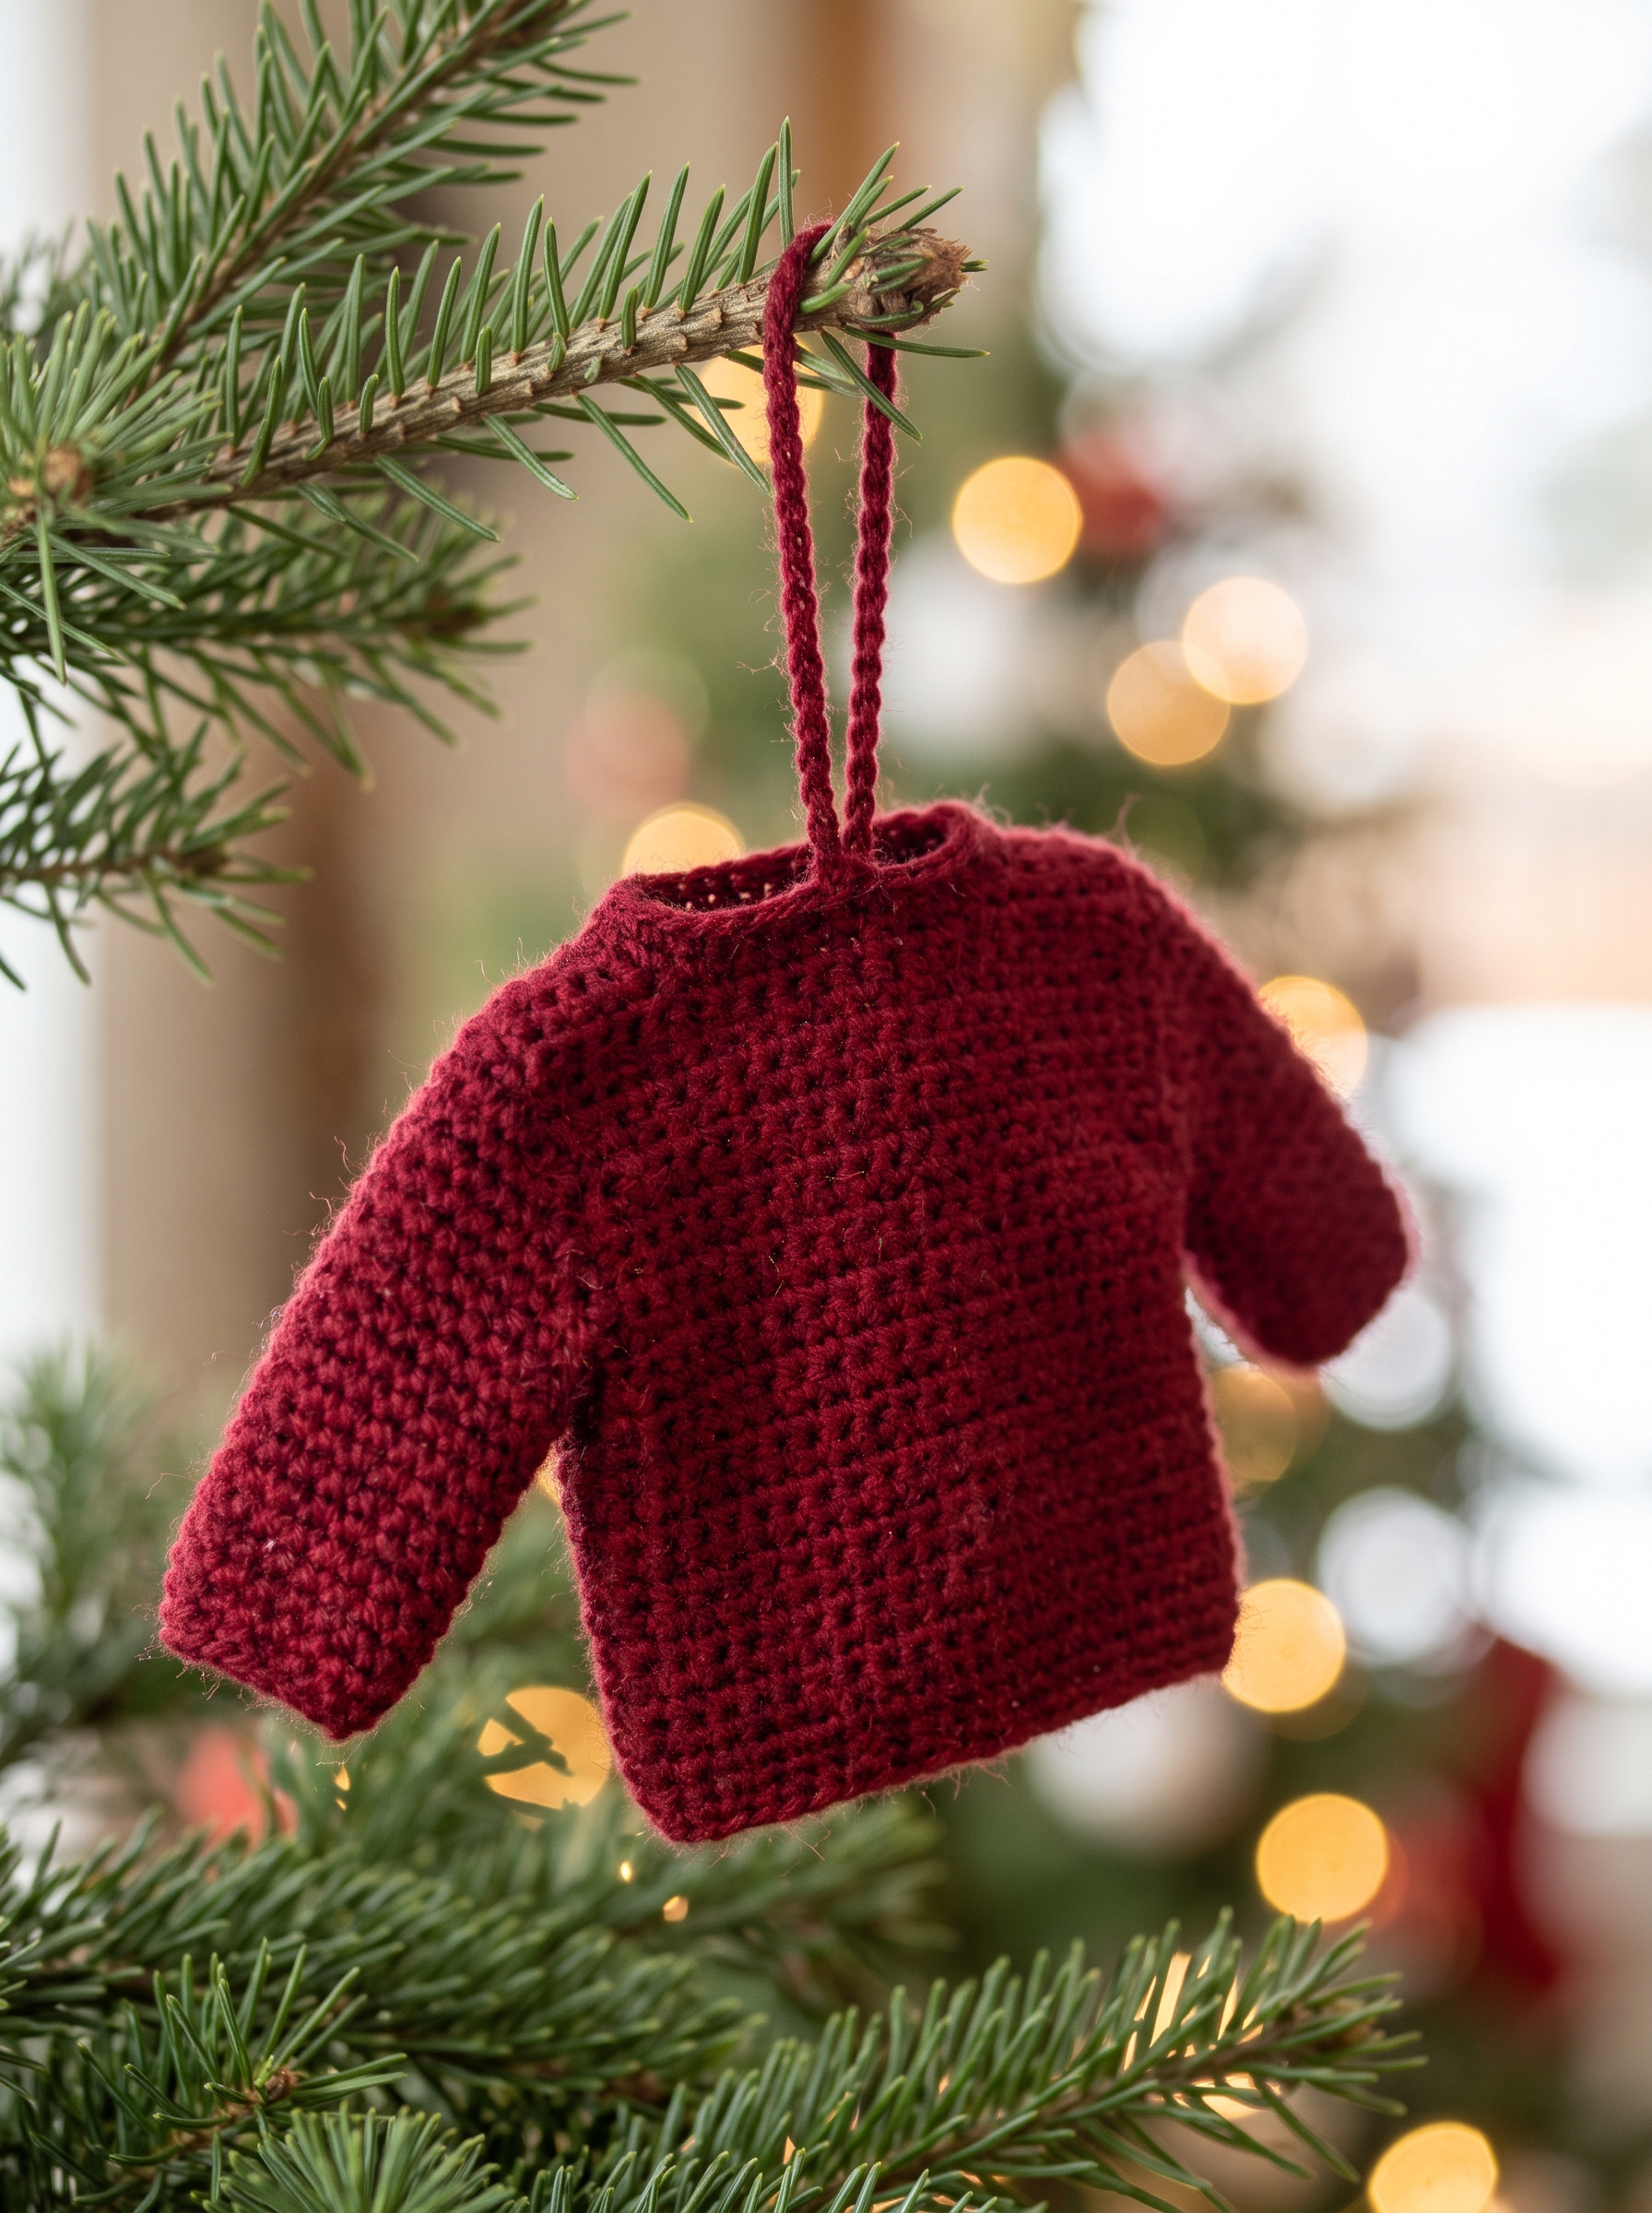
This crochet Christmas sweater ornament is a tiny sweater made of four rectangles: a front, a back and two sleeves, all in single crochet (sc). The front has a small Cream tree worked in tapestry crochet, where the yarn you are not using is carried inside the stitches. A chain loop lets you hang it on the tree.
If you like Ugly Christmas Sweater Day but not the big project, this is a small way to join in: one ornament, or a row of them on a garland. Our full-size pattern is the Crochet Christmas Sweater (https://www.amgroyal.com/crochet-christmas-sweater/).
It is flat and not stuffed on purpose: it should hang flat. Check yours. Not a toy. Small parts: keep away from young children and pets. Do not use beads, buttons or safety eyes. The chain loop and loose ends can wrap around a neck. Keep away from babies, children and pets (pets chew yarn: hang it out of reach). Yarn burns: keep away from candles and hot lights. Check the loop and seams every year; throw it away if it frays. When giving it, say it is not a toy.
Counts were checked by software. This pattern has not been crocheted and swatched by a person before publication. Sizes, yarn and time are estimates from a suggested gauge: make a swatch and adjust.
Time: About 2 1/2 to 4 hours for the ornament (sewing tiny pieces is slow if it is new to you), plus about 40 minutes for the swatch. Blocking and drying time are not included. For several ornaments: no time saved, about the same each. Sewing small pieces: allow 1 hour or more if new to you. Estimated, not timed. We assumed 8 sc a minute in plain rows and 5 in tree rows (not timed), plus 60 to 90 minutes for sewing. First-time colorwork often takes longer.
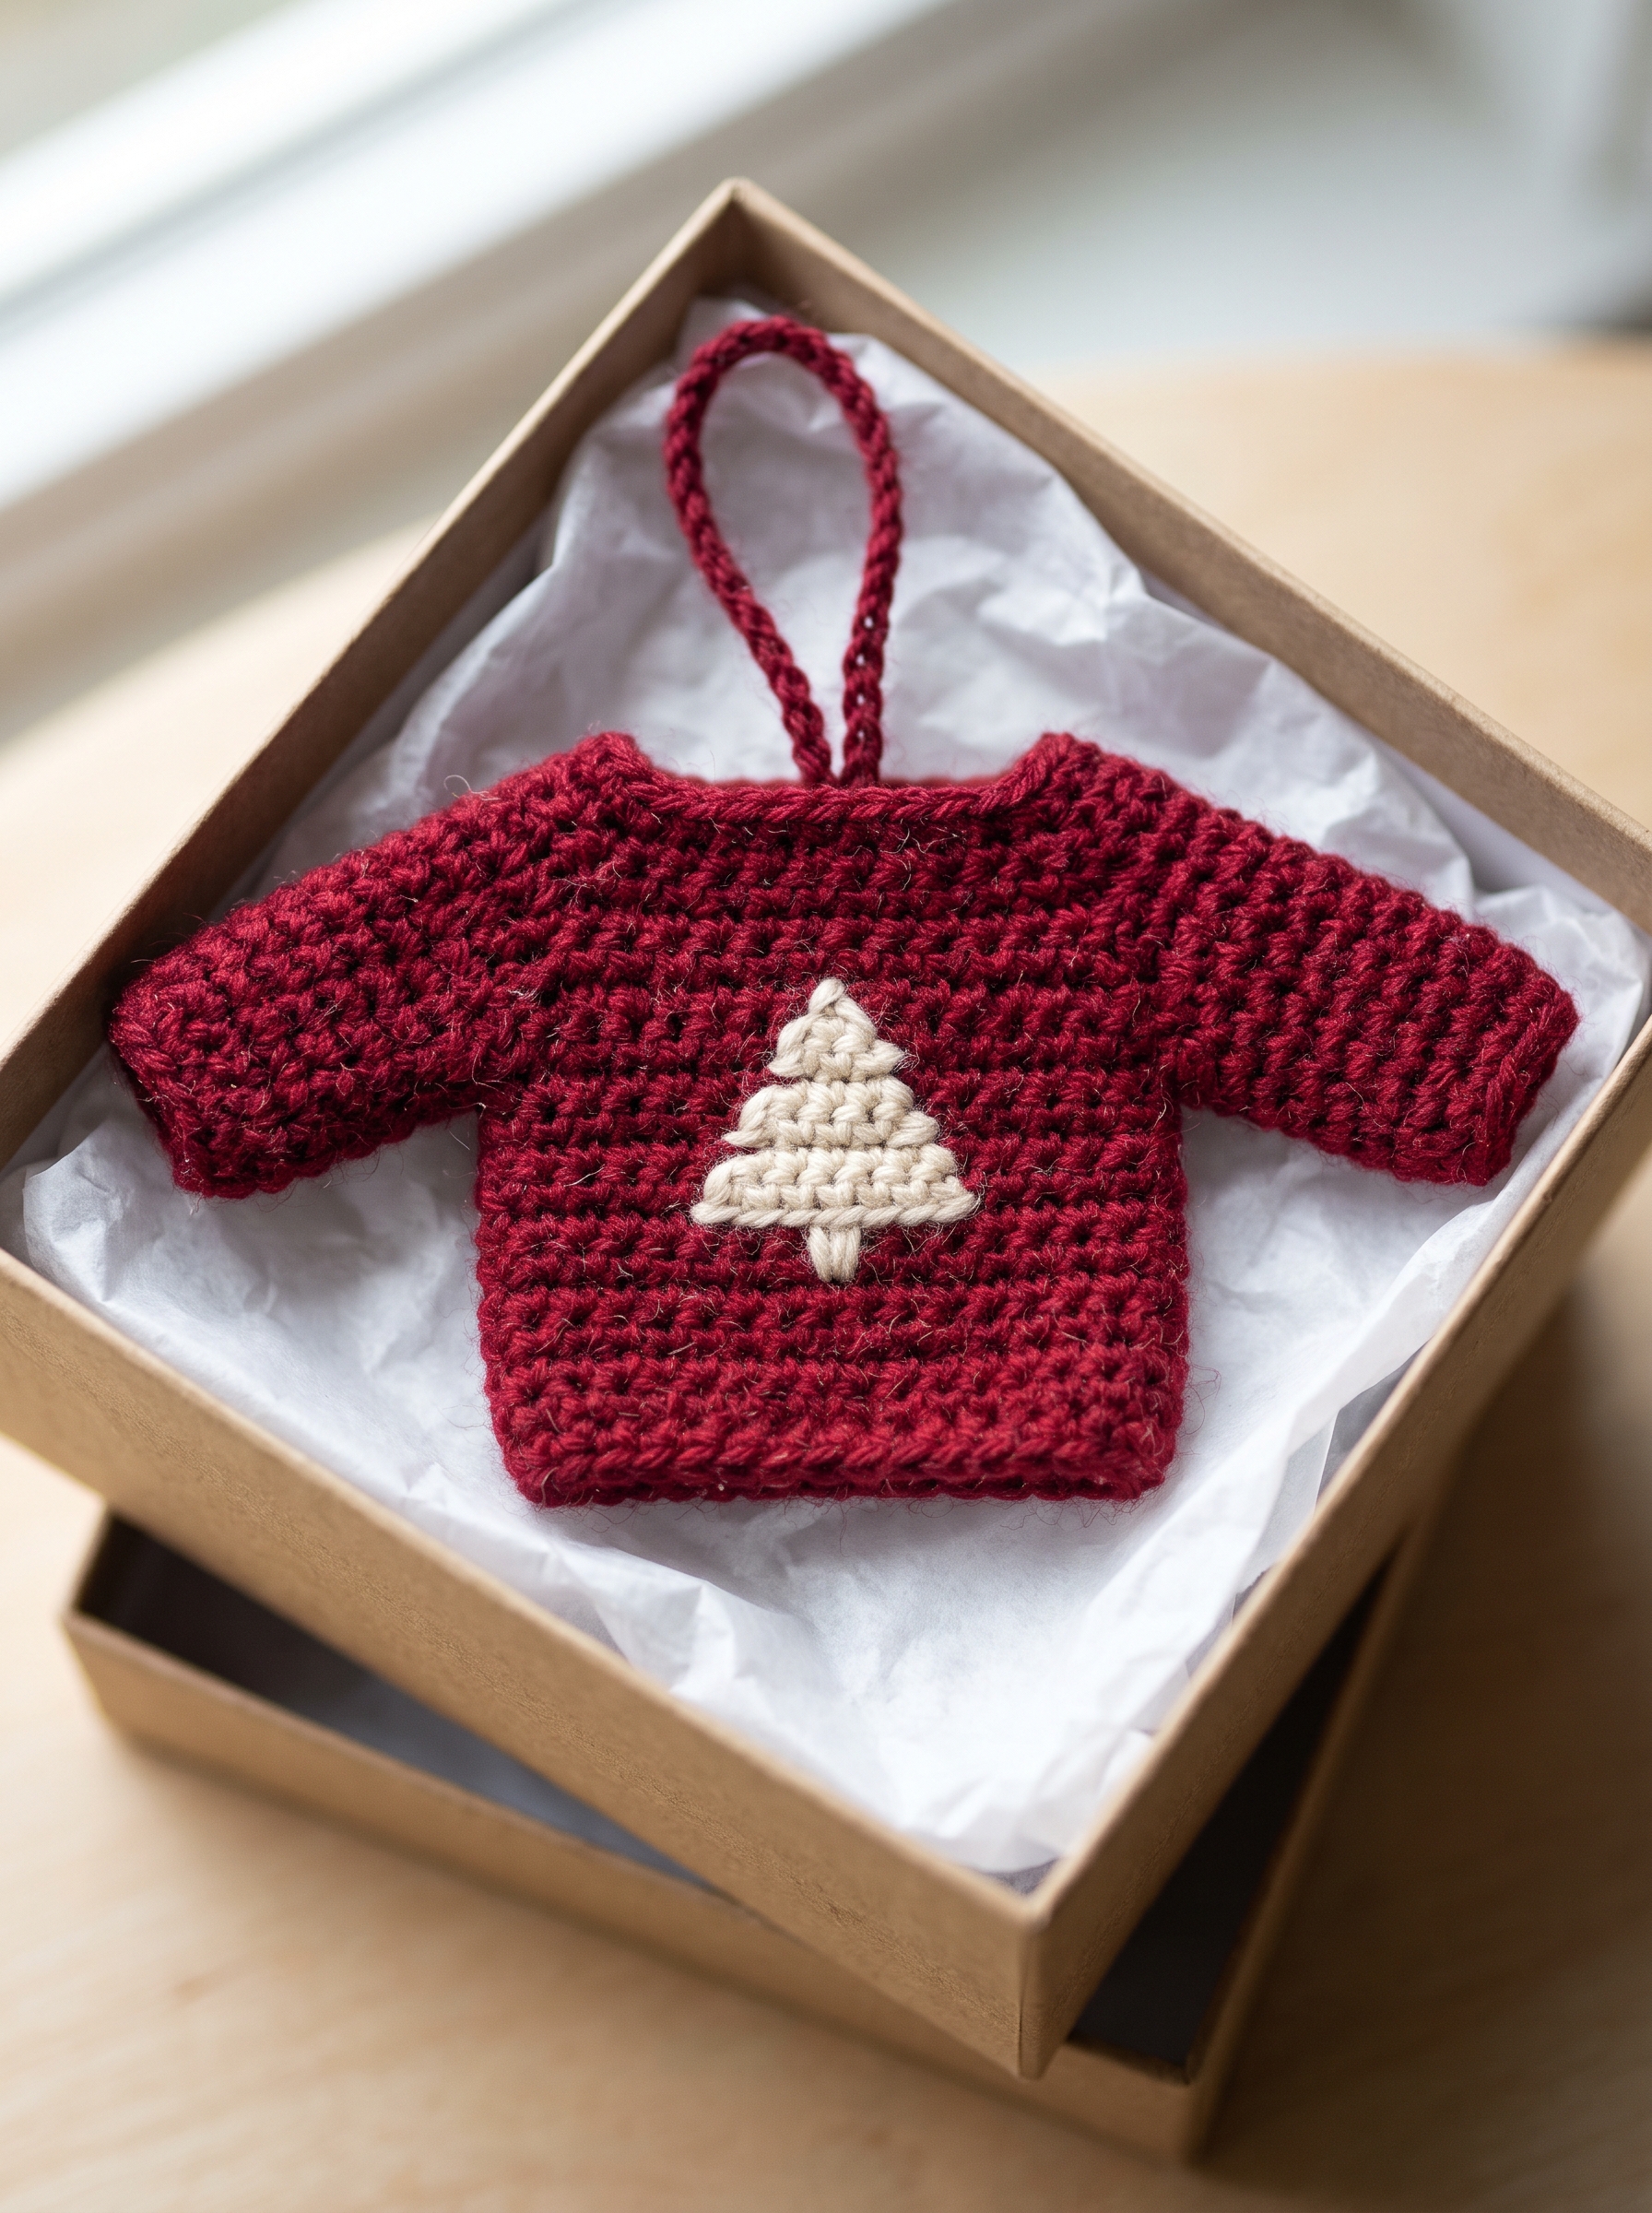
- Level
- Advanced beginner: sc, color change, carrying yarn, sewing tiny pieces. Not a first project.
- Time
- About 2 1/2 to 4 hours for the ornament (sewing tiny pieces is slow if it is new to you), plus about 40 minutes for the swatch. Blocking and drying time are not included. For several ornaments: no time saved, about the same each. Sewing small pieces: allow 1 hour or more if new to you. Estimated, not timed
- Finished size
- Body about 3 1/2 x 3 1/4 in (9 x 8 cm), about 5 3/4 in (15 cm) across the sleeves (approximate)
- Yarn
- DK weight (#3), 2 colors: Cranberry about 70 yd (64 m), Cream about 6 yd (5 m), plus about 20 yd and 6 yd for the swatch. One 50 g ball of DK is enough for the ornament
- Hook
- US D-3 (3.25 mm)
- Gauge
- Gauge swatch is required, not optional. Suggested only, not swatched: 20 sc and 22 to 23 rows = 4 in (10 cm) in tapestry single crochet with DK yarn and a US D-3 (3.25 mm) hook, colorwork rows included. Your stitches and rows may be fewer or more than we show: measure your swatch.
- Construction
- Front, back, 2 sleeves: rectangles in sc, seamed; drop shoulders, no shaping, flat (not stuffed). Open neck 1 1/2 in (4 cm) wide, chain loop for hanging.
- Safety
- Not a toy. Small parts: keep away from young children and pets. Do not use beads, buttons or safety eyes. The chain loop and loose ends can wrap around a neck. Keep away from babies, children and pets (pets chew yarn: hang it out of reach). Yarn burns: keep away from candles and hot lights. Check the loop and seams every year; throw it away if it frays. When giving it, say it is not a toy.
Abbreviations (US)
- ch = chain
- sc = single crochet
- st(s) = stitch(es)
- RS = right side
- WS = wrong side
- yo = yarn over
- tch = turning chain (ch 1 here: never counted, never worked into)
- Cranberry / Cream = the two colors: Cranberry (main color) and Cream (the tree)
Materials
- Cranberry (main color, seams, loop): about 70 yd (mini size)
- Cream (the tree): about 6 yd (mini size)
- Yardage above is for the ornament; the swatch needs more (see the Sizes card). Leftover DK yarn is enough.
- Tapestry needle (DK size, round tip), scissors, at least 4 stitch markers, measuring tape. No beads, buttons or safety eyes.
- Acrylic or wool DK yarn with good contrast between the two colors. Do not steam acrylic.
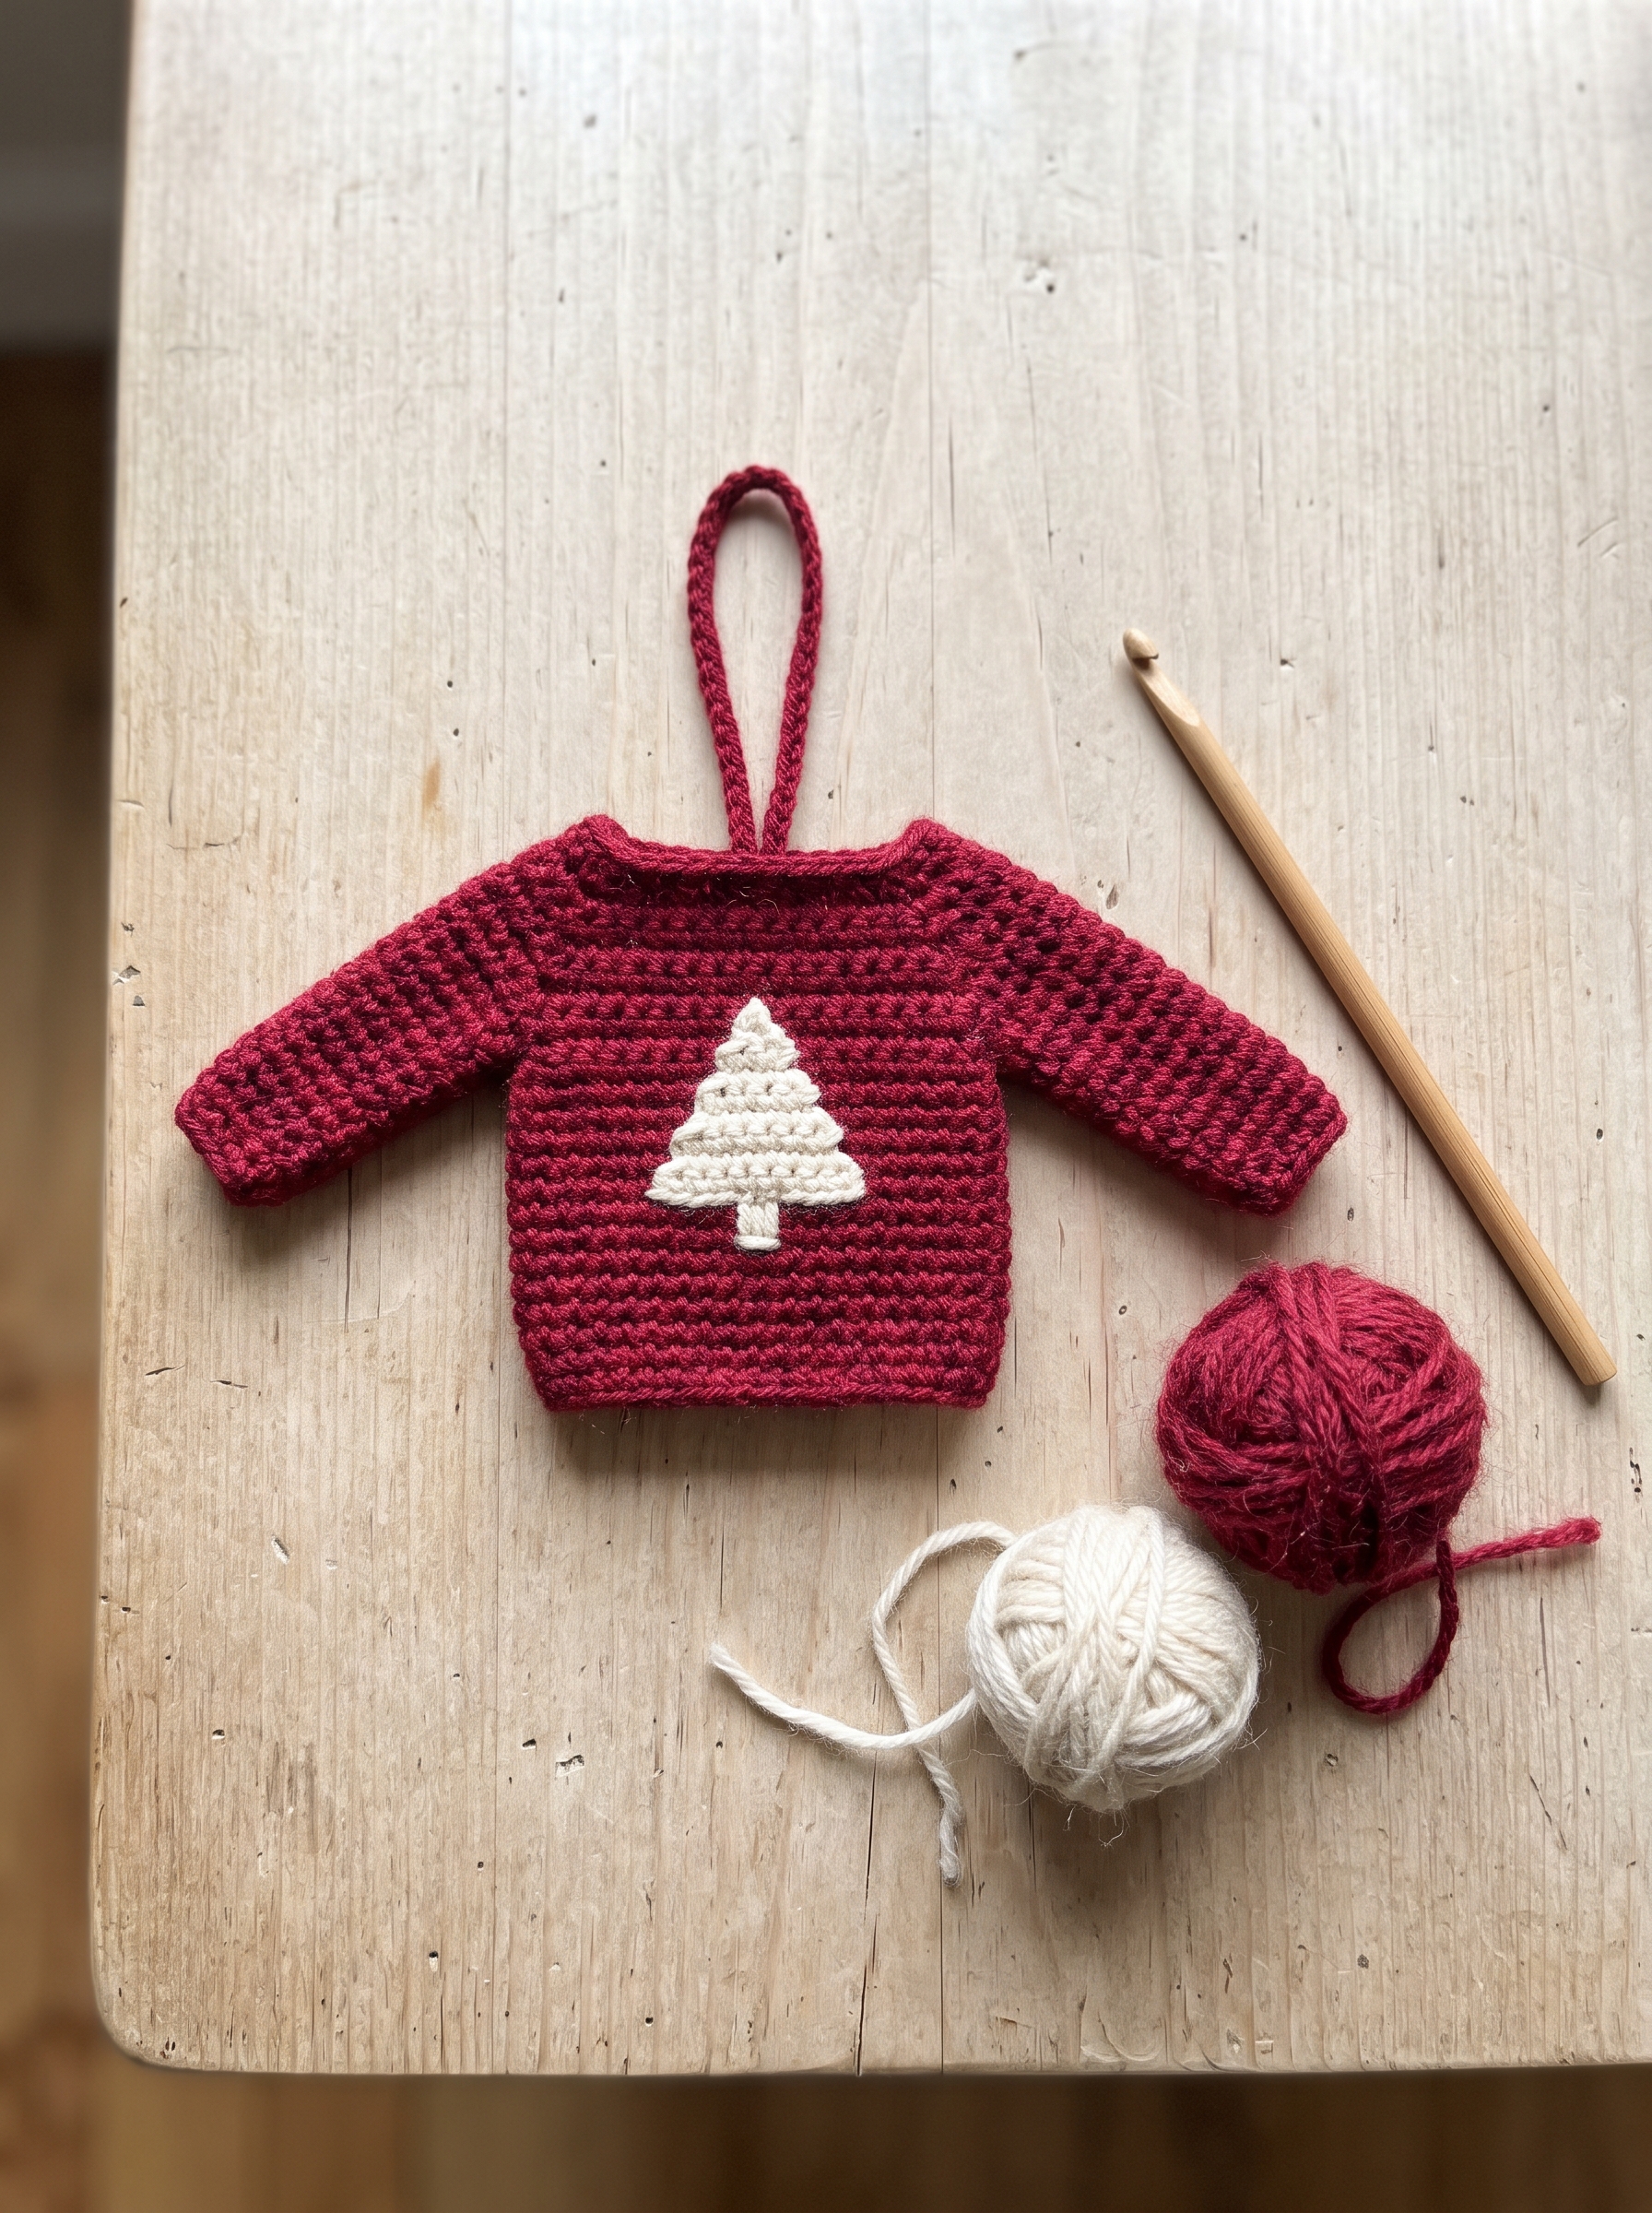
Mini: about 3 1/2 in wide, 3 1/4 in tall (5 3/4 in across the sleeves)
- Yarn
- DK weight (#3), 2 colors: Cranberry and Cream
- Hook
- US D-3 (3.25 mm)
- Yarn needed
- Cranberry 70 yd (64 m) · Cream 6 yd (5 m) (estimated, with a 30 % margin). One 50 g ball of DK is enough for the ornament. The swatch needs about 20 yd (18 m) more Cranberry and 6 yd (5 m) Cream; you can unravel it afterwards
- Finished size
- A body width 3 1/2 in (9 cm); B body height 3 1/4 in (8 cm); C armhole depth 1 in (3 cm); D sleeve length, cuff to armhole 1 1/4 in (3 cm); E sleeve edge sewn to the armhole 2 1/4 in (6 cm); F neck opening 1 1/2 in (4 cm); across the sleeves 5 3/4 in (15 cm); hanging loop about 6 in (15 cm) of chain. All approximate.
- Counts
- Front and back: ch 18, 17 sts, 18 rows each. Tree: Rows 5-13 of the front, 9 sts wide, 4 Cranberry sts at each end. Sleeves (2): ch 7, 6 sts, 12 rows. Shoulder seams 5 sts each, neck 7 sts. Armhole 6 rows on the front and on the back. Loop: ch 30. About 2 1/2 to 4 hours in all, estimated, not timed.
Gauge and swatch
Notes
- US crochet terms: see the abbreviations above. One size.
- Turning ch (ch 1): it does not count as a st. Work the first sc in the very first st and the last sc in the last st of the row, never in the turning ch.
- Sc: insert the hook under both top loops of the next st (the V), yarn over and pull up a loop (2 loops on the hook), yarn over and pull through both loops.
- Back bump: the bump on the back of each foundation ch. Row 1 goes in the back bumps. Keep the foundation chain loose: use a hook one size up for it if you tend to chain tight.
- Row 1 of every piece is a right-side (RS) row, so odd rows are RS and even rows are WS. The chart shows the front as seen from the right side: RS rows are read right to left, WS rows left to right.
- Carrying the yarn: in every tree row, hold the color you are not using along the top of the stitches of the row below and work your sc over it, so it is inside the stitches. Do this for the whole row, also on the stretches where that color is not used, up to the edge. Then the yarn is always waiting where the next row needs it and the back stays free of loops. Honest warning: carried yarn makes the fabric thicker and tighter, the Cranberry can show through the Cream, and the tree can lean a little between right-side and wrong-side rows. The Cream may show through the Cranberry on the right side. If it does, carry the Cream only across the stitches next to the tree and drop it at the 4th Cranberry stitch from the tree, then pick it up again in the next row (a small loop at the edge is fine: it goes in the seam). We have not tried this: the swatch tells you.
- Changing color: work the sc up to its last step: you have 2 loops on the hook. Drop the old color (it is carried over the next sts) and pull the new color through both loops. The change happens on that last pull-through, so the new color shows in the next st. Pull the carried yarn gently: tight strands pucker the fabric.
- Every tree row starts and ends with at least 4 Cranberry sts (the tree never touches the edges), so the turning ch is always Cranberry. The Cream is joined at the center st of Tree Row 1 (its tail is covered by the sts and cut short) and cut at the edge in Tree Row 9: that end is woven in.
- Tails: leave an 18 in tail at the start and at the end of the front, the back and each sleeve, in Cranberry. You will sew with them: a long tail is easier than new yarn.
- Drop shoulder: the sleeve is sewn to a straight armhole edge, and the shoulder seam sits on top of the arm. Blocking: shaping a finished piece by wetting it or steaming it, pinning it flat to its size and letting it dry. Tapestry needle: a blunt yarn needle, DK size, with a round tip.
- Left-handed: work the same, read the charts in the other direction.
How to make it
Swatch
Make this first. 17 sts and 13 rows.
- FoundationCh 18 (17 + 1 turning ch).Stitch count: 18 ch
- Row 1 (RS)Sc in the back bump (the bump on the back of the chain) of the 2nd ch from the hook, and in the back bump of each ch across. The loop on your hook is not a ch, and the ch you skip is the turning ch. (17 sc)Stitch count: 17 sc
- Rows 2 to 2Ch 1 (does not count as a st), turn. Sc in each st across: the first sc in the very first st, the last sc in the very last st. Do not work in the turning ch. (17 sc)Stitch count: 17 sc
- Row 3 = Tree Row 1 (RS)Ch 1 with Cranberry (does not count as a st), turn. Join the Cream: work st 8 (the last Cranberry st before the first Cream st) until 2 loops are left on the hook, lay the Cream's 6 in tail along the top of the next sts, and pull the Cream through both loops. The first Cream st is st 9 of the row, the center st. Work over the tail and carry the Cream strand (not the tail). Once the tail is covered, cut it to 1 in (if it pokes out, weave it in). From there carry the Cream in every st to the end of the row. Sc: 8 Cranberry, 1 Cream, 8 Cranberry. Do not work in the turning ch. (17 sc)Stitch count: 17 sc
- Row 4 = Tree Row 2 (WS)Ch 1 with Cranberry (does not count as a st), turn. Sc: 8 Cranberry, 1 Cream, 8 Cranberry. Do not work in the turning ch. (17 sc)Stitch count: 17 sc
- Row 5 = Tree Row 3 (RS)Ch 1 with Cranberry (does not count as a st), turn. Sc: 4 Cranberry, 9 Cream, 4 Cranberry. Do not work in the turning ch. (17 sc)Stitch count: 17 sc
- Row 6 = Tree Row 4 (WS)Ch 1 with Cranberry (does not count as a st), turn. Sc: 5 Cranberry, 7 Cream, 5 Cranberry. Do not work in the turning ch. (17 sc)Stitch count: 17 sc
- Row 7 = Tree Row 5 (RS)Ch 1 with Cranberry (does not count as a st), turn. Sc: 6 Cranberry, 5 Cream, 6 Cranberry. Do not work in the turning ch. (17 sc)Stitch count: 17 sc
- Row 8 = Tree Row 6 (WS)Ch 1 with Cranberry (does not count as a st), turn. Sc: 7 Cranberry, 3 Cream, 7 Cranberry. Do not work in the turning ch. (17 sc)Stitch count: 17 sc
- Row 9 = Tree Row 7 (RS)Ch 1 with Cranberry (does not count as a st), turn. Sc: 6 Cranberry, 5 Cream, 6 Cranberry. Do not work in the turning ch. (17 sc)Stitch count: 17 sc
- Row 10 = Tree Row 8 (WS)Ch 1 with Cranberry (does not count as a st), turn. Sc: 7 Cranberry, 3 Cream, 7 Cranberry. Do not work in the turning ch. (17 sc)Stitch count: 17 sc
- Row 11 = Tree Row 9 (RS)Ch 1 with Cranberry (does not count as a st), turn. Sc: 8 Cranberry, 1 Cream, 8 Cranberry. Do not work in the turning ch. Cut the Cream, leaving a 6 in tail, and weave this end in at the edge (it goes in the side seam). (17 sc)Stitch count: 17 sc
- Rows 12 to 13Ch 1 (does not count as a st), turn. Sc in each st across: the first sc in the very first st, the last sc in the very last st. Do not work in the turning ch. (17 sc)Stitch count: 17 sc
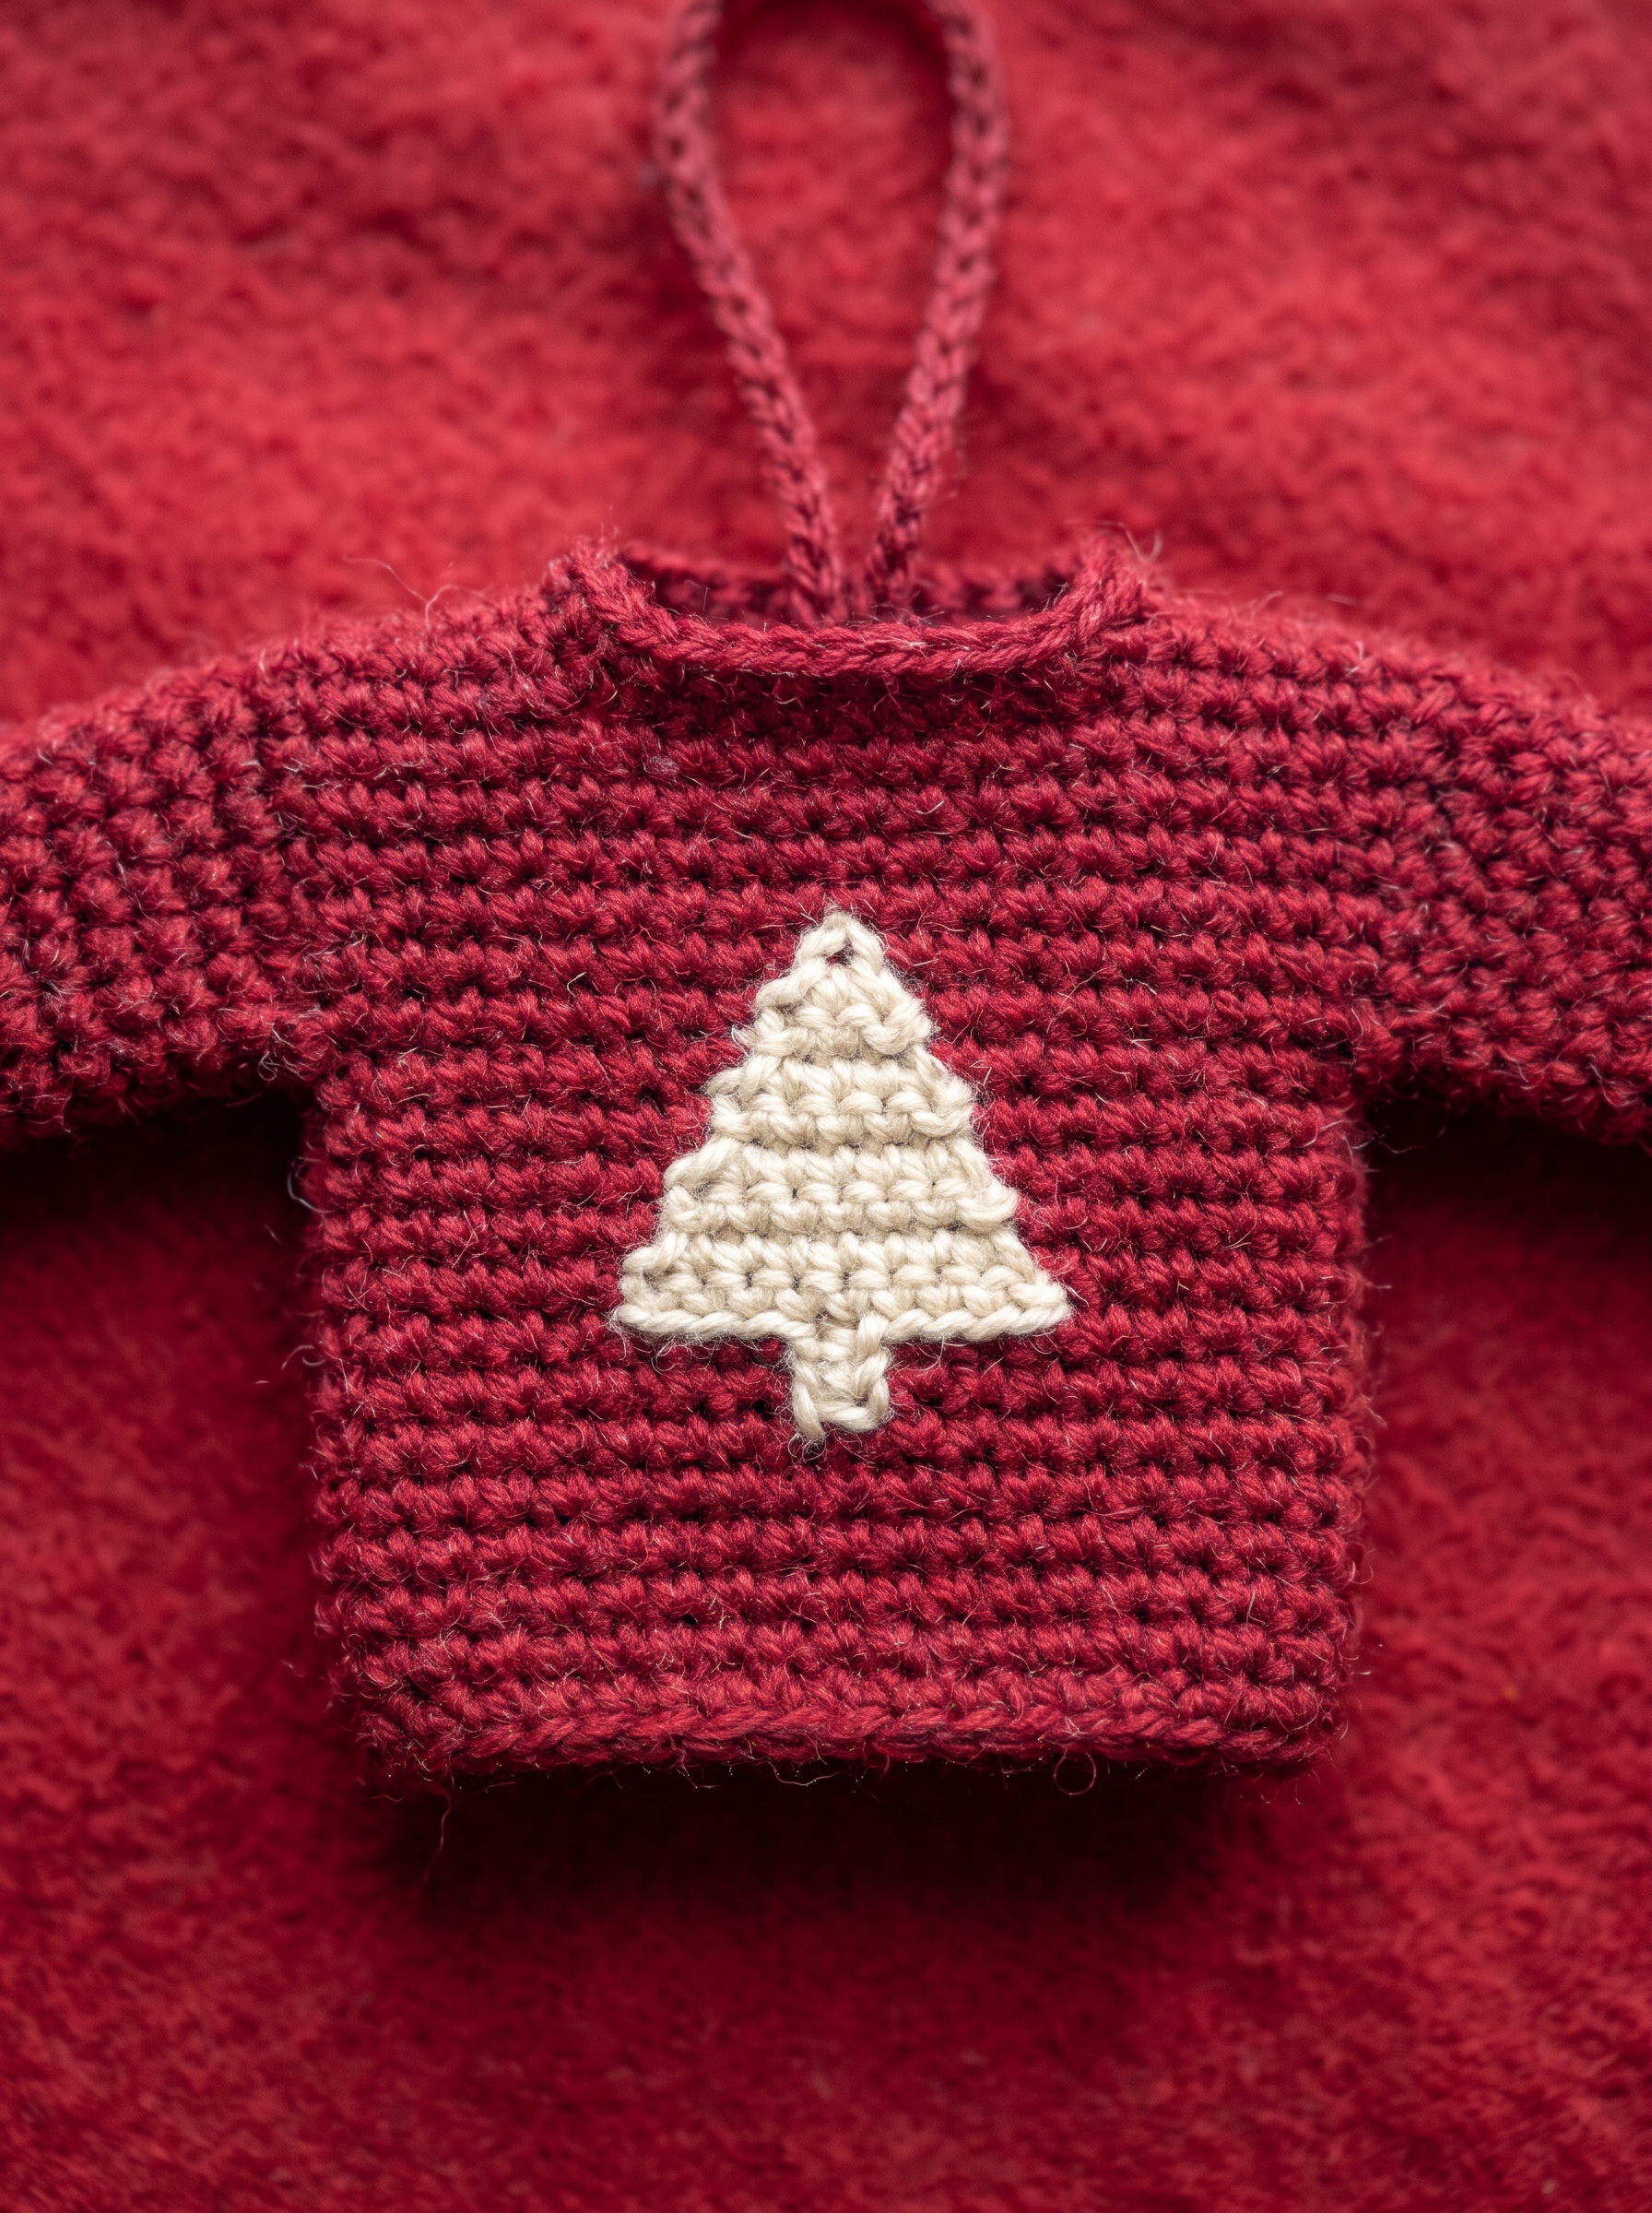
Front
Worked from the hem up in Cranberry, with the tree in Cream.
- FoundationCh 18 (17 + 1 turning ch).Stitch count: 18 ch
- Row 1 (RS)Sc in the back bump (the bump on the back of the chain) of the 2nd ch from the hook, and in the back bump of each ch across. The loop on your hook is not a ch, and the ch you skip is the turning ch. (17 sc)Stitch count: 17 sc
- Rows 2 to 4Ch 1 (does not count as a st), turn. Sc in each st across: the first sc in the very first st, the last sc in the very last st. Do not work in the turning ch. (17 sc)Stitch count: 17 sc
- Row 5 = Tree Row 1 (RS)Ch 1 with Cranberry (does not count as a st), turn. Join the Cream: work st 8 (the last Cranberry st before the first Cream st) until 2 loops are left on the hook, lay the Cream's 6 in tail along the top of the next sts, and pull the Cream through both loops. The first Cream st is st 9 of the row, the center st. Work over the tail and carry the Cream strand (not the tail). Once the tail is covered, cut it to 1 in (if it pokes out, weave it in). From there carry the Cream in every st to the end of the row. Sc: 8 Cranberry, 1 Cream, 8 Cranberry. Do not work in the turning ch. (17 sc)Stitch count: 17 sc
- Row 6 = Tree Row 2 (WS)Ch 1 with Cranberry (does not count as a st), turn. Sc: 8 Cranberry, 1 Cream, 8 Cranberry. Do not work in the turning ch. (17 sc)Stitch count: 17 sc
- Row 7 = Tree Row 3 (RS)Ch 1 with Cranberry (does not count as a st), turn. Sc: 4 Cranberry, 9 Cream, 4 Cranberry. Do not work in the turning ch. (17 sc)Stitch count: 17 sc
- Row 8 = Tree Row 4 (WS)Ch 1 with Cranberry (does not count as a st), turn. Sc: 5 Cranberry, 7 Cream, 5 Cranberry. Do not work in the turning ch. (17 sc)Stitch count: 17 sc
- Row 9 = Tree Row 5 (RS)Ch 1 with Cranberry (does not count as a st), turn. Sc: 6 Cranberry, 5 Cream, 6 Cranberry. Do not work in the turning ch. (17 sc)Stitch count: 17 sc
- Row 10 = Tree Row 6 (WS)Ch 1 with Cranberry (does not count as a st), turn. Sc: 7 Cranberry, 3 Cream, 7 Cranberry. Do not work in the turning ch. (17 sc)Stitch count: 17 sc
- Row 11 = Tree Row 7 (RS)Ch 1 with Cranberry (does not count as a st), turn. Sc: 6 Cranberry, 5 Cream, 6 Cranberry. Do not work in the turning ch. (17 sc)Stitch count: 17 sc
- Row 12 = Tree Row 8 (WS)Ch 1 with Cranberry (does not count as a st), turn. Sc: 7 Cranberry, 3 Cream, 7 Cranberry. Do not work in the turning ch. (17 sc)Stitch count: 17 sc
- Row 13 = Tree Row 9 (RS)Ch 1 with Cranberry (does not count as a st), turn. Sc: 8 Cranberry, 1 Cream, 8 Cranberry. Do not work in the turning ch. Cut the Cream, leaving a 6 in tail, and weave this end in at the edge (it goes in the side seam). (17 sc)Stitch count: 17 sc
- Rows 14 to 18Ch 1 (does not count as a st), turn. Sc in each st across: the first sc in the very first st, the last sc in the very last st. Do not work in the turning ch. (17 sc)Stitch count: 17 sc
Back
Same size as the front, all Cranberry.
- FoundationCh 18 (17 + 1 turning ch).Stitch count: 18 ch
- Row 1 (RS)Sc in the back bump (the bump on the back of the chain) of the 2nd ch from the hook, and in the back bump of each ch across. The loop on your hook is not a ch, and the ch you skip is the turning ch. (17 sc)Stitch count: 17 sc
- Rows 2 to 18Ch 1 (does not count as a st), turn. Sc in each st across: the first sc in the very first st, the last sc in the very last st. Do not work in the turning ch. (17 sc)Stitch count: 17 sc
Sleeves
Make 2, all Cranberry. The rows run from cuff to armhole.
- FoundationCh 7 (6 + 1 turning ch).Stitch count: 7 ch
- Row 1 (RS)Sc in the back bump (the bump on the back of the chain) of the 2nd ch from the hook, and in the back bump of each ch across. The loop on your hook is not a ch, and the ch you skip is the turning ch. (6 sc)Stitch count: 6 sc
- Rows 2 to 12Ch 1 (does not count as a st), turn. Sc in each st across: the first sc in the very first st, the last sc in the very last st. Do not work in the turning ch. (6 sc) The rows run from cuff to armhole: the two long edges (12 row ends each) are the cuff and the armhole; the two short edges (foundation and last row, 6 sts each) are sewn together under the arm.Stitch count: 6 sc
Hanging loop
A plain chain.
- ChainCh 30. Cut the yarn, leaving two 8 in tails.Stitch count: 30 ch
Assembly
Rectangles seam row end to row end, so the counts below match.
- Weave in endsThe Cream has 1 end to weave in: the tail you cut at the edge of Tree Row 9 (also weave in the short start tail from Tree Row 1 if it pokes out). Weave it into the side seam later. Keep the 18 in Cranberry tails for sewing.
- BlockBlocking: lightly dampen the swatch AND the four pieces, pin them flat to the measurements in the Sizes card, and let them dry, following the yarn label. Do not steam acrylic: it can melt.
- Pin firstFor every seam, pin the first and the last rows (or sts) of the seam and the middle first, then sew between the pins with a tapestry needle and the Cranberry tails. Row ends: sew with mattress stitch (one row end to one row end).
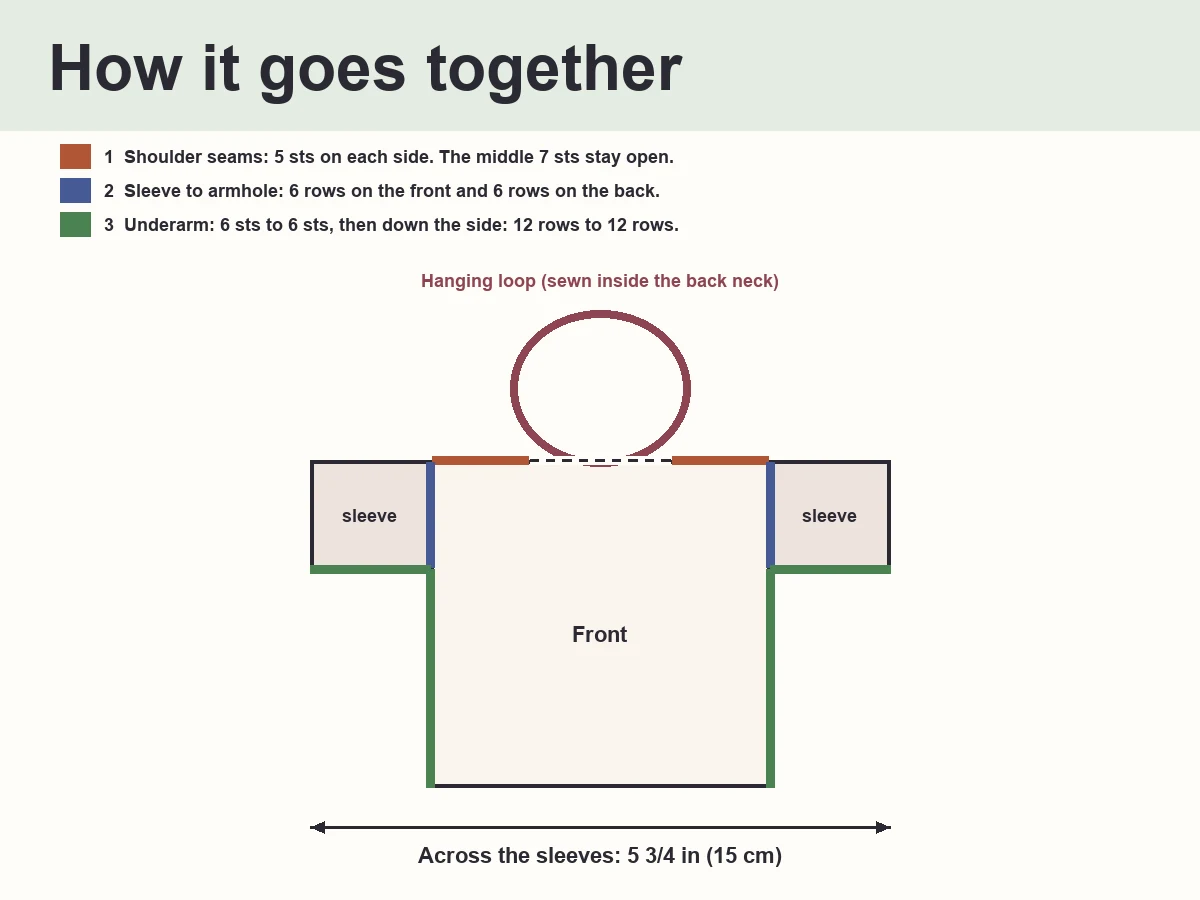
- Shoulder seamsLay the front and the back flat in one line, right sides up: the back is turned upside down so its top edge faces the front's top edge (tops of the stitches touching). With the needle, go under the 2 loops of the V of one st on the front, then under the V of the matching st on the back, and repeat across. Seam the first 5 sts and the last 5 sts of the top edge. Leave the middle 7 sts open: this is the neck (5 + 7 + 5 = 17 sts). After seaming, fold the back down behind the front: both right sides are outside.
- Mark the armholesOn each side edge of the front and of the back, count 6 rows down from the shoulder seam and put a marker. This is the armhole (the underarm marker).
- Attach the sleevesA sleeve has 6 sts in each of its 12 rows. The rows run from cuff to armhole, so the two long edges, 12 row ends each (about 2 1/4 in), are the cuff and the armhole. Fold the sleeve in half: the fold is between its Row 6 and its Row 7. Put that fold at the shoulder seam and sew one long edge of the sleeve to the armhole: 6 rows on the front and 6 rows on the back, one row end to one row end, with mattress stitch. The other long edge is the cuff: leave it open. Do the same with the other sleeve.
- Underarm and side seamsSew the short edge of the sleeve with the foundation ch to the short edge with the last row (6 sts to 6 sts), then continue down the side of the body: 12 rows of the front to 12 rows of the back, with mattress stitch. The sleeve seam and the side seam meet at the underarm marker; sew them as one seam from cuff to hem. Repeat on the other side.
- Hanging loopMake the loop: ch 30 (about 6 in; it should lie flat without being stretched). Cut the yarn, leaving two 8 in tails. Fold the chain in half. On the wrong side of the back, at the top edge in the middle of the open neck (back st 9 is the center; you sew to st 8 and st 10, one on each side), sew one end of the chain to each of those two sts. Pass the needle through three times and knot firmly. Tug it gently to check. Sewing it inside the back neck helps it hang straight.
- FinishWeave in the seaming ends on the wrong side. The neck, hem and cuffs are left as they are (the edge of the sc rows): no border to work. Hang it on a tree hook or a thick branch (the folded loop is about 3 in). Not a toy. Small parts: keep away from young children and pets. Do not use beads, buttons or safety eyes. The chain loop and loose ends can wrap around a neck. Keep away from babies, children and pets (pets chew yarn: hang it out of reach). Yarn burns: keep away from candles and hot lights. Check the loop and seams every year; throw it away if it frays. When giving it, say it is not a toy.
Charts and plans
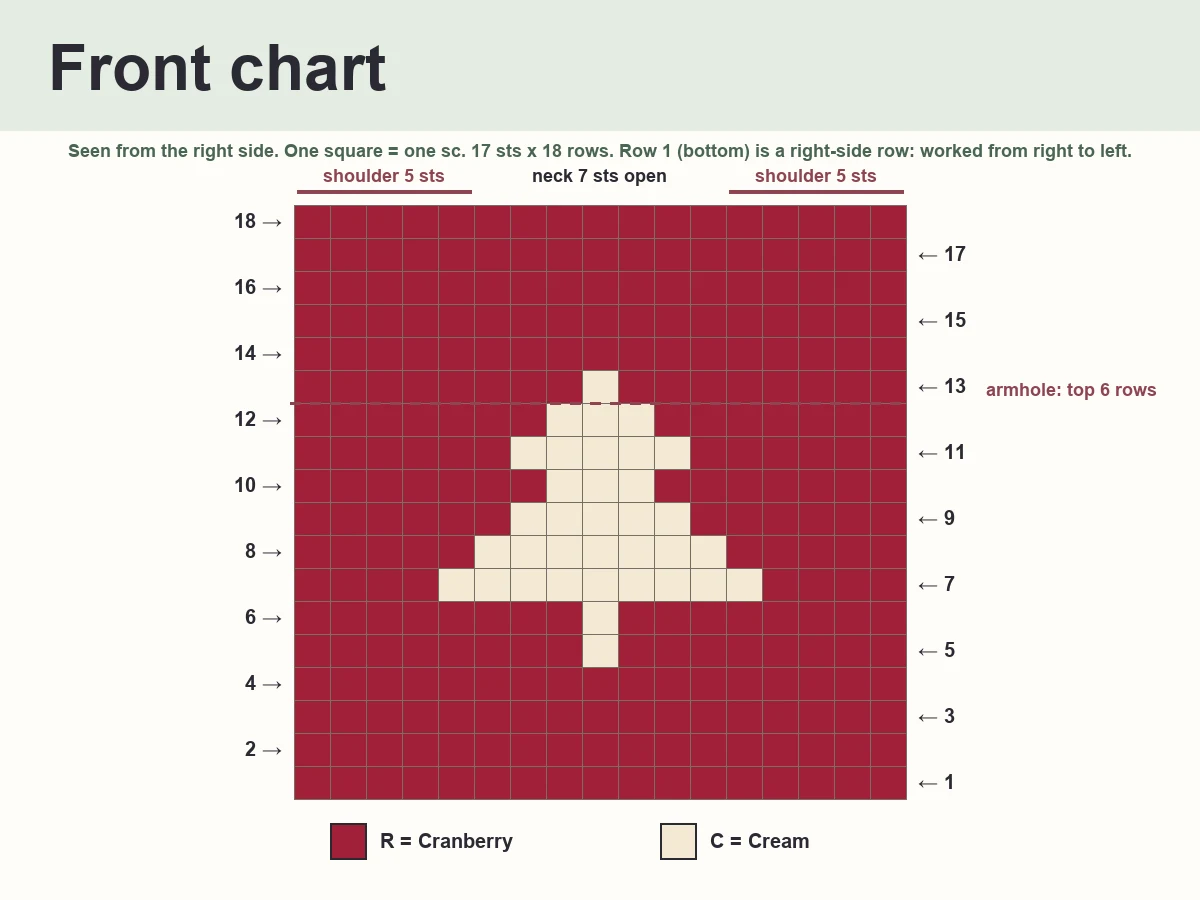
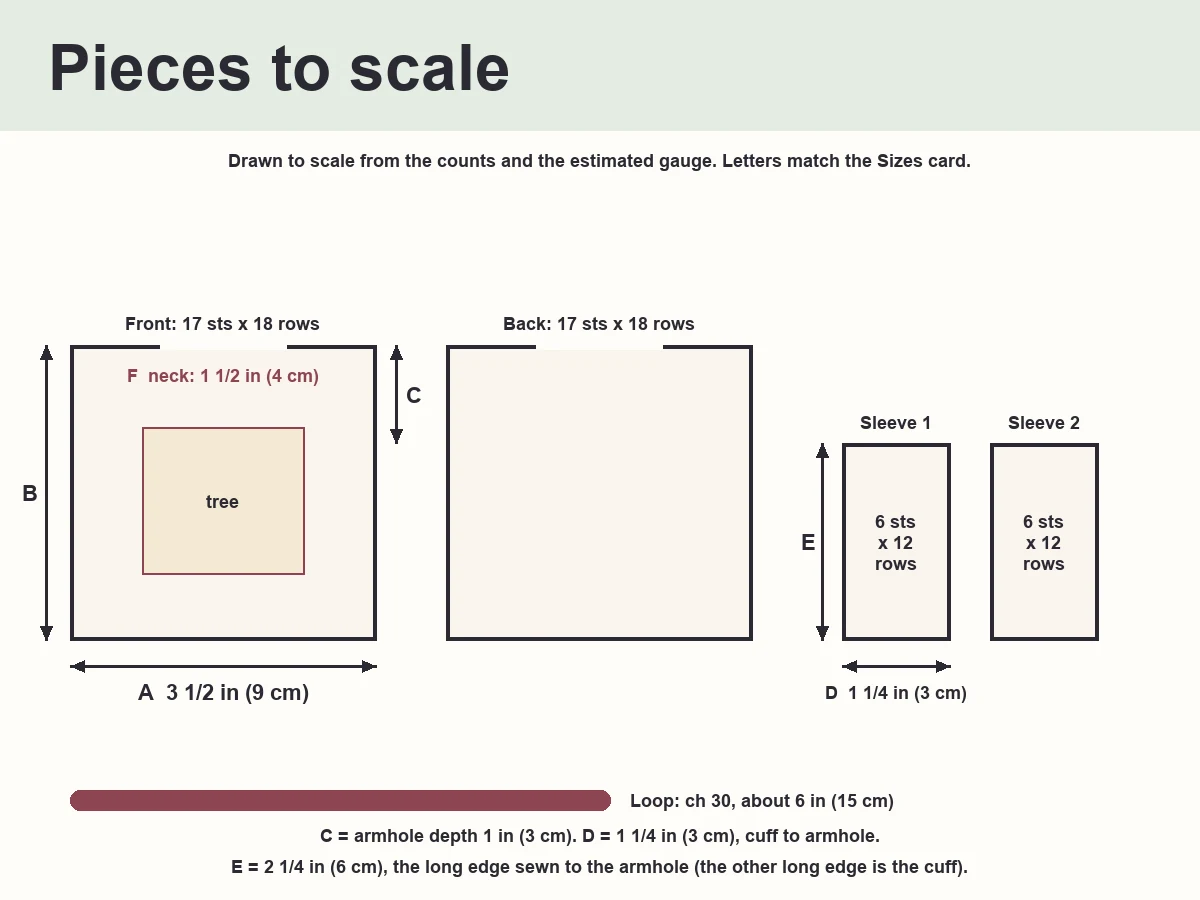
The tree, row by row
| Part | Rows | Color |
|---|---|---|
| Hem | Rows 1-4 | Cranberry |
| Tree | Rows 5-13 | Cranberry and Cream |
| Above the tree | Rows 14-18 | Cranberry |
Finishing
Check that every end is woven in, that the seams are flat and that the loop is firmly sewn. Store flat in tissue. Do not wash; spot clean. Not a toy. Small parts: keep away from young children and pets. Do not use beads, buttons or safety eyes. The chain loop and loose ends can wrap around a neck. Keep away from babies, children and pets (pets chew yarn: hang it out of reach). Yarn burns: keep away from candles and hot lights. Check the loop and seams every year; throw it away if it frays. When giving it, say it is not a toy.
Tips
- Put a stitch marker in the first stitch of every row so you can count quickly: every row must give 17 sts (front and back) or 6 sts (sleeve).
- Work the first tree rows, then compare them with the chart: it is easier to rip back 2 rows than 8.
- Sew with the tails you left: a long tail is easier than a new piece of yarn.
- Sewing small pieces: allow 1 hour or more if new to you.
- Make two sleeves one after the other, so they match.
Common mistakes
- Working in the turning chain: the row gets 1 stitch too many.
- Skipping the first stitch of the row: the row gets 1 stitch too few.
- Pulling the carried yarn tight: the tree puckers and the ornament gets narrower there.
- Sewing the loop to the front: it must go inside the back neck. This helps it hang straight.
Make it your own
- Cream sweater with a Forest Green tree: swap the two color names. Use a Green that is darker than the Cream so the tree stays clear.
- Navy sweater with a Cream tree, or a Forest Green sweater with a Cream tree: any two colors with good contrast work.
- Make several in different color pairs for a garland or a gift topper. Keep to the same swatch. Each one takes about the same time.
- Another small motif: any 2-color picture that fits in 9 sts x 9 rows can replace the tree. Keep Cranberry sts (4 or more) at both ends. This is a suggestion, not something we checked.
- Worsted: use a US H-8 (5 mm) hook, about 4 1/4 in wide (17 sts at 4 sts per in). Not tried: swatch first.
- Please do not add beads, buttons or safety eyes.
Care
- Store flat in tissue. Do not wash; spot clean.
FAQ
More from amgroyal.com
© 2026 amgroyal.com. You may sell what you crochet. Please don't copy or repost this pattern; link to it instead.