So, you’ve caught the sourdough bug—congrats! That bubbly, tangy loaf you bake? It all starts with your hard-working sourdough starter. But let’s be honest—not everyone has time to bake daily. That’s why learning how to feed a sourdough starter in the fridge can be a total game-changer. It lets you maintain your starter with less effort while still keeping it ready for your next bake.
But wait—does that mean you can just toss your jar in the fridge and forget about it? Not quite. Knowing how to feed a sourdough starter in the fridge is essential if you want to keep your starter alive, thriving, and ready to rise to any baking challenge.
Knowing how to feed a sourdough starter in the fridge is essential if you want to keep your starter alive, thriving, and ready to rise to any baking challenge. Just like us, starters need regular “meals” even when they’re chilling in the cold. Ignore it too long, and you could be looking at some funky smells, strange liquids (called hooch), or even mold. Yikes.
This guide will walk you through everything you need to know—step-by-step feeding instructions, how often to feed, the best flours to use, how to troubleshoot problems, and pro-level tips to keep your starter super healthy even if you’re only baking once in a while.
By the end of this article, you’ll feel confident and capable of maintaining a fridge-based sourdough starter like a pro. Let’s dive in!
Understanding Sourdough Starters
Before we get into fridge feeding, let’s quickly break down what a sourdough starter actually is. At its core, a sourdough starter is a living culture of wild yeast and lactic acid bacteria. It’s a natural leavening agent, meaning it helps your bread rise without commercial yeast. Pretty cool, right?
The Science Behind Sourdough Fermentation
Here’s a cool little fact: the wild yeast and friendly bacteria in your sourdough starter are always busy munching on the carbs in your flour. As they feed, they release carbon dioxide—that’s what creates all those beautiful bubbles in your dough. Meanwhile, bacteria like lactobacillus produce the acids that give sourdough its distinct tang. That’s why it’s so important to understand how to feed a sourdough starter in the fridge—even when it’s dormant, those microbes still need care.
This little jar of microbes is like a mini-ecosystem, and it thrives with care and feeding.
Why Starters Need Feeding
A sourdough starter is a living culture, and just like any living thing, it needs regular feeding—usually with a mix of flour and water. When you know how to feed a sourdough starter in the fridge properly, you keep its microbes nourished, the balance stable, and its activity healthy. Neglect it too long, and it becomes sluggish, unresponsive, or even dies off—something every baker wants to avoid.
When kept at room temperature, feeding is typically a daily ritual. But in the fridge? Things slow down, making your life a bit easier.
Refrigerating Your Sourdough Starter: Why & When
Now that you get the basics, you might be wondering, “Why even put the starter in the fridge?”
The answer is simple: convenience.
Storing Long-Term vs. Daily Use
If you’re not baking daily or even weekly, storing your starter in the fridge is ideal. It dramatically slows down fermentation, meaning you only need to feed it about once a week—maybe less if your starter is well-established.
For frequent bakers, room-temperature storage might be better since the starter stays more active. But for the occasional sourdough artist? The fridge is your friend.
Signs Your Starter Needs Attention in the Fridge
Many bakers aren’t sure how to feed a sourdough starter in the fridge properly. If you’re seeing hooch or your starter looks lifeless, it’s a clear sign that it’s time for a feeding. Understanding how fridge storage slows fermentation helps you time your feeds better and maintain a healthy, reliable culture.
Even in the fridge, your starter needs a little TLC now and then. Here are a few red flags to watch for:
- A layer of liquid on top (hooch): Totally normal, but it means your starter is hungry.
- Funky or off smells: Slightly sour is fine. Rotten or moldy? Not so much.
- Visible mold or discoloration: If you see pink, green, or black spots—toss it.
The trick is to keep your starter happy without hovering over it. That’s where fridge feeding comes in.
How to Feed a Sourdough Starter in the Fridge Without Mistakes
One of the biggest misconceptions is that feeding is optional when storing your starter cold. In reality, how to feed a sourdough starter in the fridge correctly involves discarding old starter, using the right flour and water ratio, and refrigerating at the perfect time. Stick to a schedule, and you’ll avoid issues like hooch buildup or weakened activity.
Step-by-Step: How to Feed a Sourdough Starter in the Fridge
Feeding your sourdough starter while it’s stored in the fridge might sound intimidating at first, but don’t worry—once you’ve done it a couple of times, it’ll become second nature. Whether you’re a weekend baker or a once-a-month sourdough adventurer, the process is straightforward and quick.
Let’s walk through it in easy, bite-sized steps.
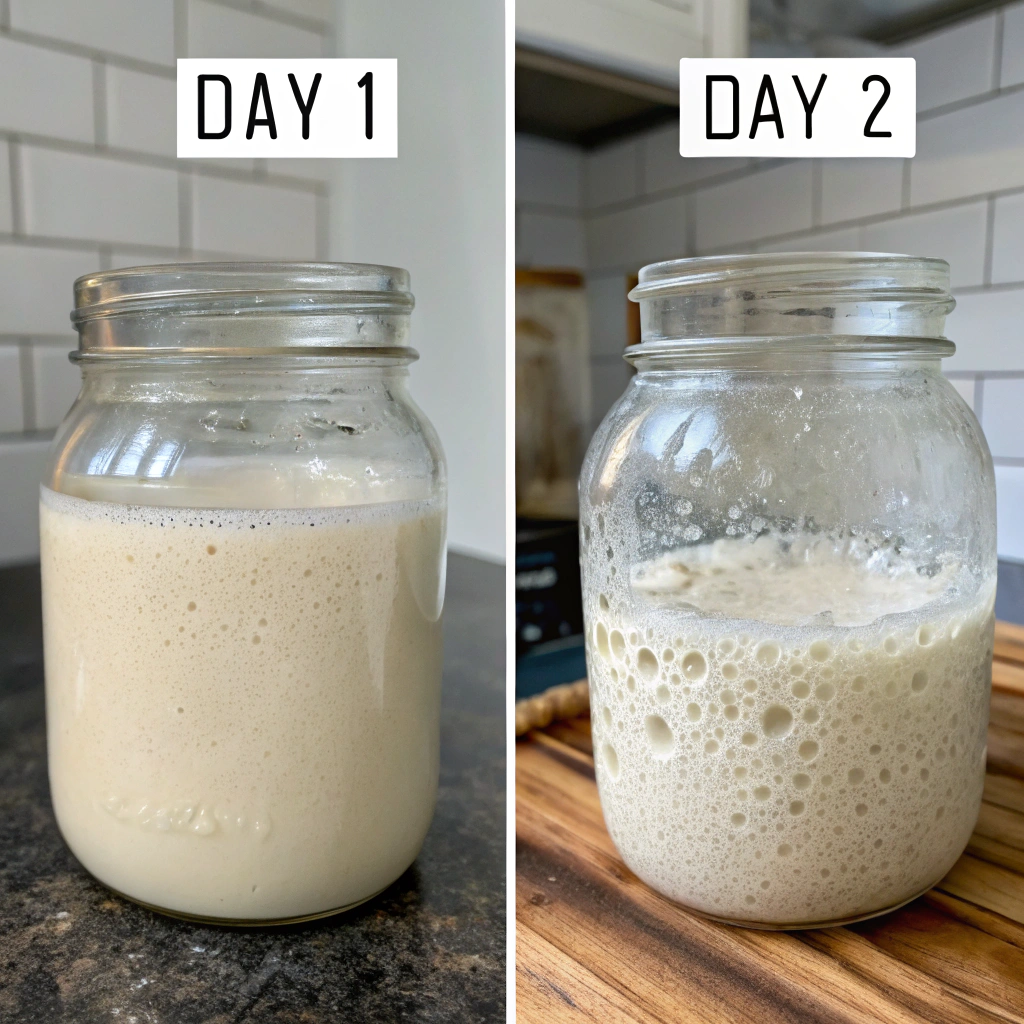
Tools & Ingredients You’ll Need
Now that you’ve got the tools ready, it’s time to walk through how to feed a sourdough starter in the fridge step by step. Proper tools make the process easier and help you avoid contamination or overfeeding.
Before you get started, gather a few basic kitchen essentials:
- A digital kitchen scale (accuracy is key!)
- A clean glass jar or container with a loose-fitting lid
- Unbleached all-purpose flour (or another flour of your choice)
- Filtered or dechlorinated water (room temp)
- A spoon or spatula for mixing
Optional but handy:
- Rubber band or marker (to track rise)
- Another jar (if you want to clean or switch containers)
The Right Ratios: Flour to Water to Starter
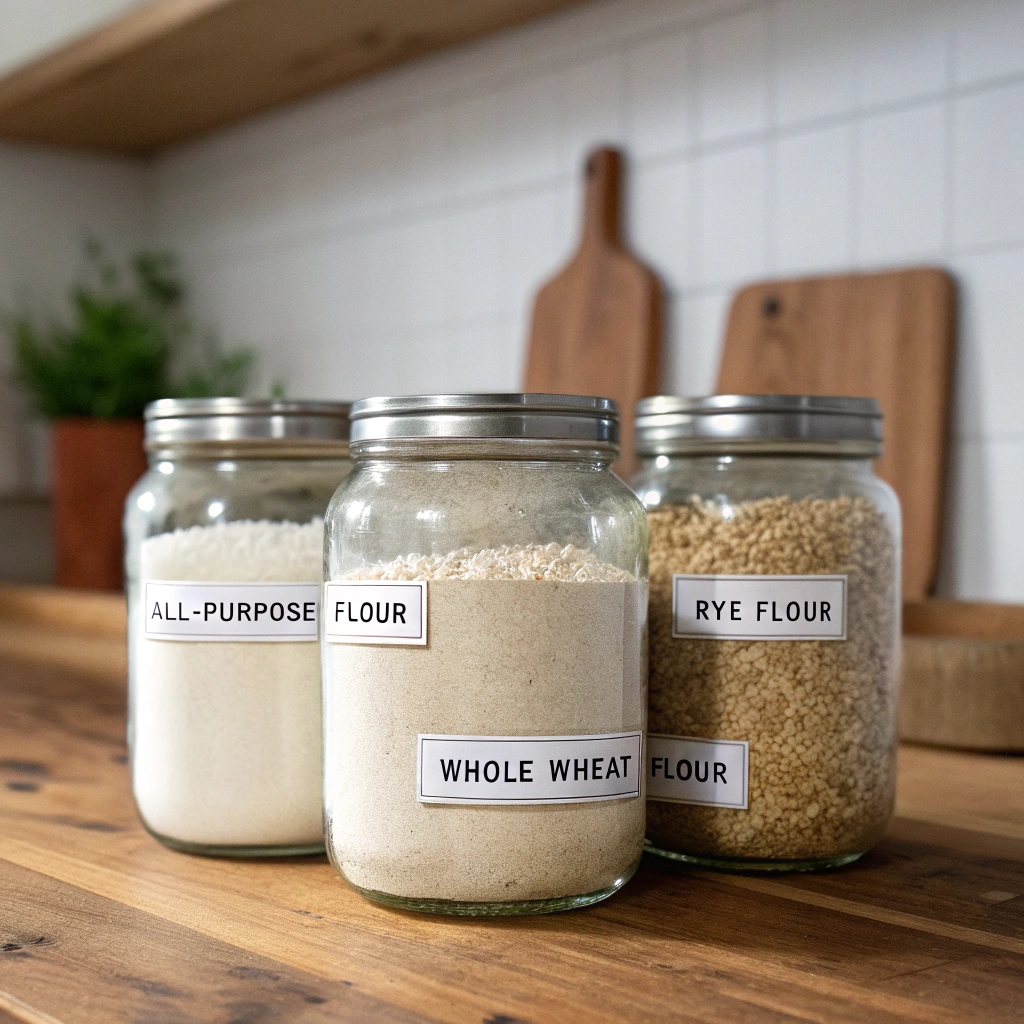
Before diving into measurements, it’s important to understand that how to feed a sourdough starter in the fridge involves balancing the correct ratio of old starter to fresh flour and water. This balance keeps fermentation steady while stored cold.
A common feeding ratio is 1:1:1 by weight—equal parts starter, flour, and water. For example:
- 50g of starter
- 50g of flour
- 50g of water
This is called a 100% hydration starter—perfect for most sourdough recipes. It’s flexible, though. You can adjust to suit your baking schedule or preference.
If your starter is really hungry (like you haven’t fed it in a while), you might use a 1:2:2 ratio to give it a bigger meal.
Removing and Discarding Old Starter
Here’s a hot tip: always discard before feeding. Why? Because over time, the population of yeast and bacteria grows too large and needs a fresh balance of nutrients.
- Open your fridge and pull out your sourdough starter.
- Let it sit at room temperature for 30–60 minutes (optional but helpful).
- Stir it well to combine any hooch.
- Remove and discard all but about 25–50 grams (a heaping tablespoon or two).
You can compost the discard or save it for pancakes, crackers, or waffles—no waste here!
Mixing Fresh Flour and Water
Mixing is a critical part of how to feed a sourdough starter in the fridge successfully. If you don’t mix well, pockets of dry flour or uneven hydration can weaken the starter over time.
Once you’ve discarded, it’s time to feed:
- Add equal weights of fresh flour and water to the remaining starter.
- Mix until fully combined—no dry flour clumps or watery layers.
- The consistency should be like thick pancake batter—stiff but stirrable.
Use a spatula to scrape down the sides and cover loosely. You want airflow, not an airtight seal.
Returning the Starter to the Fridge
Now here’s where things change depending on your baking schedule:
- If you’re baking within the next 4–12 hours, leave the starter at room temperature so it becomes active and bubbly. Then use what you need.
- If you’re just feeding for maintenance, wait about 1–2 hours at room temp after feeding, then place it back in the fridge.
This short warm-up gives your microbes a chance to wake up and start feeding before going back to hibernation mode in the cold.
Quick Recap: Feeding Your Fridge Starter
Here’s a cheat-sheet for your sourdough fridge-feeding routine:
| Step | Action |
|---|---|
| 1 | Take starter out of the fridge |
| 2 | Discard all but 25–50g of starter |
| 3 | Add equal parts flour and water |
| 4 | Mix thoroughly |
| 5 | Let sit at room temp (1–2 hours) |
| 6 | Return to the fridge for storage |
Simple, right? The whole process takes less than 10 minutes!
How Often to Feed a Sourdough Starter in the Fridge
Once your starter is chilling in the fridge, the pace slows down dramatically—like putting your yeast and bacteria on a mini-vacation. But that doesn’t mean they can go completely hungry! Knowing how often to feed your sourdough starter in the fridge is key to keeping it strong, flavorful, and ready for action.
The frequency really depends on how often you bake, how mature your starter is, and even the type of flour you use.
Weekly Feeding Schedule
Many bakers wonder exactly how to feed a sourdough starter in the fridge when they only bake once a week. The key is consistency—regular feeding, even when you don’t plan to bake, keeps your starter active and safe to use.
If you’re a weekend baker or bake every 7–10 days, this is the schedule for you.
What to do:
- Take your starter out of the fridge once a week.
- Discard and feed it using the 1:1:1 ratio (as discussed earlier).
- Let it sit at room temperature for about 1–2 hours.
- Return it to the fridge.
That’s it! If you’re baking soon, let it continue fermenting at room temp for 4–8 hours or until bubbly and doubled in size before using it.
This once-a-week routine works well for most people and keeps your starter vibrant without a lot of fuss.
Monthly Maintenance for Infrequent Bakers
Not baking often? No worries. A well-established sourdough starter can survive a month (sometimes more) between feedings in the fridge—especially if stored properly in a clean, sealed jar.
Tips for longer intervals:
- Use a thicker consistency (less water, more flour) before refrigerating—it ferments more slowly.
- Always feed before putting it away long-term. Never refrigerate an unfed starter.
- Don’t ignore it longer than 4–6 weeks. Even sturdy starters can weaken beyond that point.
Before your next bake, you’ll want to revive it with a few room-temperature feedings (we’ll cover that later!).
Feeding Before Baking: Yes or No?
Here’s where things get a little more flexible. If you plan to bake with your starter, you might:
- Feed the starter the day before and leave it at room temp overnight.
- Or, use it straight from the fridge—especially if it’s recently fed and still active.
So, ask yourself: When’s my next bake? That answer tells you whether to feed, revive, or just go for it.
Feeding More or Less Often?
Some bakers go by smell and appearance rather than the calendar. Here’s what to look for:
| Sign | What It Means | What to Do |
|---|---|---|
| Gray liquid on top (hooch) | Starter is hungry | Feed it soon |
| Smells overly sour or acidic | It’s fermented too long | Feed it and remove some |
| No bubbles after 4–6 hours at room temp | Inactive or weak | Needs several feedings to revive |
If your starter seems sluggish or isn’t doubling after a feeding, it’s probably time to increase the frequency—even if it’s been refrigerated.
Bonus: Set a Calendar Reminder
Let’s be honest—life gets busy. A simple calendar reminder or weekly phone alert can be a total lifesaver. Label your jar with the last fed date using masking tape and a marker. You’ll never forget again.
Hydration and Temperature Factors
You’ve mastered the flour. You’ve got a feeding schedule. Now it’s time to fine-tune two often-overlooked variables: hydration and temperature.
These two factors control how quickly your sourdough starter ferments, how it behaves in the fridge, and how strong your rise will be when it’s time to bake. Think of them as the steering wheel and gas pedal of your sourdough routine.
Cold Fermentation vs. Room Temp Fermentation
Let’s start with temperature. When you leave your starter at room temperature (about 70–75°F / 21–24°C), fermentation is fast and active. You’ll often see bubbles forming within a few hours and a doubled volume within 6–8 hours.
But in the fridge (around 38–42°F / 3–6°C), things slow way down. This chilled environment puts your starter into a kind of dormancy. The microbes are still alive—but they’re moving in slow motion.
Benefits of cold fermentation:
- Less frequent feedings (once a week or even monthly)
- More consistent flavor and acidity
- Less risk of over-fermentation or collapse
Drawbacks:
- Starter takes longer to wake up when you need it
- Risk of forgetting to feed over long periods
That’s why it’s crucial to understand how cold impacts activity—you can’t expect the same rise speed as room-temp fermentation.
The Role of Hydration
Hydration refers to the ratio of water to flour in your sourdough starter. The standard is 100% hydration, meaning equal parts flour and water by weight.
But you can adjust hydration depending on your needs:
- Thicker starters (less water): Slower fermentation, great for fridge storage
- Looser starters (more water): Faster fermentation, good for quick rise
If you’re storing your starter in the fridge for longer periods, consider using a slightly thicker consistency—something like 1:1:0.85 (100g flour to 85g water). This slows down microbial activity and helps prevent hooch buildup.
Temperature Shifts: Don’t Shock the Starter
When moving your starter from cold to warm (or vice versa), try to avoid abrupt temperature swings. Let it sit at room temperature for 1–2 hours before feeding or before placing it back in the fridge.
Gentle transitions help prevent microbe shock and keep your fermentation consistent.
Summary: Get the Most From Hydration & Temperature
| Factor | Best Practice for Fridge Starters |
|---|---|
| Temperature | Keep between 38–42°F (3–6°C) |
| Hydration | Use thicker consistency for slower fermentation |
| Water | Use filtered or dechlorinated water |
| Transition | Always give 1–2 hours at room temp before/after fridge |
By mastering these subtle variables, you’ll gain total control over your starter’s behavior—and you’ll reduce the chance of common issues like hooch, sourness, or stalling.
Troubleshooting Common Problems
Even the best-kept starters can sometimes run into issues—especially when stored in the fridge for long stretches. Don’t panic! Most problems are fixable with a little patience and know-how.
Let’s dive into the most common issues and how to handle them.
Hooch Formation
What is it?
Hooch is a grayish or brown liquid that forms on top of your starter. It’s a byproduct of fermentation and a sign your starter is hungry.
What to do:
- Stir it back in (if it’s clear and smells fine), or
- Pour it off before feeding for a less sour starter
Pro Tip: Frequent hooch means you may need to feed more often or use less water during feeding.
Mold or Bad Smells
Red flags:
- Pink, green, black, or fuzzy spots = mold
- Strong rotten or cheese-like odor = bad bacteria
If you see or smell these:
🚫 Toss your starter. It’s unsafe to revive and could contaminate new starters.
To prevent this:
- Use clean utensils and jars
- Avoid airtight lids (allow gas to escape)
- Feed on a regular schedule
Lack of Bubbles or Growth
No rise? No bubbles? Starter not floating?
It might be:
- Over-fermented and exhausted
- Too cold (fridge is too cold or shock from temp change)
- Starved from infrequent feeding
Reviving a Neglected Fridge Starter
If you’ve neglected your jar and aren’t sure how to feed a sourdough starter in the fridge to bring it back to life, the answer is frequent, small feedings. Over 24–48 hours at room temp, you’ll rebuild its strength.
Multiple Feedings Over 24–48 Hours
- Remove most of the old starter, keeping 25g.
- Feed it 1:1:1 (e.g., 25g starter, 25g water, 25g flour).
- Leave it at room temperature.
- Repeat this process every 12 hours for 2–3 days.
- By day two, you should see bubbling and a rise in volume.
This process refreshes the yeast and bacteria and brings your starter back to baking shape.
Using Pineapple Juice Method (Optional)
If your starter seems too acidic or smells off after reviving attempts, you can use this trick:
- Mix equal parts whole wheat flour and pineapple juice (instead of water) for one or two feedings.
- Pineapple juice helps lower the pH, preventing bad bacteria from taking over.
This is especially useful for starting from scratch or reviving starters on the edge.
Using Your Starter Straight from the Fridge
Once you understand how to feed a sourdough starter in the fridge, you’ll also be able to judge whether it’s strong enough to bake with directly or if it needs a boost at room temperature.
Stirring and Using Without Feeding
If your starter was recently fed (within 5–7 days) and still shows signs of activity (small bubbles, pleasant aroma), you can:
- Stir it well
- Use it directly in dough
- Add a longer bulk fermentation time
When a Pre-Feed is Necessary
If your starter’s been in the fridge for longer than a week, or seems sluggish, it’s best to:
- Take it out and feed it
- Let it double in size at room temp
- Use it when it passes the float test (a spoonful floats in water)
How to Know If Your Starter Is Healthy
A strong sourdough starter has certain signs you can count on.
The Float Test Explained
Scoop a spoonful of starter into a glass of water:
✅ If it floats = ready to bake
❌ If it sinks = needs more feeding
This test only works right after your starter has peaked post-feeding.
Aroma & Texture Cues
- Smell: Mildly tangy, not stinky or rotten
- Texture: Light, airy, stretchy
- Color: Creamy white to beige (gray from hooch is fine)
Trust your senses—if it smells and looks gross, it probably is!
For more delicious recipes and cooking inspiration, follow me on Facebook and Pinterest!
FAQ: Frequently Asked Questions
Before we wrap up, let’s address some common questions related to how to feed a sourdough starter in the fridge, especially for beginners or occasional bakers.
Can I skip feeding if I’m not baking?
Yes, but don’t go longer than 3–4 weeks without feeding in the fridge.
What if I forget for a few weeks?
You can usually revive it with 2–3 feedings at room temp. If mold is present, start fresh.
Is it okay to switch flour types?
Absolutely! Just ease into it over a few feedings to avoid shocking the starter.
Can I feed less if I store more?
Yes. You can scale your starter up or down—just maintain the same ratio (starter:flour:water).
How do I travel with my starter?
Dehydrate it into flakes or transfer to a travel-sized jar and keep it cool.
Can I freeze my starter instead?
Yes! Freeze a small portion in an airtight container. It’ll need multiple feedings to revive.
Conclusion
Learning how to feed a sourdough starter in the fridge might feel a bit tricky at first, but once you get the rhythm—discard, feed, rest, refrigerate—it quickly turns into a simple, low-maintenance routine. With just a bit of care, your fridge-stored starter can stay active and healthy for weeks, always ready to rise to the occasion when you’re ready to bake.
Whether you’re baking weekly or monthly, knowing how to feed a sourdough starter in the fridge will ensure you’re never disappointed when it’s baking time. Keep it fed, keep it clean, and happy baking!
Want to take your sourdough skills further? Start with our complete guide: 7 Essential Steps to Mastering Your Sourdough Starter.
If you’re wondering what a ready sourdough starter should look like or simply how it looks at different stages, we’ve got you covered. You’ll also learn how to feed your starter when it’s in the fridge, how to spot and fix mold issues, and the difference between a liquid starter and a stiff sourdough starter.





This was super clear and easy to follow. I wasn’t sure how to feed my sourdough starter while keeping it in the fridge, but this post explained it really well. The tips were practical and made the whole process feel simple. Great help!