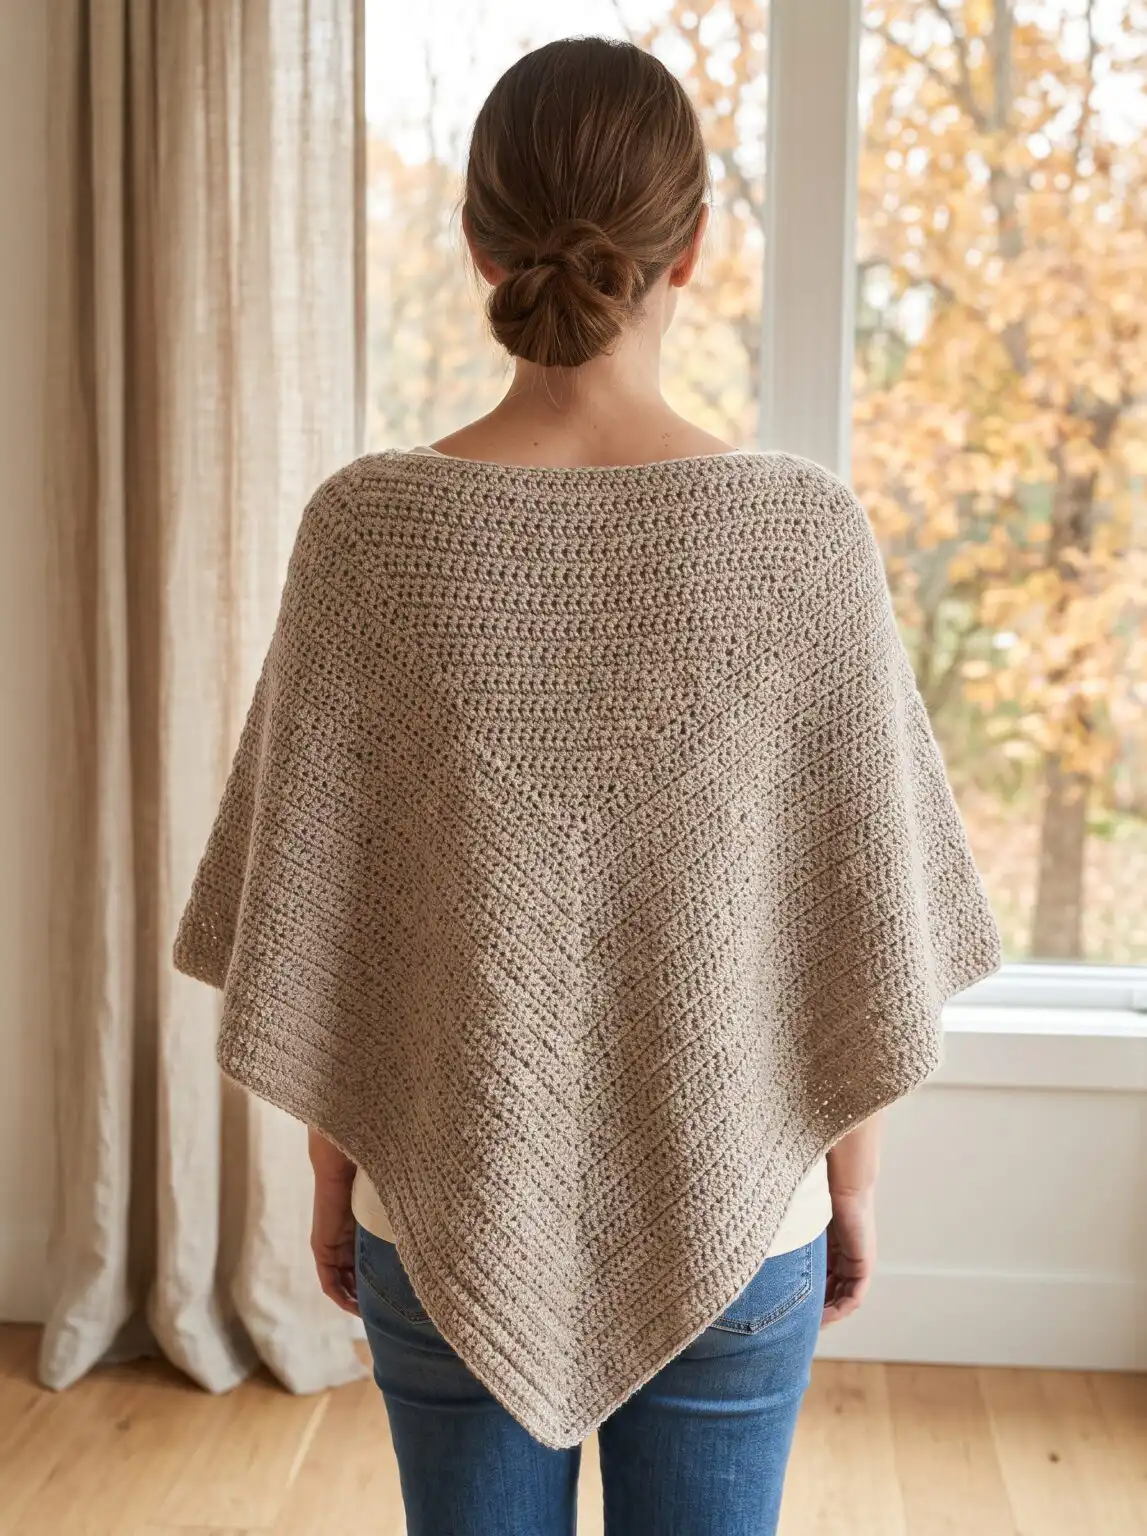
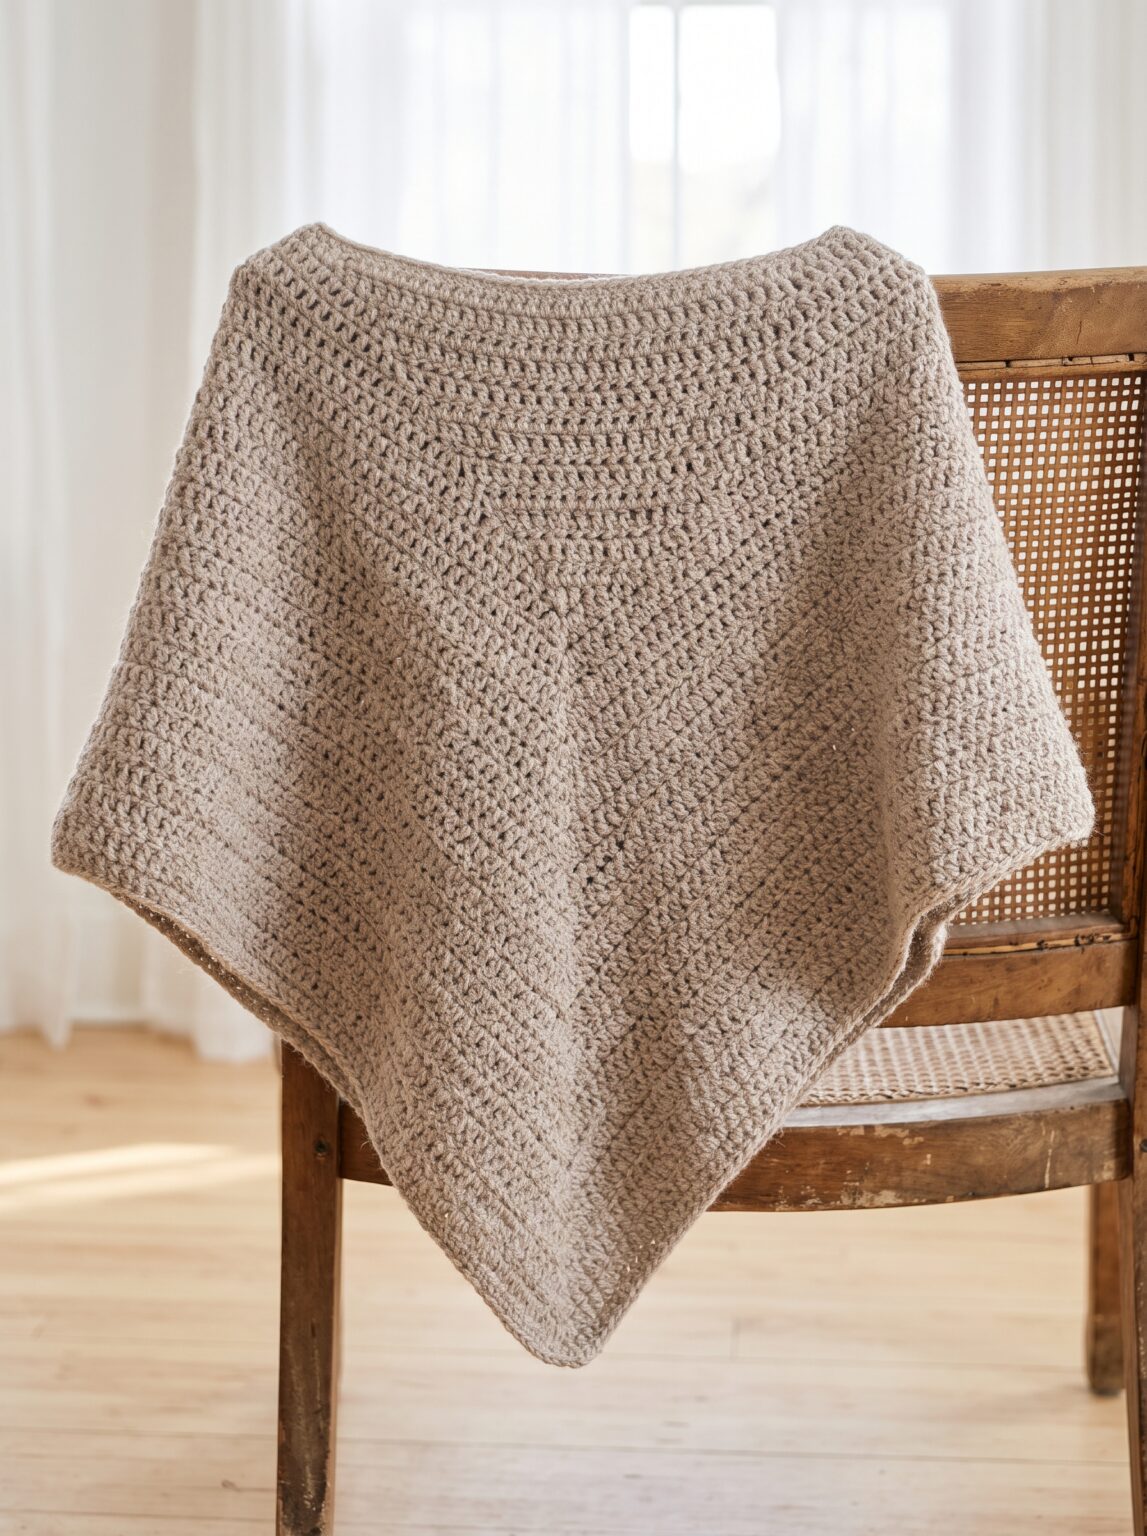
The back of the poncho: a straight hem and one point in the middle. Preview picture, not a photo of a finished piece. Your poncho will differ with your yarn, hook and tension.
This crochet poncho is made of two identical rectangles in half double crochet, sewn together with two seams. You get a point at the front and a point at the back, in worsted (#4) yarn and one color. The free pattern gives sizes S to 2X, stitch counts for every row, yardage and a to-scale diagram.
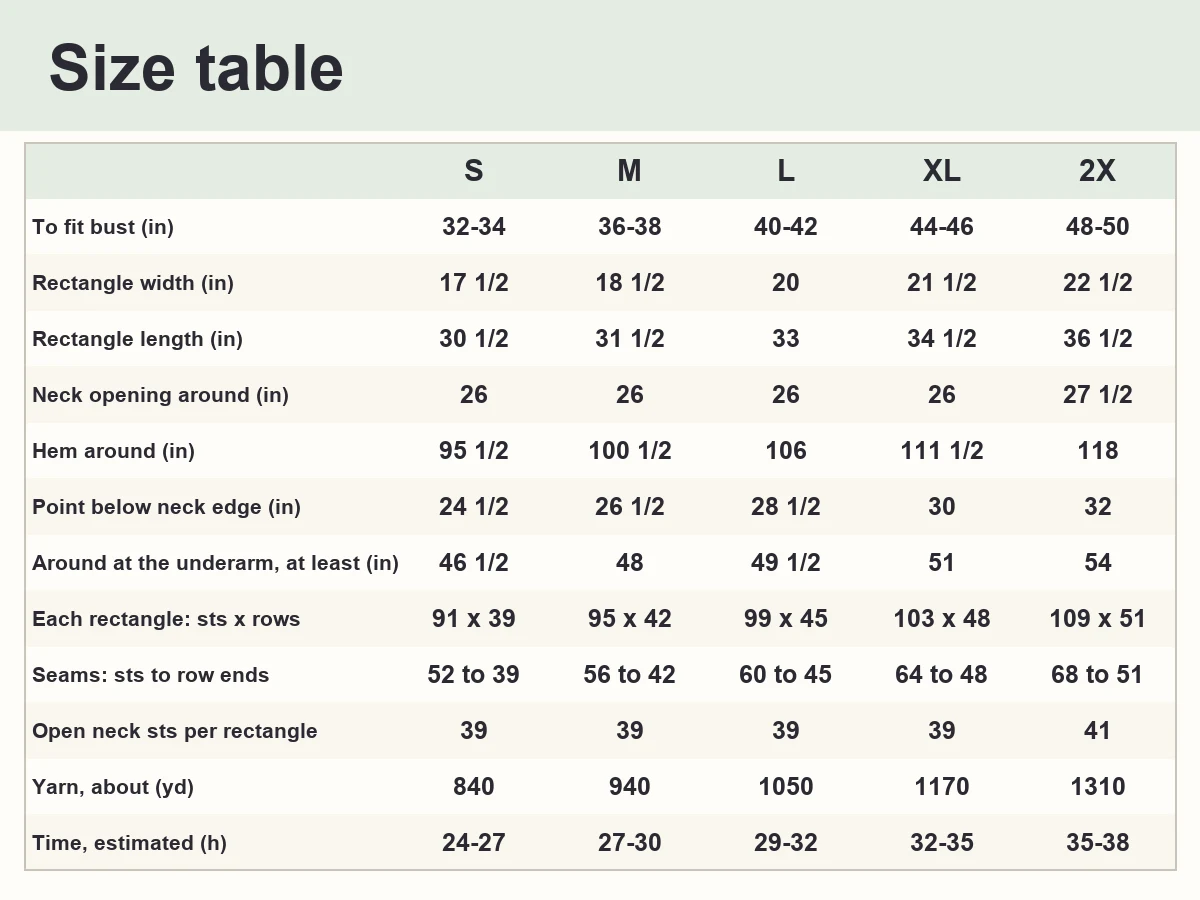
Pick by bust: S 32-34 · M 36-38 · L 40-42 · XL 44-46 · 2X 48-50 in
Advanced beginner: hdc in rows and two seams that join stitches to row ends. Not a first project
Time
About 24 to 27 hours (S) to 35 to 38 hours (2X), estimated, not timed
Finished size
Each rectangle 17 1/2 x 30 1/2 in (S) to 22 1/2 x 36 1/2 in (2X). Neck opening 26 to 27 1/2 in around, hem 95 1/2 to 118 in around. Loose, with room over the bust (approximate).
Yarn
Worsted weight (#4), one color: about 840 yd (S) to 1310 yd (2X).
Hook
US J-10 (6 mm)
Construction
Two identical hdc rectangles, two seams, no shaping, no border: the left edge of each rectangle is sewn to the last row of the other one. The unsewn part of the two last rows is the neck opening.
How this pattern was checked
Stitch counts were checked by software; no person has crocheted this pattern yet, so every number is an estimate. Make the swatch first.
Which Size to Make: Bust, Width and Length, S to 2X
S: to fit bust 32-34 in, each rectangle about 17 1/2 x 30 1/2 in
About 840 yd: 6 skeins of 200 yd (5 + 1 spare) or 4 skeins of 360 yd (3 + 1 spare).
M: to fit bust 36-38 in, each rectangle about 18 1/2 x 31 1/2 in
About 940 yd: 6 skeins of 200 yd (5 + 1 spare) or 4 skeins of 360 yd (3 + 1 spare).
L: to fit bust 40-42 in, each rectangle about 20 x 33 in
About 1050 yd: 7 skeins of 200 yd (6 + 1 spare) or 4 skeins of 360 yd (3 + 1 spare).
XL: to fit bust 44-46 in, each rectangle about 21 1/2 x 34 1/2 in
About 1170 yd: 7 skeins of 200 yd (6 + 1 spare) or 5 skeins of 360 yd (4 + 1 spare).
2X: to fit bust 48-50 in, each rectangle about 22 1/2 x 36 1/2 in
About 1310 yd: 8 skeins of 200 yd (7 + 1 spare) or 5 skeins of 360 yd (4 + 1 spare).
The poncho is loose: it stays above the bust and falls from the shoulders. Between sizes, take the smaller for a shorter drop, the larger for a longer one. The bust ranges are the Craft Yarn Council ranges, the same as in our Chunky Crochet Sweater.
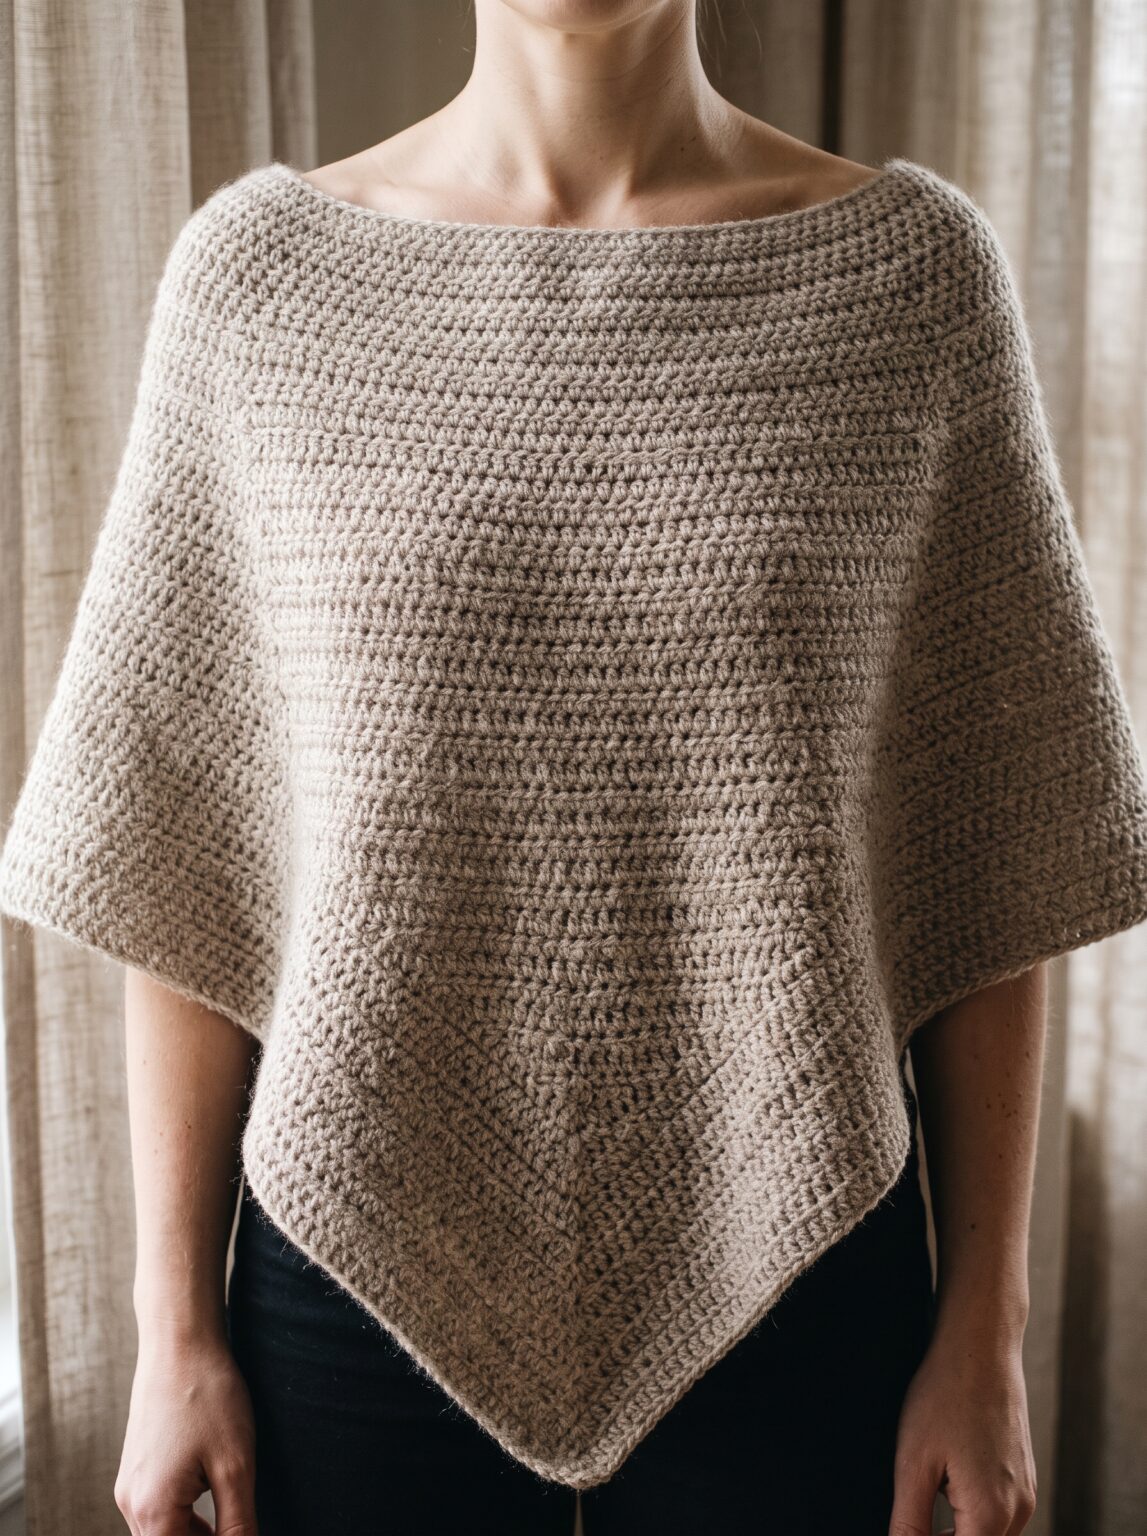
From the front you see the second point and the wide neck opening. Preview picture, not a photo of a finished piece.
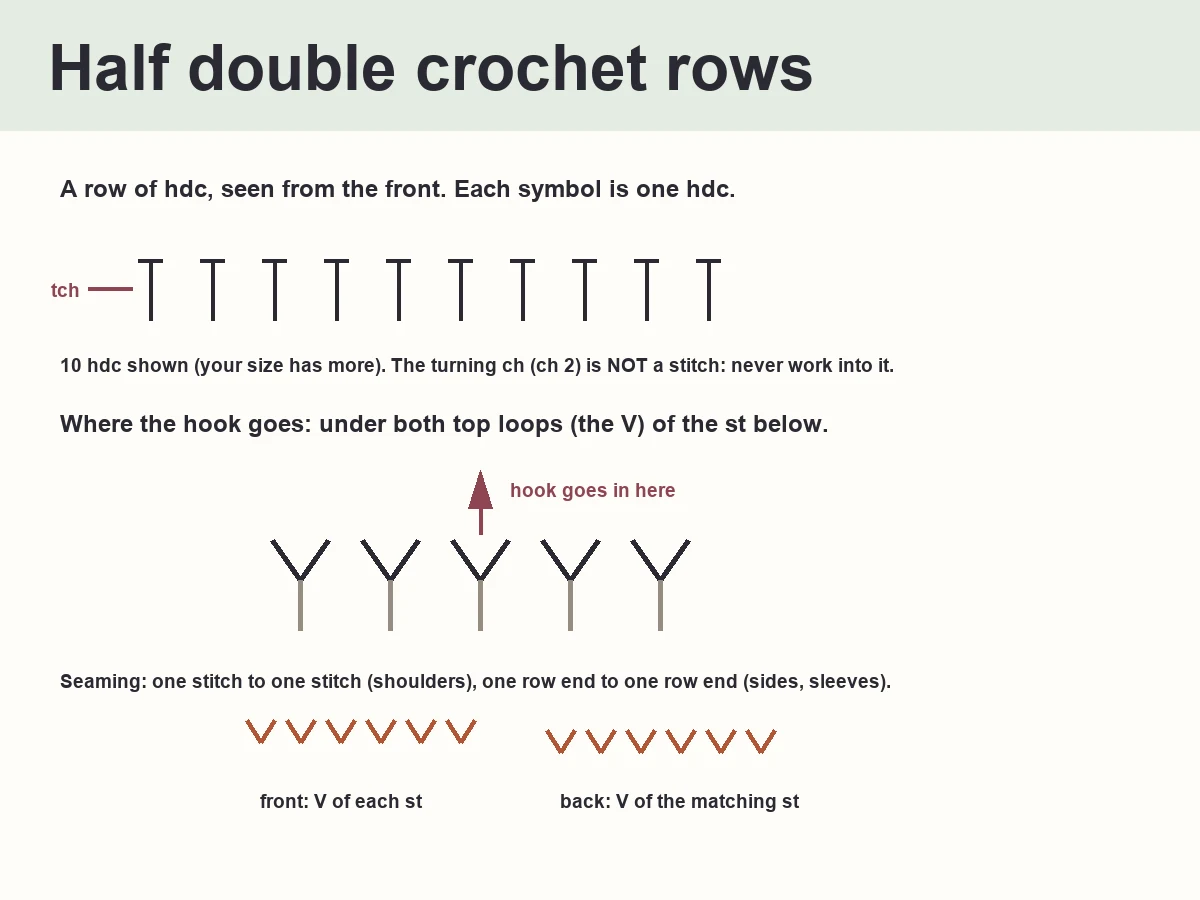
tch = turning chain (ch 2 here: never counted, never worked into)
S (M, L, XL, 2X) = numbers for each size: the first is S, the others follow in order
Materials and Yardage per Size
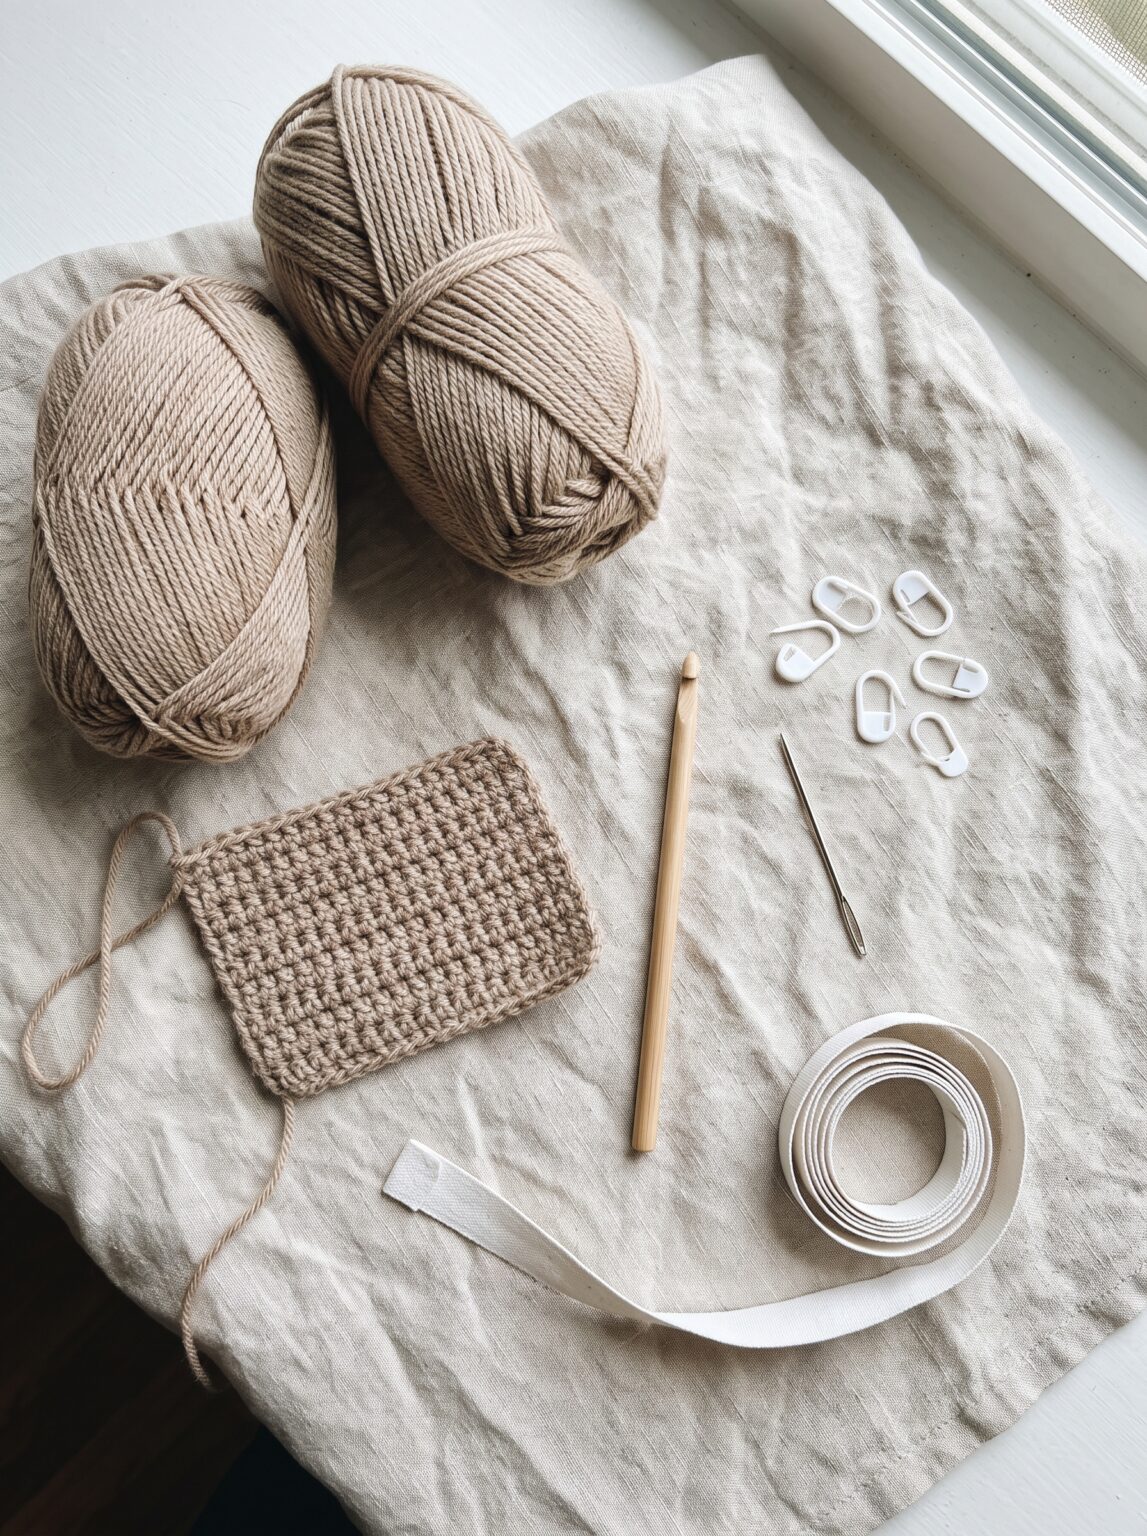
Use a worsted (#4) acrylic or wool-blend yarn. Cotton and linen are much heavier and will stretch. One color; yards for each size are in the size cards above.
Skeins = yards / yards per skein, rounded up, plus 1. Example (S, 840 yd): 200-yd skeins = 5 + 1; 360-yd skeins = 3 + 1. Check the label for yards, not grams.
Add 15 % to the yards you work out from your swatch.
Required, not optional. Our gauge is an estimate, not a measurement. With your yarn and the US J-10 hook, work the Swatch section (ch 26, 24 sts, 15 rows of hdc), block it the way you will block the poncho, let it dry, then measure the middle 12 sts and 9 rows: each should measure 4 in.
If they measure more than 4 in, your stitches are bigger than ours: change to a hook one size smaller. If they measure less, change to a hook one size larger. Then swatch again.
Count rows as well as sts: your sts decide the length and the neck, your rows decide the width. The seams only work if your gauge is close to ours (4 sts = 3 row ends).
Notes
US crochet terms: see the abbreviations above. Sizes: S, M, L, XL, 2X. Numbers are written S (M, L, XL, 2X).
Hdc: yarn over, insert the hook under both top loops of the next st (the V), yarn over and pull up a loop (3 loops on the hook), yarn over and pull through all 3 loops.
Back bump: the bump on the back of each foundation ch. Row 1 goes in the back bumps. Keep the foundation chain loose: use a hook one size up for it if you tend to chain tight. It is long, so count it in tens.
Row 1 of every rectangle is a right-side (RS) row, so odd rows are RS and even rows are WS. RS = the outside of the poncho, WS = the inside. The turning ch (ch 2) does not count as a st and you never work into it. Row 1 starts at the right end of the rectangle, held with Row 1 at the bottom. Every 'right' and 'left' in this pattern is written for a right-handed crocheter: if you crochet left-handed, mirror the directions (our drawings are not mirrored).
Join a new skein at the end of a row. Leave 6 in tails.
Expect the poncho to grow 1 to 2 in in length once worn or wet. Weigh your swatch when you block it.
Glossary. Row end: the side edge of a row. Last row: the top edge of the rectangle. Point: a corner of the hem that no seam touches. Swatch: a small test piece you crochet and measure. Gauge: how many stitches and rows make 4 in. WS: wrong side, the inside of the poncho.
Crochet the 2 Rectangles
Work the two rectangles
Chain, work Row 1 and the plain rows. The two rectangles are identical: work the same number of rows on both. The last hdc of every row goes in the first hdc of the row before, next to the turning ch, never in it.
Swatch
Make this first. 24 sts and 15 rows, the same for every size.
FoundationCh 26.Stitch count: 26 ch
Row 1 (RS)Skip the first 2 ch from the hook (they are the turning ch and do not count as a st). Work a hdc in the back bump of the next ch and of each ch across.Stitch count: 24 hdc
Rows 2 to 15Ch 2 (does not count as a st), turn. Hdc in each st across. The last hdc of every row goes in the first hdc of the row before, next to the turning ch, never in it.Stitch count: 24 hdc
Rectangle A
Worked from the foundation chain up, in one color. Sizes: S, M, L, XL, 2X. Numbers are written S (M, L, XL, 2X).
Get the free printable PDF (Letter + A4)Every size and stitch count on paper, ready to print.Get the free PDF
Row 1 (RS)Skip the first 2 ch from the hook (they are the turning ch and do not count as a st). Work a hdc in the back bump of the next ch and of each ch across.Stitch count: 91 (95, 99, 103, 109) hdc
Rows 2 to 39 (42, 45, 48, 51)Ch 2 (does not count as a st), turn. Hdc in each st across. The last hdc of every row goes in the first hdc of the row before, next to the turning ch, never in it.Stitch count: 91 (95, 99, 103, 109) hdc
Rectangle B
Same as rectangle A: ch 93 (97, 101, 105, 111), then 39 (42, 45, 48, 51) rows of 91 (95, 99, 103, 109) hdc. Work it again, row for row.
Join Your Poncho in 2 Seams
Row ends and stitches seam 3 row ends to 4 sts, so the counts below match.
Before you sew
Weave in the ends on the wrong side, along a row, going back on yourself for 3 in.
Block the two rectangles flat, as the yarn label says.
For every seam, pin the first and last sts and the middle first, then add pins every 2 in.
Mark the seam stitches
Hold each rectangle with the right side facing you and Row 1 at the bottom, so the top edge is the last row.
Count 52 (56, 60, 64, 68) sts from the right end of the last row and put a marker between st 52 (56, 60, 64, 68) and the next st.
The 52 (56, 60, 64, 68) sts at the right are sewn; the 39 (39, 39, 39, 41) sts at the left stay open and make the neck (52 (56, 60, 64, 68) + 39 (39, 39, 39, 41) = 91 (95, 99, 103, 109) sts).
Which row is the last row?
In sizes S, L, 2X, the last row is a right-side row: its turning ch is at the right end, do not count it, and the first st of the row is the first st you count. In sizes M, XL, the last row is a wrong-side row: its turning ch is at the left end, and the right end is the last st of the row; count from there the same way.
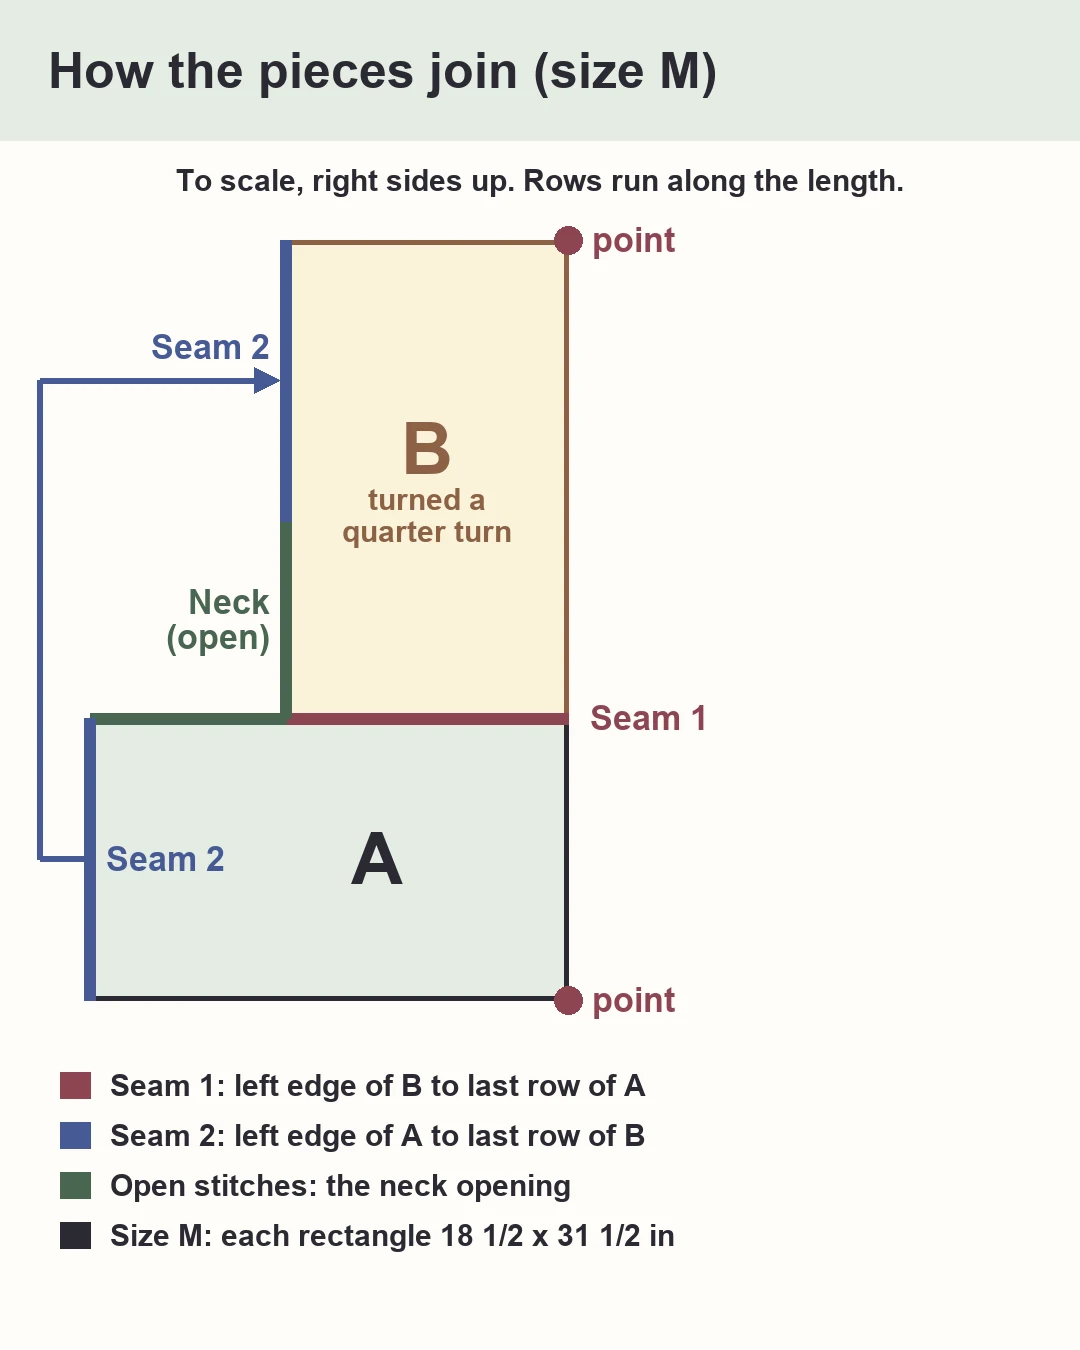
How the two rectangles go together, drawn for size M (the other sizes use their own numbers in the Assembly rows). A computer drawing. Tap to enlarge: Open it full size
Sew 4 sts of A to 3 row ends of B, and repeat 13 (14, 15, 16, 17) times (52 (56, 60, 64, 68) sts to 39 (42, 45, 48, 51) row ends).
Lay A flat, right side up, with Row 1 at the bottom, and turn B a quarter turn counterclockwise, right side up, so that its left edge lies along the last row of A, with its top-left corner on the marker of A and its bottom-left corner on the top-right corner of A.
Use mattress stitch: pick up the 2 bars between the first and second st of a row end, go under the 2 loops of the V of one st, and pull gently every 4 sts.
Seam 2
Sew 4 sts of B to 3 row ends of A, and repeat 13 (14, 15, 16, 17) times (52 (56, 60, 64, 68) sts to 39 (42, 45, 48, 51) row ends).
Curl the left end of A toward B without flipping it, so that both right sides face you and its left edge lies against the last row of B, with its top-left corner on the marker of B and its bottom-left corner on the top-right corner of B.
Sew it the same way with mattress stitch, pulling gently every 4 sts; the poncho is worn with the right side out.
Check the opening
The neck opening is the 39 (39, 39, 39, 41) open sts of A and the 39 (39, 39, 39, 41) open sts of B.
Hold the poncho up: it is a ring with one point at the front and one at the back (the two corners where Row 1 meets the right edge).
Try your head through the opening before you weave in the seam ends.
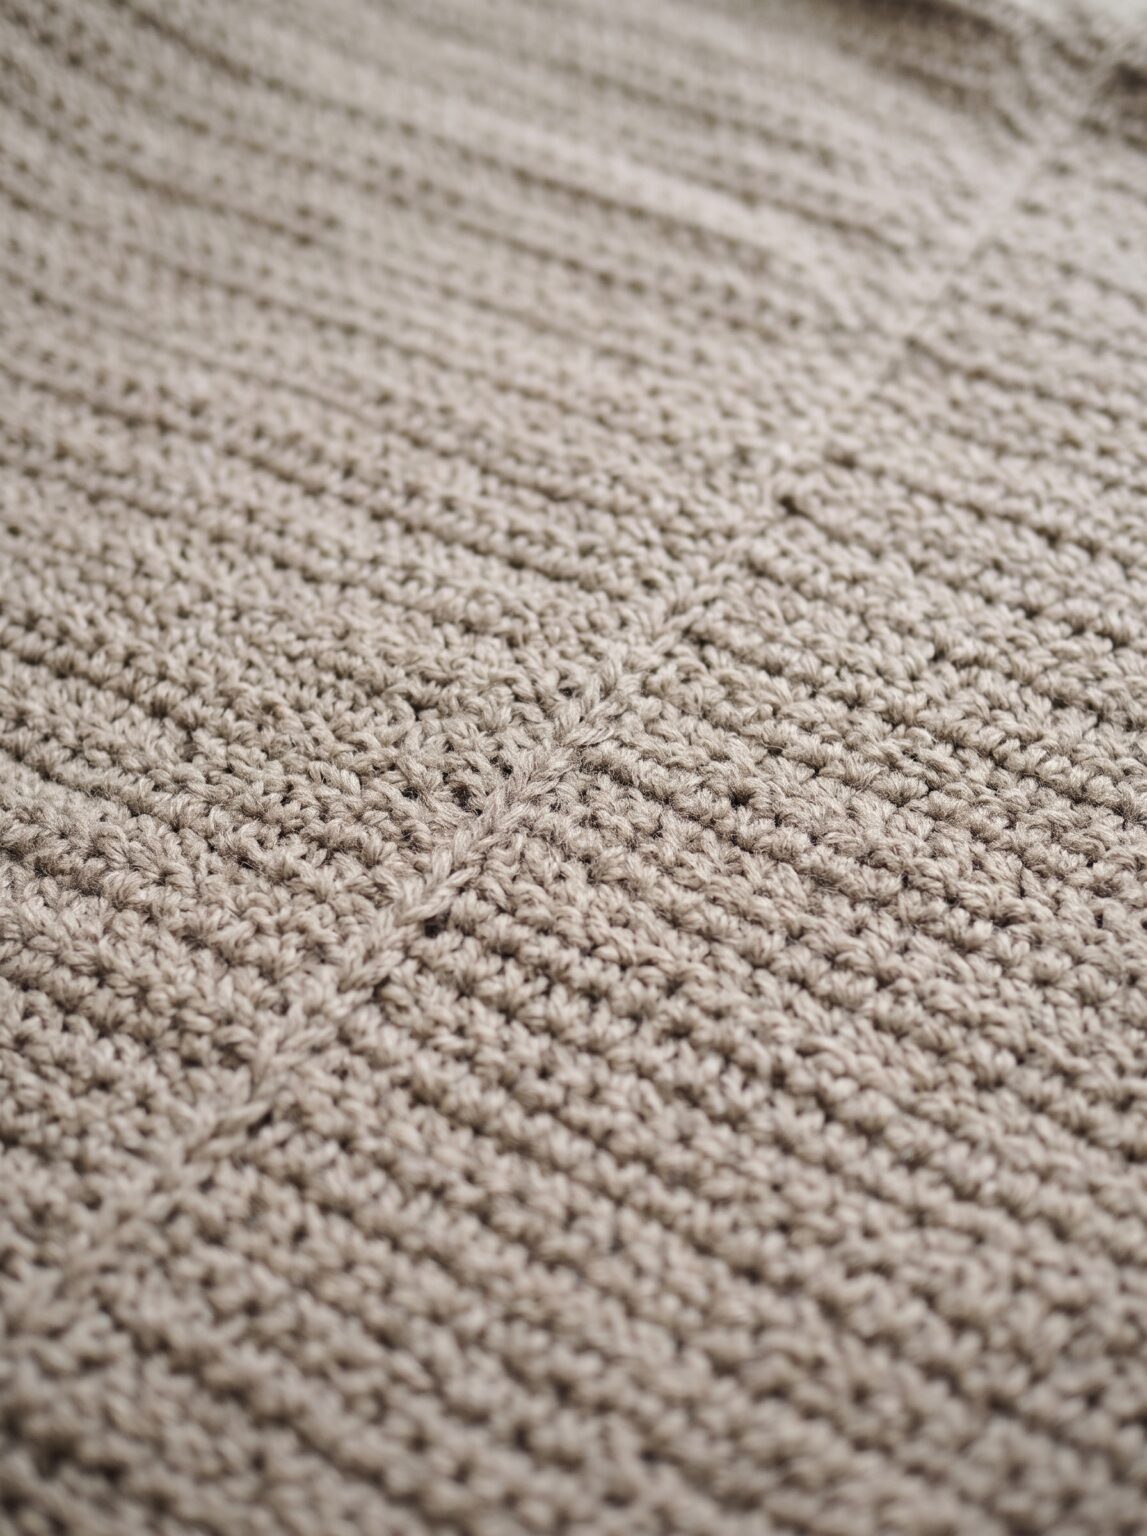
Close up: half double crochet rows and a seam. Preview picture, not a photo of a finished piece. Your stitches will look different with your yarn.
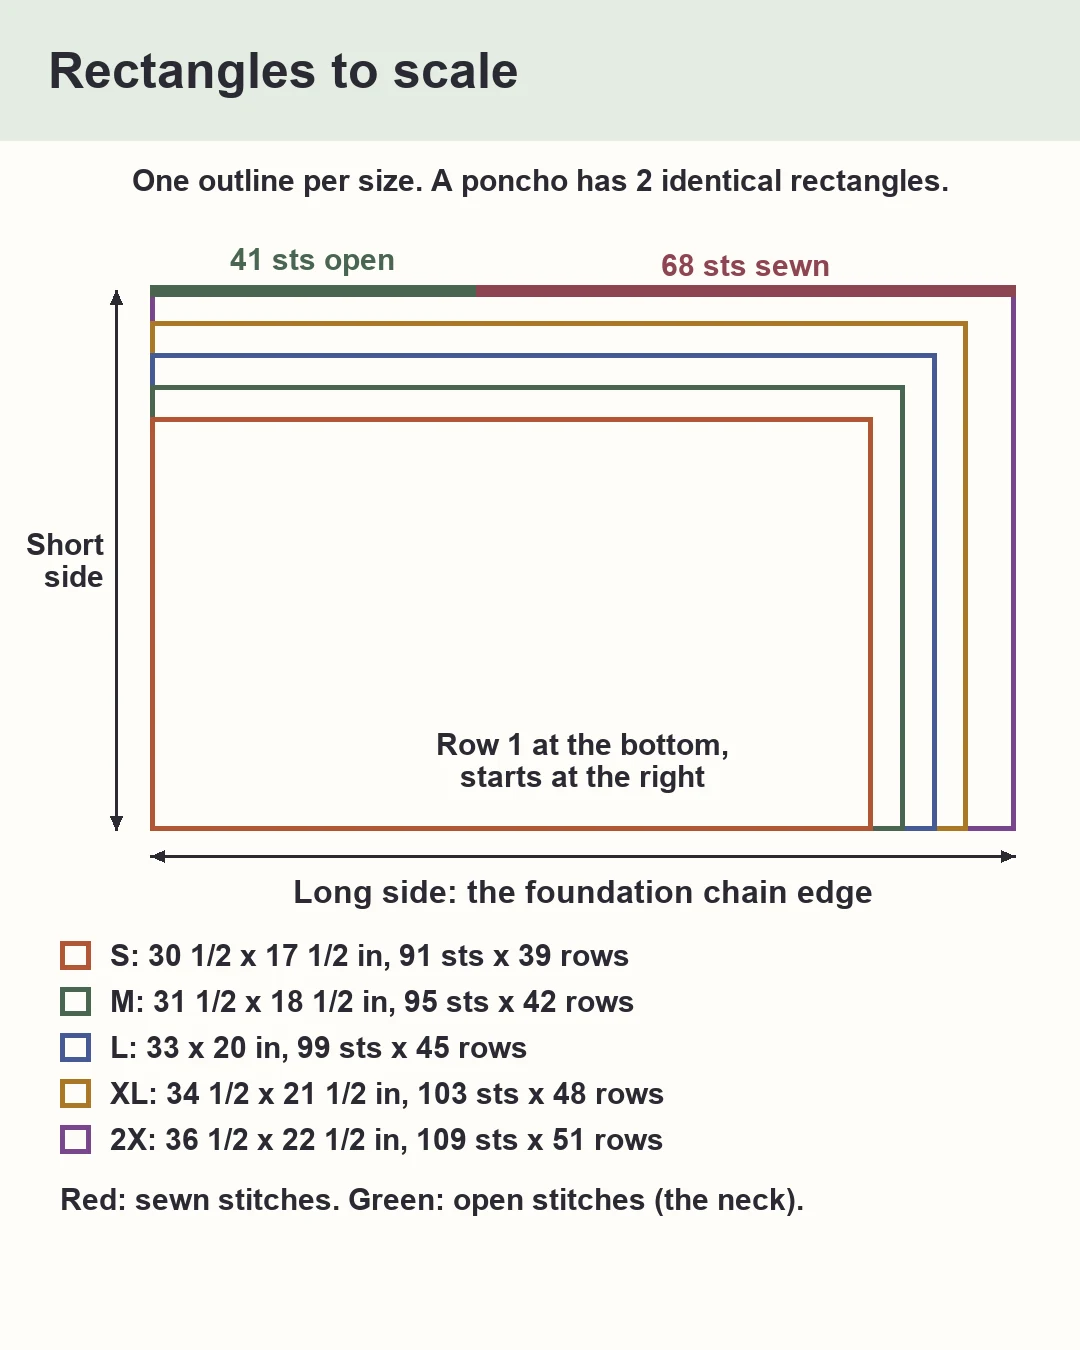
The rectangle of every size to scale, with the stitch counts. The two rectangles of a poncho are identical. A computer drawing. Tap to enlarge: Open it full size
Weave in the seaming ends and check that the seams lie flat. The neck and the hem stay raw: no border, no fringe. Wash as the label says. Lay flat to dry (drying time not tested). Store folded.
A poncho draped over a chair. Preview picture, not a photo of a finished piece. Real drape depends on your yarn and tension.
Put a stitch marker in the first stitch of every row so you can count quickly: every row must give the number of sts in your size card.
Count the foundation chain twice: it is long, and the length of the rectangle comes from it.
Weigh your skeins before you start: the yardage is an estimate, and a second skein of the same dye lot is easier to buy now than later.
To make the poncho hang lower, add plain rows to both rectangles (3 rows = 1 1/3 in). Then re-count the seams: 4 sts to 3 row ends needs the row ends to be a multiple of 3 and the sewn sts a multiple of 4.
Keep your tension relaxed: a tight hook gives a board, not a poncho.
Common mistakes
Working in the turning chain: the row gets 1 stitch too many.
Skipping the first stitch of the row: the row gets 1 stitch too few.
Different numbers of rows on the two rectangles: the seams will not match.
Counting the seam sts from the left end of the last row: count from the right end.
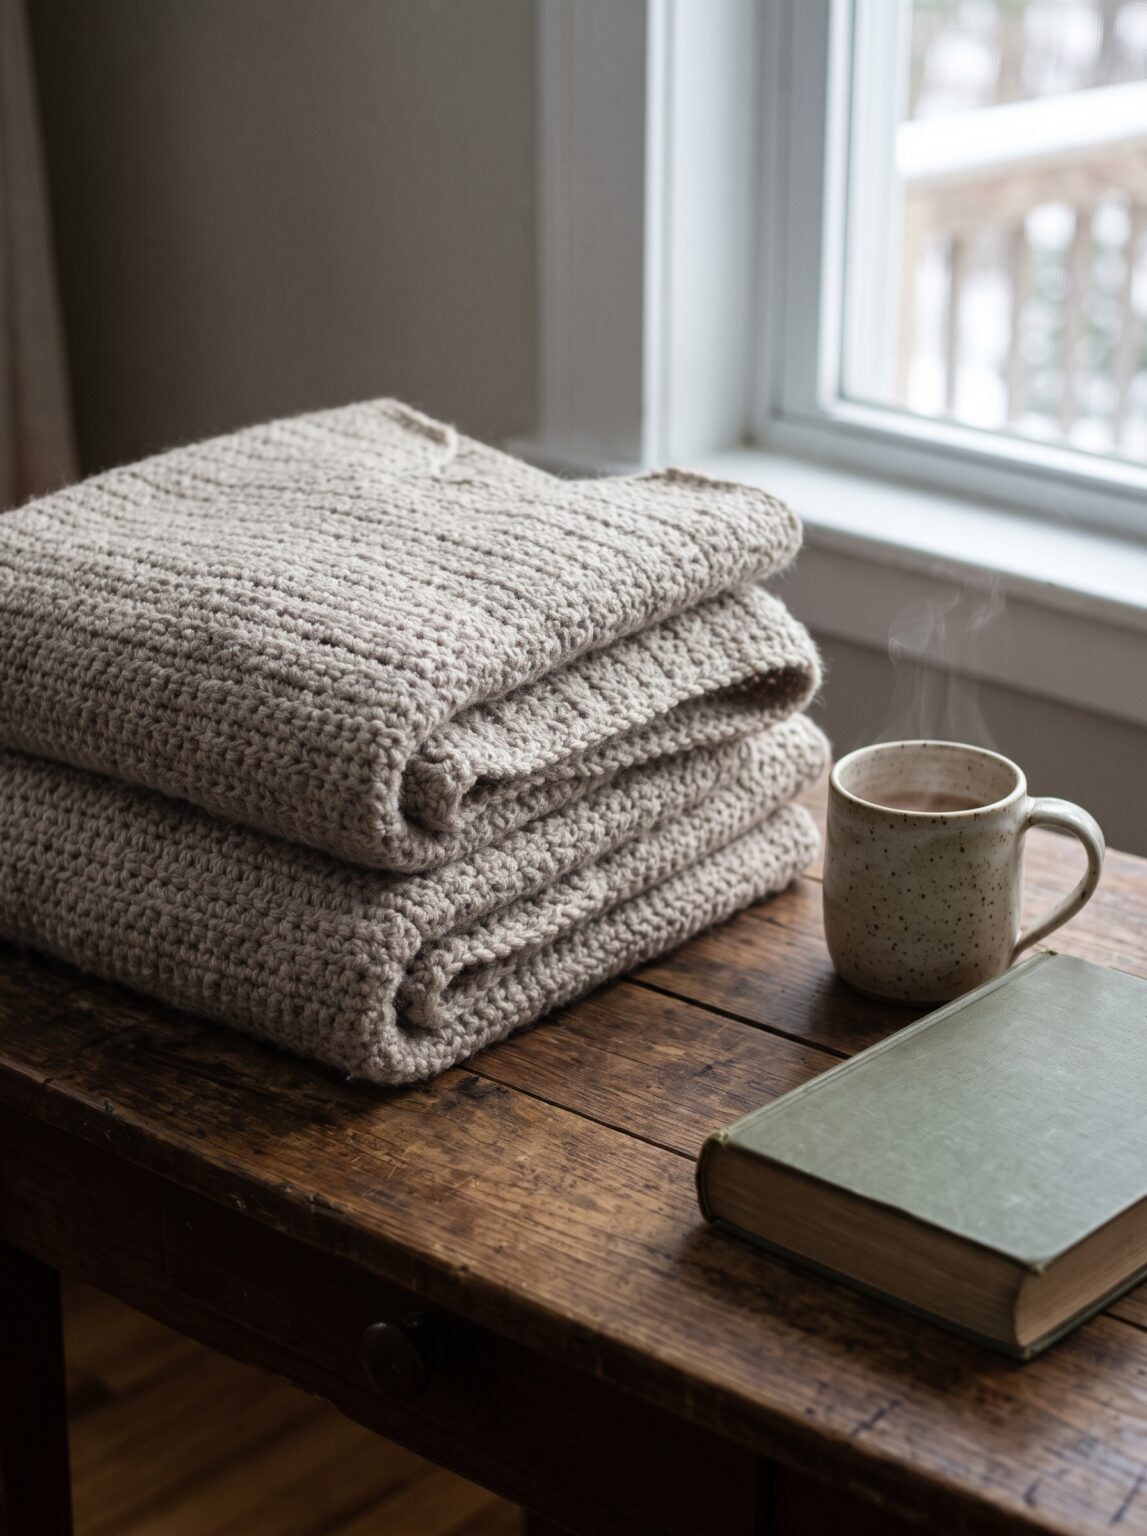
A folded poncho in a gift stack. Preview picture, not a photo of a finished piece.
With two seams that follow the same rule. Seam 1 sews the left edge of rectangle B onto the last row of rectangle A. Seam 2 sews the left edge of A onto the last row of B. Sew 4 stitches to 3 row ends, again and again. The open stitches left on each rectangle make the neck opening.
Why does a two-rectangle poncho have a point in the front and in the back?
Each rectangle has one corner that no seam touches: where Row 1 meets the right edge. Those two corners are the points. They hang about 24 1/2 in (S) to 32 in (2X) below the neck edge, while the sides hang about 17 1/2 in (S) to 22 1/2 in (2X). These are computed on the flat pattern, not seen on a body.
What size crochet poncho should I make?
Choose by your bust: S 32-34 in, M 36-38 in, L 40-42 in, XL 44-46 in, 2X 48-50 in. These are the Craft Yarn Council ranges. Measure at the fullest part of the bust. The poncho is loose, with a wide neck opening of about 26 to 27 1/2 in around.
How much yarn do I need for a crochet poncho?
About 840 yd (S), 940 yd (M), 1050 yd (L), 1170 yd (XL) and 1310 yd (2X) of worsted (#4) yarn, with a 15 % margin. Check the label for yards, not grams, and buy one skein more than you think.
What if my rectangles come out too short or too narrow?
Count both stitches and rows on your swatch. If you get 13 hdc per 4 in instead of 12, the neck opening of the S poncho is about 24 in around, not 26, so go up a hook size. If you get 10 rows per 4 in instead of 9, the rectangles are about 15.6 in wide, not 17.3, so add 3 rows to each rectangle.
Is a crochet poncho a good first garment?
This one is not a first project. It uses only chain and half double crochet, but you sew row ends to stitches in two seams and you must check your gauge. If you have made a few rows-based projects and can sew a seam, you have the skills it asks for.
Can I sell ponchos I make from this pattern?
Yes, you may sell what you crochet. Please don't copy or repost the pattern; link to it instead.
Does the pattern have a border or fringe?
No. The edges are plain, with no border and no fringe. Your hem and the neck opening are raw crochet edges. You can add your own edging if you like.
The AMG Royal pattern teamPatterns on AMG Royal are designed by calculation: every row is simulated and the full pattern is independently re-checked before publishing. They are not hand-crocheted samples — times and yardage are estimates.How we make our patternsFound a mistake? Tell us
 SweatersFree Crochet Top Pattern: Boxy Mesh Tee in Sizes S to 2X
 SweatersCrochet Star Sweater: Free Midnight Star Pattern (XS-2X)
 Baby BlanketsCrochet Baby Hat and Booties Set (Free Pattern, 0-12 Months)
 Baby BlanketsFree Crochet Baby Blanket Patterns: 4 Blankets Compared (Sizes, Yarn, PDF)
 Baby BlanketsChristmas Tree C2C Crochet Blanket (Free Baby Blanket Pattern)
 Baby BlanketsChevron Crochet Baby Blanket (DC Ripple Pattern in 2 Sizes)